Home > Paint > Painting doors and trim (How to paint doors and trim)
The skill level; time to complete; materials; and tools required to paint doors and trim is as follows:
Time to complete:
Experienced: 1 hrs
Handy: 2 hrs
Novice: 3 hrs
Materials:*
- 3-inch drywall screws
- White-pigmented shellac (it door has knots)
- Latex wood putty
- Acrylic Latex caulk
- lightweight crack filler (optional)
- 80- and 220-grit sandpaper
- Stain-blocking primer
- Paint (probably enamel)
- TSP solution
- Denatured alcohol or chemical deglosser (optional)
- Blue painter’s masking tope
Click on the links to purchase paint materials and tools online from the Amazon store.
*Disclaimer: This pages contains Amazon affiliate links and other affiliate links. That means that if you click a link and decide to make a purchase I will receive a commission at no extra cost to you.
Painting doors, windows, baseboards, and moldings successfully involves six key steps:
- Clean and prime to achieve maximum adhesion.
- Smooth the surface so that cracks, holes, dents, and chips don’t show through the finish coat.
- Mask adjacent surfaces so you can paint quickly and confidently.
- Keep a wet edge to eliminate any lap marks.
- Avoid overworking paint; brush it on and let it flow to avoid brush marks.
- If closing a partially dry door is unavoidable, place plastic wrap between surfaces that touch.
Painting doors
Minimize brush marks by painting your door in the order shown at right. Moving from top to bottom, working in this order gives you time to feather the paint in adjacent sections before it dries. Paint all of the edges first; then work on sections 2 through 5 at the top of the door before moving to the bottom portion.
Professionals often paint a door without removing it from the jamb.
Placing the door on sawhorses and painting in the order shown, though, will avoid the drips that inevitably occur when you’re painting vertically.
If the door has knots or strong variations in grain or color, it’s a good idea to spot-prime the offending areas with a stain-blocking primer to prevent problems with coverage in the final coat.
Painting Order

Painting order:
- All edges
- Panel bevels and flats
- Rails
- Stile middles
- Stiles
Painting doors
1. Remove all hardware from the door. Insert long screws in the top and bottom edges and suspend the door on sawhorses. Fill holes and gouges, spot prime knots, and sand the door as necessary with 80-grit sandpaper. Follow up with 220-grit sandpaper so the sanding marks won’t show under the finish coat.


2. Prime the door. Use a tinted, stain-blocking primer to prime the door, following the painting order above. When the primer dries, sand it lightly and remove the dust with a tack cloth. Apply the finish coat of paint in the same order.


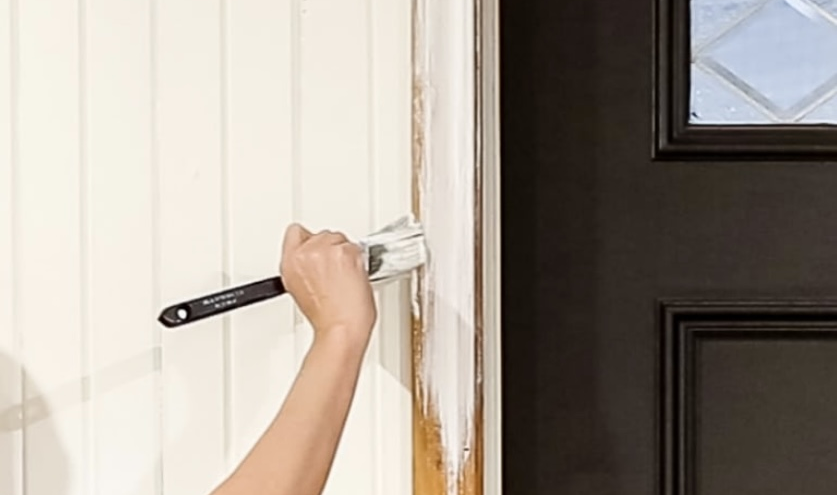
Painting trim
When you are painting trim, the critical rools are the paintbrushes. Too wide, and you won’t be able to paint neatly. Too narrow, and you’ll have to rework the paint unnecessarily. Choose brushes with bristles appropriate for the kind of paint (latex or oil/alkyd) you are using, and don’t skimp on the quality. For most trim jobs, a 1½-or 2-inch brush works well, but in some instances, you may need several brushes:
- An angled sash brush for laying down sharp edges.
- A square-edged trim brush for laying down flat areas of paint.
- An oval brush for getting paint into tight areas.
1. Clean the woodwork with a TSP solution (see …), using a plastic scrub pad to remove residue (wear rubber gloves). Rinse several times. Remove blistered or chipped paint with a paint scraper, trying not to gouge the wood. Sand with 80-grit then 220-grit sandpaper. Remove dust with a lint-free cloth.


2. Fill gaps and cracks with paintable caulk or glazing compound. Remove the excess and smooth the joint with your finger. Fill holes and gouges with lightweight spackling compound. Remove the excess material with the edge of a putty knife and let it dry.


3.Spot prime any knots or resin pockets with white-pigmented shellac primer and let it dry. Mask all adjacent surfaces with blue painter’s masking tape, sealing the edges firmly. Wipe down the surface with denatured alcohol or a paint deglosser immediately before priming.


4. Prime the entire surface with a stain-blocking primer. Alter 24 hours, sand with 220-grit sandpaper and wipe the sanded surface with a damp sponge or rag. Apply the finish coat of paint with a 2-inch trim brush. Remove the masking tape while the paint is still wet.


WORK SMART
PROFESSIONAL TIPS
Don’t overwork the paint.
Flow it on, and then let it level itself to leave a surface free of brush marks. If you do get brush marks, let the paint dry, sand with 120-grit sandpaper, and repaint.
Professional painters may prefer a “cigar” or “hot dog” roller for painting doors. This 6-inch-wide dense foam roller leaves a smooth finish coat without brush marks. You will need to brush in the bevels in the door panels before rolling