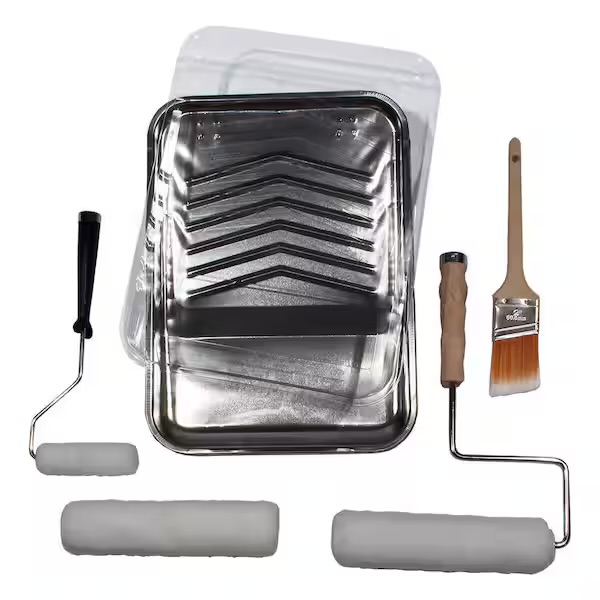
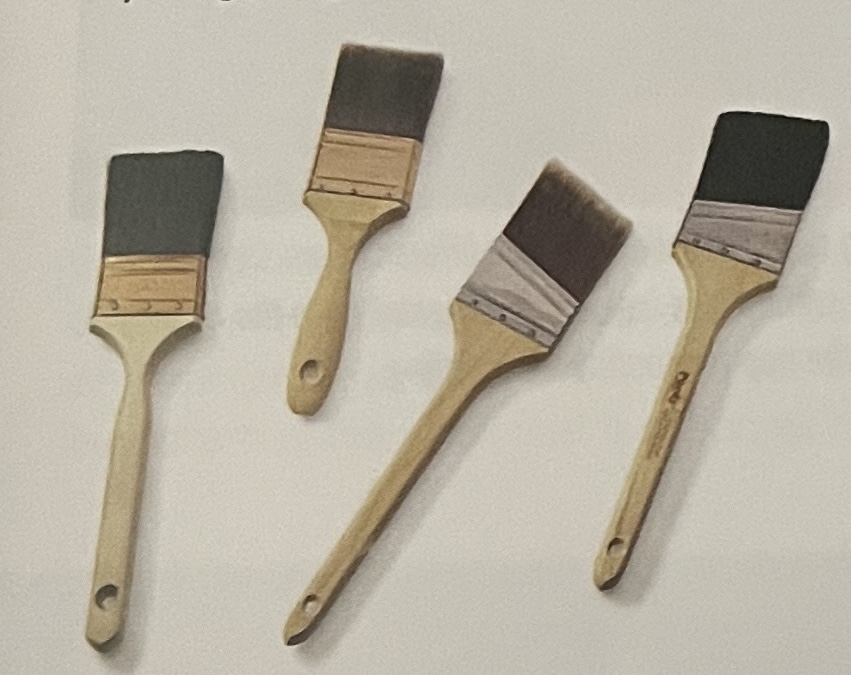
For most painting jobs, you’ll need both a roller and a brush. The brush is ideal for narrow spaces or cutting in (creating a sharp-edged line where the wall meets the molding). Use a brush for detailed work and trim.
When it comes to speed, the roller can apply paint at least three times faster than the widest brush, making it a crucial tool. The beveled ends of the roller cover cannot lay down sharp paint lines, but this prevents the appearance of roller and overlap marks. Rollers are best suited for large, flat areas such as ceilings, walls, and floors. While specialized painting pads and tools are available for corners, edges, and faux finishes, the basic brush and roller are still necessary.
The key to successful painting lies in quality: it is essential to invest in high-quality brushes, rollers, and other painting tools. Although Lou may initially save money, the outcome will be marred by loose bristles and roller fuzz on the surfaces that have been painted.
🔺 With proper care, a good quality brush will remain effective for many years.
There are two main types of bristle brushes:
Natural (typically hog bristles) for solvent-base finishes.
Water-base finishes can utilize synthetic (nylon or polyester) products. (Some can also be used with alkyd-base finishes.)
Using the correct type of bristle brush is extremely important because natural bristles can swell in water-base paint, resulting in poor application. With proper care and cleaning, a paint brush will last for many years (see…..)
In some instances, a disposable brush is the most suitable choice:
For a cost-effective solution, consider disposable bristle brushes with unfinished-wood handles. These are perfect for applying materials that are hard to clean, such as contact cement and fiberglass resin. They are designed to be used once and then discarded. Foam brushes are another low-cost option that should be considered disposable. They work well for applying smooth finishes to small areas.
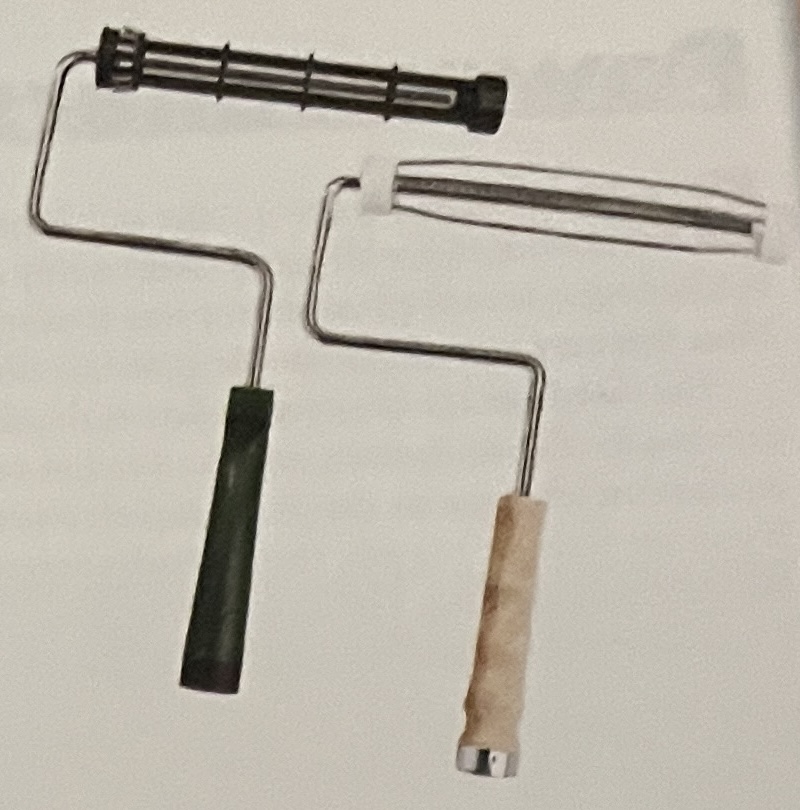
Paint rollers
The basic paint roller consists of a handle with a wire cage and threaded base, along with a roller cover featuring a nap designed to fit over the cage. For added convenience, an extender can be purchased for the handle to facilitate painting in higher areas. Given its durability, investing in a high-quality roller is prudent. Look for the following features:
A sturdy frame with minimal flex under pressure
Nylon bearings with easy rotation
A reassuring grip
A cage with a minimum of five wires and an anti-slip device to maintain the roller’s position
🔺High-quality roller cages featuring molded or wooden handles, when paired with premium roller covers, facilitate a smoother painting experience.
Roller covers
Purchase a high-quality roller cover with the correct nap thickness. Most projects require a roller with either a ⅜- or ½-inch nap. Inexpensive roller covers with paper cores (tubes) deteriorate quickly and cannot be reused. Resin cores last longer; they can be cleaned and reused. Look for:
A sturdy resin core
Beveled ends are designed to prevent paint beads from accumulating along the edges
Seams that you cannot feel through the nap
Thick, uniform nap that sheds minimal lint
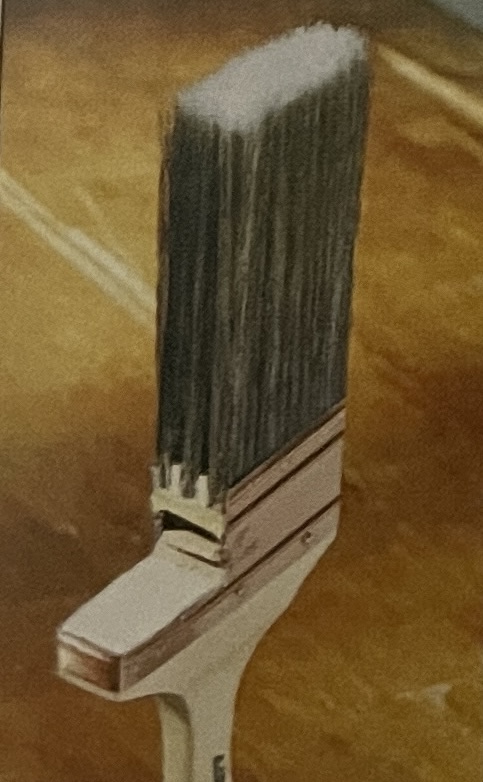
Why do high-quality brushes come with a higher price tag?
QUALITY BRUSH
DISPOSABLE BRUSH
Quality
vs.
Disposable
Flagged (split) bristle ends for a superior finish
Bristles
Unflagged bristle have straight ends and are generally stiffer than flagged bristles ends
Several wood spacer plugs to generate paint reservoirs between rows of bristles
Dividers
Individual wooden spacer plug
Reinforced, rust-resistant ferrule to securely hold bristles
Ferrule
Weak ferrule results in increased bristle fallout.
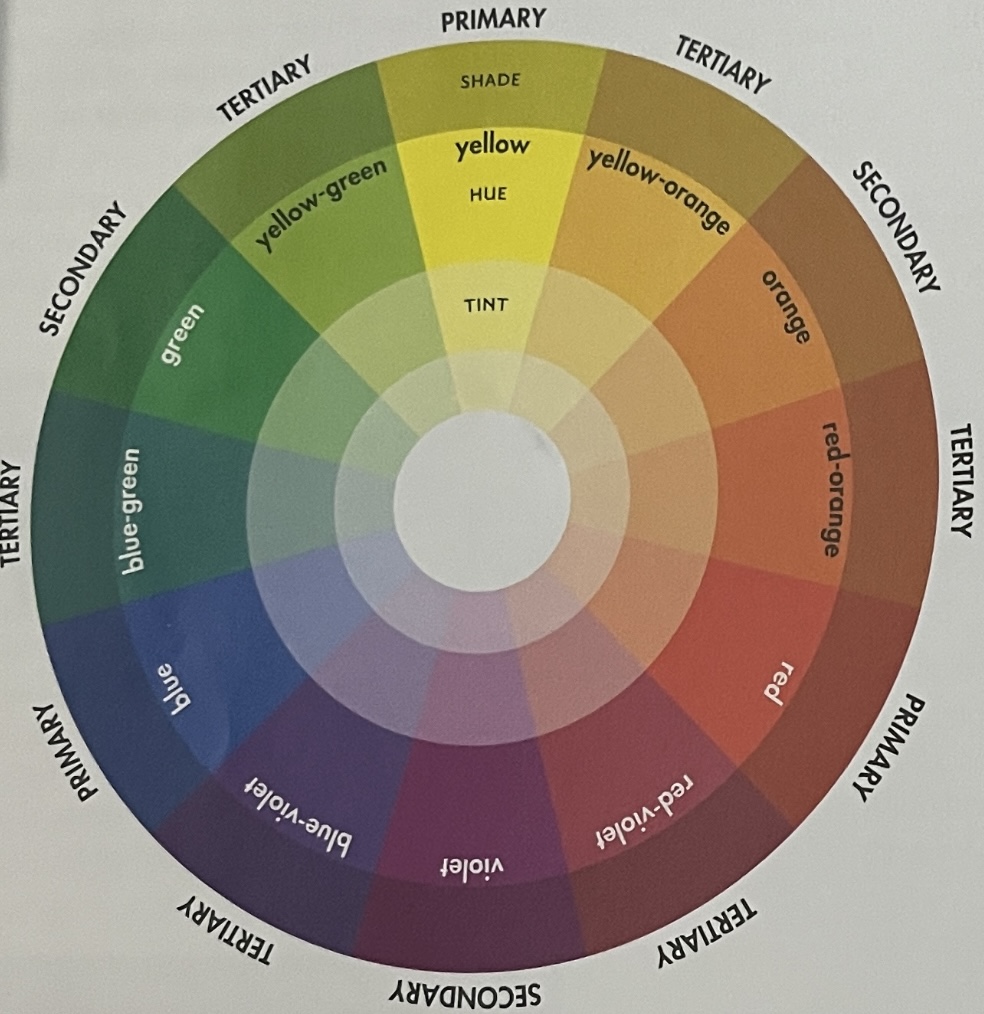
Selecting the color is the enjoyable part of painting, even if it seems somewhat confusing at first.
White or off-white may be a safe choice, but it’s not the only option. Even a casual look at the color wheel can be intimidating, but it’s a useful tool if you want to explore other colors for your walls and woodwork. Designing a color scheme is a straightforward process: choose one color and then select other colors that complement it based on their positions on the color wheel.
The primary colors-red, blue, and yellow-combine to form all other colors. Combine any two primary colors, and you’ll get two primary colors on the wheel. Tertiary colors are the a secondary color-secondary colors always fall midway between combination of a secondary color and a primary color. You’ll find them between the secondary and primary on the wheel.
Complementary colors are found directly opposite each other on the color wheel.
Keep a few guidelines in mind, and you’ll be making wise choices in no time:
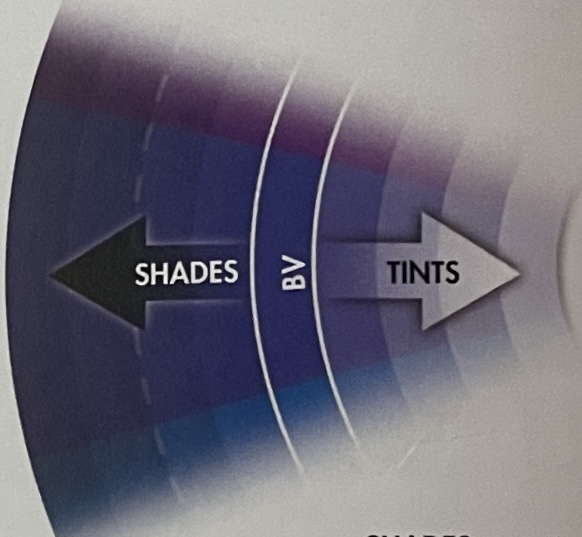
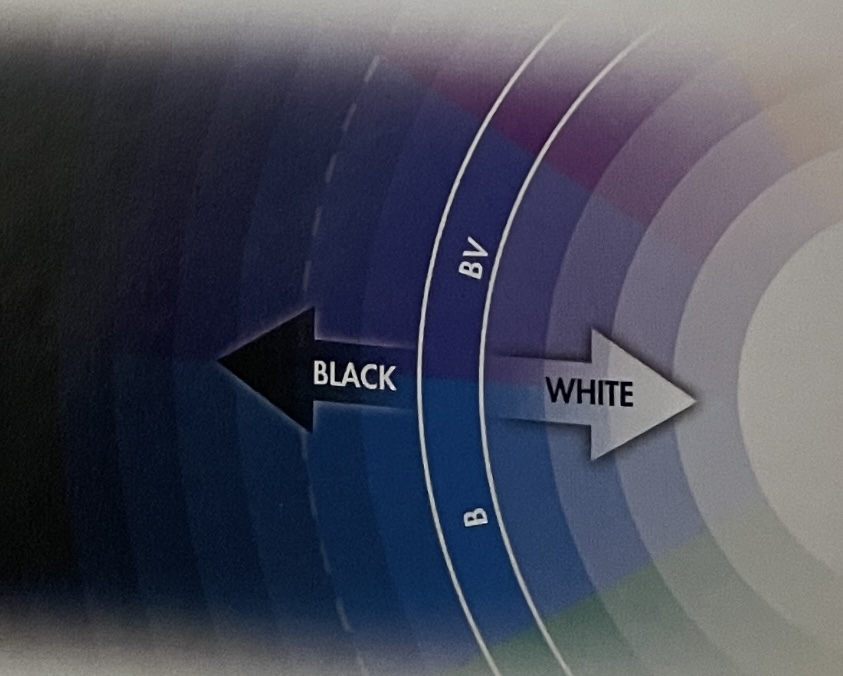
Color principles apply to pure colors and also to all of their darker shades or lighter tints.
All colors look most vibrant when paired with their complementary color.
In a room, it’s generally advisable to select one primary color and utilize accent colors in smaller proportions.
A proven and effective combination is to use one color, or even two colors, plus white.
🔻The color wheel illustrates the relationship between primary, secondary, and tertiary colors.
The colors in the band between the white rings are pure colors. Colors closer to the center of the wheel are tints. Those closer to the edge are shades.
🔺SHADES are mixtures of pure color with black. They are darker than the pure color.
TINTS are mixtures of pure color with white. They are lighter than the pure color.
Colorful language
Color value: The lightness or darkness of a color.
Saturation: The purity of a color. Red is more saturated than pink.
Hue: Synonymous with color. Red, purple, blue, green, and yellow are all hues.
Specialty paint stores and dedicated retail sections offer an extensive range of paint products, encompassing alkyd, latex, primer, stain-blocker, and enamel, alongside various sheens, including gloss, semigloss, satin, eggshell, and flat. For individuals embarking on a bathroom renovation, the vast array of options can appear overwhelming. Nonetheless, the underlying paint types are relatively simple. There are two primary paint categories: latex and alkyd. Everything else is just a variation.
Latex paint constitutes roughly 87 percent of paint sold in the United States. Although it once contained natural rubber, latex paint now incorporates a range of synthetic resins, with acrylic being the most effective. Much of latex’s appeal stems from its convenience. Much of latex’s popularity comes from its convenience.
Being a water-base paint, it enables simple cleanup of drips and spills with a damp sponge. Also, soap and water are suitable for cleaning brushes and rollers, followed by a thorough rinse.
🔍 DETAILED EXAMINATION – WHAT IS MEANT BY SHEEN?
Sheen refers to the degree of light reflection in paint. Flat paint maximizes light absorption and conceals surface imperfections. Eggshell paint provides a smoother surface, retaining some hiding ability while being more washable. Satin paint is more resistant to wear and suitable for high-traffic areas. Semigloss paint exhibits a subtle sheen and is often applied to woodwork, trim, cabinets, and doors. Gloss paint features a high-gloss finish but accentuates minor surface imperfections.
✅ WORK EFFICIENTLY – LATEX OR OIL?
For most homeowners, the choice between latex and oil-based paints hinges on drying time, odor, and ease of cleanup. This chart outlines other factors that may be equally significant. Additionally, it is crucial to review the fine print on the back of the can, as manufacturers typically offer guidance on whether latex or oil-based paints are best suited for covering existing finishes. If further guidance is needed, a toll-free number is usually provided.
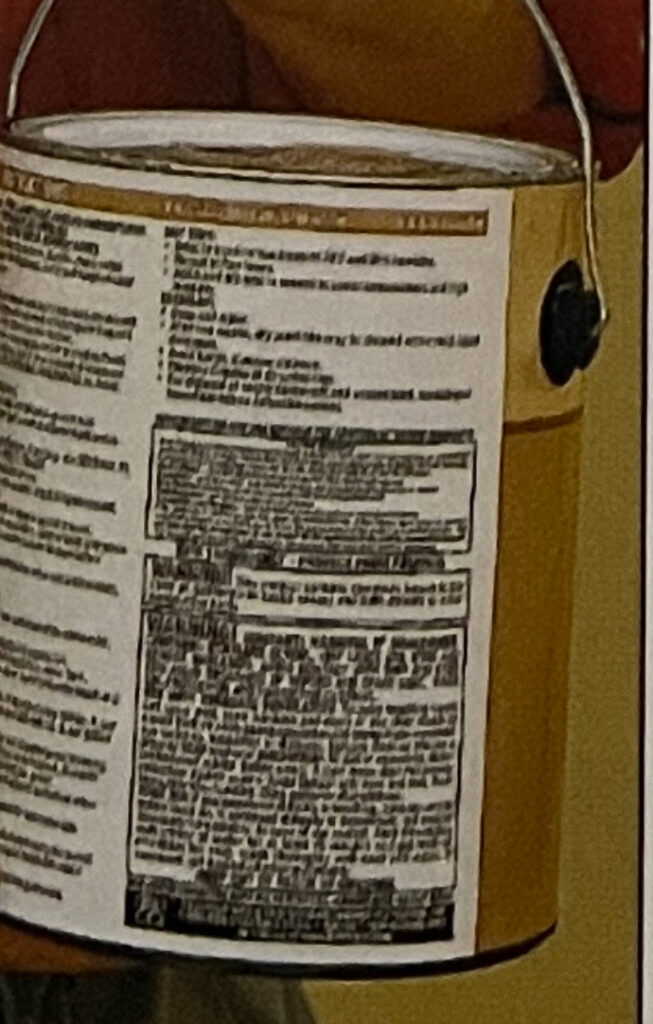
💰 CUSTOMER’S PURCHASING GUIDE. – READ THE LABEL ON THE PAINT CANISTER
Generally, the quality of paint can be evaluated by its price. Paint is one of those uncommon products for which the quality directly corresponds to the cost. Higher-quality paints are more expensive because they contain higher proportions of more expensive ingredients. This results in superior color, adhesion, and durability.
The Basics:
A liquid carrier (water or mineral spirits) suspends the particles of paint so they can be applied. As the carrier evaporates, the paint dries.
Pigments are finely ground, naturally colored solids that, when combined, generate the desired color. More intricate mixtures of pigments are employed in expensive paints. Higher percentages of titanium dioxide (Ti) result in whiter and brighter paints.
Additives are chemical enhancements that improve paint mildew resistance, adhesion, and flowability. Kaolin (clay) is employed to regulate gloss. Some additives may be hazardous. To mitigate fumes or ventilation challenges during drying, opt for a brand labeled with low volatile organic compound (VOC) content.
Binders can be made of vinyl acrylic, 100% acrylic, or alkyd-enhanced materials. The higher the percentage of acrylic resin, the harder and more durable the finish will be.
The other ingredients listed are primarily filler materials. If used in substantial quantities, filler can diminish the vibrancy of the colors, potentially leading to the paint becoming powdery over time.
Primer basics
Regardless of whether you are using alkyd or latex paint, it is imperative to apply a primer as the initial coat. Primer serves a multifaceted purpose beyond being the first layer of paint. Specifically formulated to adhere effectively to various surfaces, primers establish a robust bond between the paint and the underlying substrate, including bare wood, bare walls, or existing paint. Without primer, paint tends to peel off. However, achieving a strong connection is not the sole function of primer. It also contributes to the final color of the surface, particularly when tinted. For tinted primer, aim for approximately half the color intensity of the top coat of paint. Once the primer coat has dried, apply a final coat of paint.
Latex primers are generally effective in most situations. However, professionals may opt for an alkyd primer when dealing with challenging or chalky walls. Latex can be applied over oil-based paints, and professionals frequently do so. Alkyd and latex have distinct drying properties. If more than five coats of alkyd paint are applied to an exterior wall, it may be prudent to continue using alkyd primers and paint.
Regardless of the quality of the paint, some stains persist in bleeding through a conventional primer. Therefore, it is advisable to select a stain-blocking primer in such circumstances. For instance, water stains tend to reappear once the paint has dried. Similarly, resin from the knots in wood will inevitably bleed through. Smoke stains, oil stains, and any red chalk used in chalk lines are also susceptible to bleeding, unless a stain-blocking primer has been applied.
Stain-blocking primers are available in both alkyd and latex formulations, available in aerosol and liquid forms. An alternative option is shellac, which can be used alone to block stains and serves as the base for other stain blockers. For sealing in stubborn stains with a single coat, it is recommended to use only stain-blocking primers that are alkyd or shellac-based.
Choosing a Sheen
Once you have selected your color and determined whether to use latex or oil paint, you still have five distinct sheen options to choose from: flat, eggshell, satin, semigloss, and gloss. Each sheen represents the extent to which the paint reflects light. A flat paint reflects approximately 5 to 10 percent of the light that illuminates it, while a gloss reflects 50 percent or more. These variations in light reflection significantly impact the visual appearance of both the surface and the color. A flat sheen appears duller and darker compared to the same color in a gloss, while glossy sheens highlight imperfections more prominently.
Flat paint absorbs light, thereby disguising many surface imperfections. Dents, dings, texture changes, and wavy walls all tend to disappear behind the matte finish of a flat paint. Because it hides blemishes so well, you can often get by with only a single coat. On the downside, flat paint tenas to show dirt and usually doesn’t stand up well to washing or scrubbing
Eggshell hides many imperfections but is a bit smoother than flat paint, meaning it reflects more light. It’s also easier to wash so you can go longer before repainting. Because of its washability, it has become a popular sheen for walls.
Satin. Think of washability when you think satin— this finish is ideal for kitchens, bathrooms, hallways, kids’ rooms, woodwork, and trim. Silky satin paint looks good on walls in high-traffic rooms but is durable enough to stand up to dirt and repeated cleaning.
Semigloss. This finish offers both washability and shine. Semigloss reflects between 35 and 50 percent of the light that hits it, so most people find it too shiny to use on their walls, It is extremely durable, however. Semigloss is well-suited to surfaces that get a lot of handprints— woodwork, trim, cabinets, and doors. For the same reason, its also popular for kitchens and baths .
Gloss. Choose glossy paint for utility rooms or playroom walls, or for trim that gets a lot of abuse. A high-gloss shine may be discomforting on walls, however. Against the mirror-smooth reflective finish, even minor surface imperfections can suddenly look like glaring errors.
🔔 IMPORTANT SAFETY NOTICE – LEAD PAINT DANGER
Paint made before 1978 may contain lead, which is very hazardous, especially to young children. If you remove or sand paint, first test it for lead with an inexpensive kit sold at home centers or paint stores.
(The lead paint may be hidden beneath one or more top coats.)
Ask local authorities or check with the EPA at www.epa.gov for advice on how to remove lead-base paint safely. Children who have lived or played in homes with lead paint should have a simple test (given by a doctor) for lead exposure.
Traditional rollers permit faster paint application than brushes. At intervals, it becomes necessary to halt the process and recharge the roller by dipping it into the paint bucket…
For most painting jobs, you’ll need both a roller and a brush. The brush is ideal for narrow spaces or cutting in (creating a sharp-edged line where the…
Selecting the color is the enjoyable part of painting, even if it seems somewhat confusing at first. White or off-white may be a safe choice, but it’s not…
Specialty paint stores and dedicated retail sections offer an extensive range of paint products, encompassing alkyd, latex, primer, stain-blocker, and enamel, alongside various sheens, including gloss, semigloss, satin,…
Among various home-improvement tasks, painting offers the greatest return on investment. Paint can infuse a room with vibrant color or create a subtle tone at a minimal cost.
Paint samples are notorious for their tendency to appear differently once applied to walls, largely because of the room’s lighting. To avoid costly mistakes, invest in a quart of paint and perform a trial test before buying more. Apply the paint to white poster board and assess its color under your specific lighting conditions.
5 things to consider when taking on Home Improvement Painting projects
The preparation phase takes longer than the painting itself. To ensure superior outcomes, adequate surface preparation is essential. Budget comparable time for cleaning and repairs as for painting.
Paint conceals discolorations, but not surface flaws. It conceals the imperfections, such as bumps, nicks, dents, and cracks, that are inherent to the wall, door, or trim, but it will not eliminate the flaws. That is your responsibility.
Purchase the best paint, rollers, and brushes that are within your budget. Cheap paint, made with more filler than pigment, turns powdery after a couple of years. Cheap rollers and brushes mar the surface by leaving fuzz and bristles behind.
Protect all surfaces that are not designated for painting, including floors, trim, woodwork, and furnishings.(See Protecting Surfaces on … )
Wipe down the surface. Clean the walls or trim with trisodium phosphate (TSP) or a phosphate-free alternative, then rinse with a sponge and clean water until the water is clear. Allow the surface to dry, then identify and repair any imperfections. Consult with the paint department staff for guidance on the most suitable products for addressing specific issues, which may include the following:
Caulking compound. Fill exterior cracks with caulk. Inside, caulk between walls and molding, and run caulk down the corners. To achieve a smooth transition between surfaces, smooth the bead of caulk with a wet finger, particularly if they are cracked.
Surfacing compound is designed for wall repair applications; choose a compound compatible with your wall type, generally drywall or plaster. Utilize a lightweight spackling compound for small holes or gouges, as it provides increased body and minimizes shrinkage.
Window glazing compound. Glazier’s compound is a specialized putty designed to secure glass windowpanes in place from the exterior. It adheres instantly and dries rapidly, allowing for immediate painting. Additionally, it is ideal for filling exterior nail holes.
Use PaintPrimer on surfaces thoroughly before painting. Primer creates a molecular bond between the paint and the surface being painted. The application of a primer sealer to a stained wall or ceiling serves to prevent any underlying stains from bleeding through at a later stage.
Sanding should be done between coats. This step is brief; merely wipe the wall with 120-grit paper, then use a towel or an old paintbrush to brush off the dust. A sanded wall, when finished, feels velvet-smooth to the touch. An unsanded wall feels slightly bumpy.
Develop your decorativeskills on a sheet of base-coated poster board until you achieve the desired look. Variations in technique and glaze application yield diverse effects, even with the same color palette.