
Introduction: Transforming an Empty Space Into an Outdoor Living Area
One of the most rewarding outdoor projects I’ve completed was building a stone paver patio. Over my 40+ years of DIY home improvement experience, I’ve learned that outdoor spaces can dramatically improve both the appearance and functionality of a home. A well-built paver patio creates a place for relaxing, entertaining family and friends, and enjoying the outdoors without the expense of hiring a contractor.
This particular project involved moving hundreds of pavers, constructing a retaining wall, preparing a solid base, and carefully installing each stone to create a durable and attractive finished product. While the work was physically demanding, the results were worth every minute. In this article, I’ll walk you through the process, share lessons learned, and help you avoid common mistakes that can lead to costly repairs later.
Why I Chose Stone Pavers Instead of Concrete

When planning this project, I considered several patio options. Concrete is often less expensive initially, but pavers offer significant advantages.
Benefits of Stone Pavers
✔ Easier to repair if damaged
✔ More attractive appearance
✔ Better drainage
✔ Increased property value
✔ Greater design flexibility
✔ Less cracking than poured concrete
Pavers also allow individual stones to be replaced without tearing out the entire patio.
Buyer’s Guide: Choosing the Right Pavers
When shopping for pavers, consider:
- Thickness (2⅜” minimum for patios)
- Color consistency
- Slip resistance
- Freeze/thaw durability
- Manufacturer warranty
- Matching retaining wall products
For most homeowners, concrete pavers provide the best balance between cost, durability, and appearance.
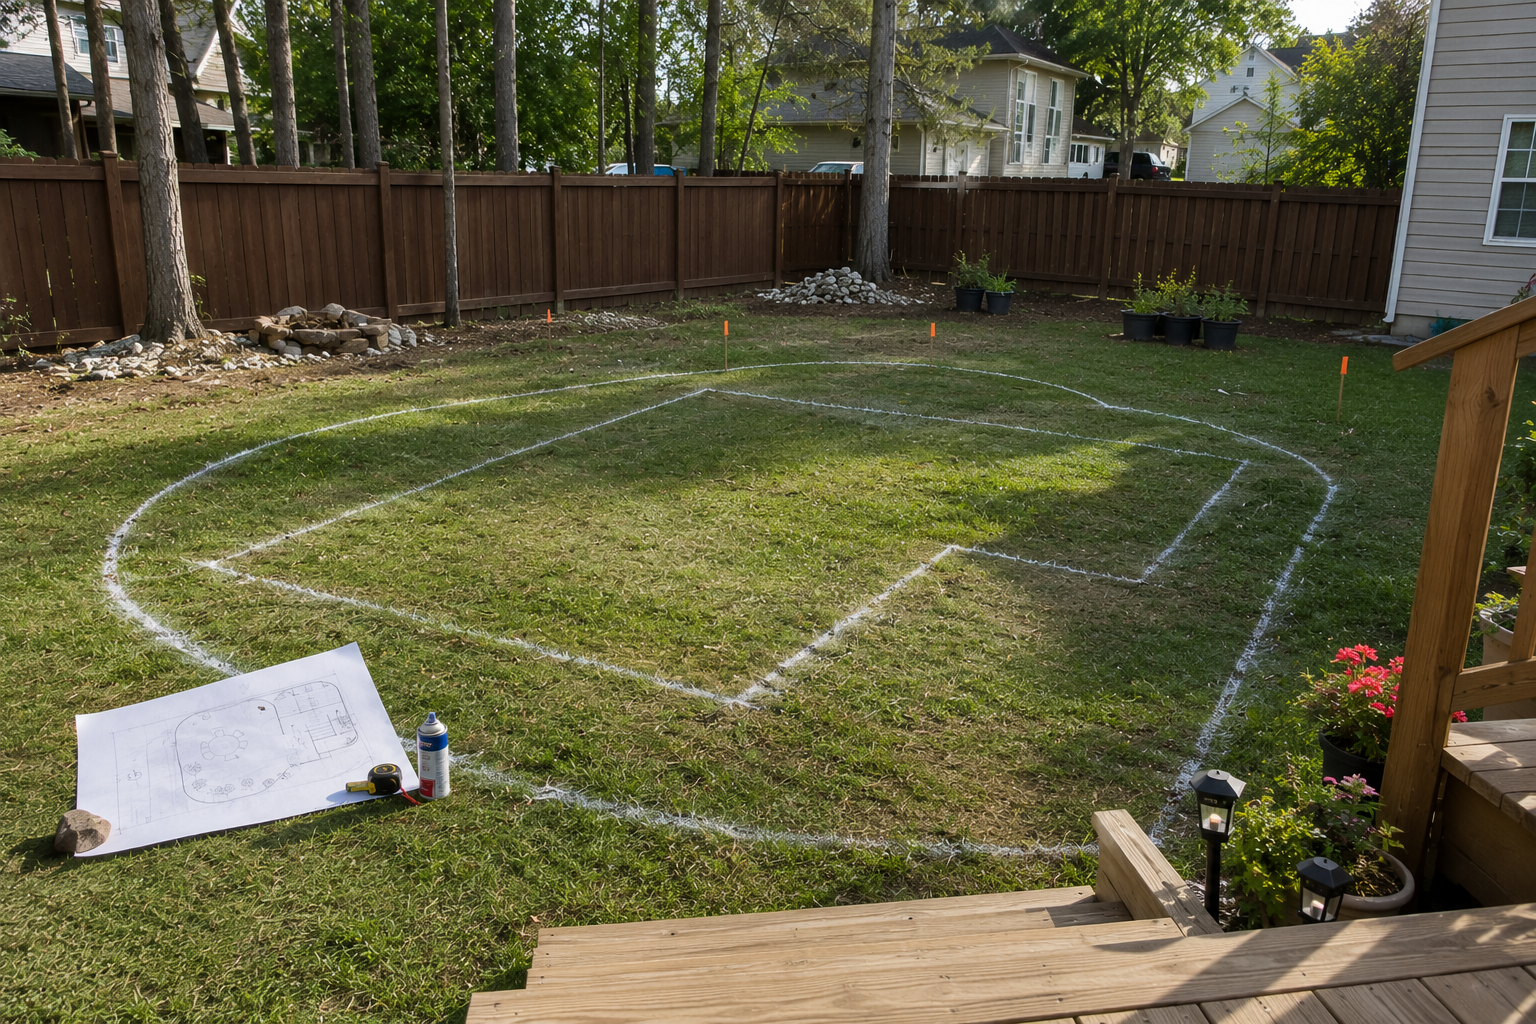
Step 1: Planning the Patio Layout

Before moving a single paver, I spent time designing the layout.
A successful patio starts with careful planning. Measure the space, identify drainage patterns, and determine how the patio will connect to existing structures.
Design Tip
Avoid creating a patio that looks disconnected from the house.
Instead:
- Match colors with your home’s exterior.
- Align edges with architectural features.
- Incorporate landscaping around the perimeter.
- Consider future additions such as pergolas, fire pits, or seating walls.
The goal is to make the patio look like it was always part of the property.
Safety Alert: Call Before You Dig
Before excavation begins, contact your local utility locating service.
Safety Alert
Never assume you know where utilities are located.
Underground lines may include:
- Electrical service
- Gas lines
- Water pipes
- Internet cables
- Sewer connections
Striking a utility line can result in severe injury, property damage, or costly repairs.
Step 2: Moving Materials to the Work Area

One of the biggest surprises for many DIYers is how heavy pavers actually are.
Each pallet can weigh several thousand pounds.
For this project, I used a wheelbarrow to move pavers from the delivery location to the patio site.
Work Smart Tip
Don’t overload the wheelbarrow.
Many small trips are safer and often faster than struggling with oversized loads.
Your back will thank you later.
Tool Tip: Getting More Life From Your Wheelbarrow
A quality wheelbarrow becomes one of the most valuable tools on a paver project.
Tool Tip
Before starting:
- Check tire pressure.
- Tighten loose bolts.
- Lubricate moving parts.
- Inspect handles for cracks.
A properly maintained wheelbarrow reduces fatigue and increases productivity.
Step 3: Building the Retaining Wall

Because the patio site involved changes in elevation, a retaining wall was needed.
This wall serves both structural and decorative purposes.
Every block was carefully positioned and checked for level before adding the next course.
Common Mistake
Many DIYers rush through retaining wall installation.
If the first course isn’t perfectly level, the error becomes larger with every row.
Take extra time on the first row.
Everything else depends on it.
Step 4: Preparing the Base

This step determines whether your patio lasts five years or twenty-five years.
The visible pavers only represent part of the project.
The real strength comes from the layers underneath.
A proper base includes:
- Excavation
- Compacted gravel
- Bedding sand
- Proper drainage slope
Safety Alert
Wear safety glasses and hearing protection whenever operating compactors, saws, or cutting equipment.
Dust and flying debris can cause serious injuries.
Work Smart Tip: Rent the Right Equipment
Many homeowners try to save money by skipping compaction equipment.
This often leads to settlement problems later.
Work Smart Tip
Rent a plate compactor.
A few hours of rental time can prevent thousands of dollars in future repairs.
It’s one of the smartest investments you can make on a paver project.
Step 5: Installing the Pavers

This is where the transformation really begins.
As each row of pavers is installed, the patio starts taking shape.
I worked methodically, checking alignment frequently and maintaining consistent spacing.
Tool Tip
Use string lines to keep rows straight.
Even minor alignment errors become noticeable over larger areas.
String lines provide a simple and inexpensive way to maintain professional-looking results.
Common Mistakes to Avoid
Over the years, I’ve seen homeowners make the same paver patio mistakes repeatedly.
Mistake #1: Skipping Base Preparation
The patio may look great initially but will begin settling and shifting later.
Mistake #2: Poor Drainage
Water is the enemy of every patio project.
Always slope the patio away from structures.
Mistake #3: Buying Cheap Materials
Inferior pavers often fade, chip, or deteriorate prematurely.
Mistake #4: Ignoring Edge Restraints
Without proper edge support, pavers gradually spread apart.
Mistake #5: Rushing the Project
Patience produces better results than speed.
Design Tips for a Professional-Looking Patio
A few design choices can elevate a basic patio into a showpiece.
Design Tip #1: Use Multiple Paver Sizes
Mixed-size patterns create visual interest.
Design Tip #2: Add Contrasting Borders
Borders define the space and create a premium appearance.
Design Tip #3: Incorporate Landscaping
Plants soften hard edges and help blend the patio into the yard.
Design Tip #4: Consider Lighting
Low-voltage lighting extends patio use into the evening.
Design Tip #5: Create Gathering Areas
Think about furniture placement before installation begins.
Design with function in mind.
The Finished Result

After countless wheelbarrow trips, hundreds of pavers, and many hours of work, the project was complete.
What was once an underutilized section of the yard became a beautiful outdoor living space that added both value and enjoyment to the property.
The finished patio provides a durable surface for entertaining, relaxing, and spending time with family. Most importantly, it serves as a reminder that large projects become manageable when approached one step at a time.
Final Thoughts
Building a stone paver patio is not the easiest DIY project, but it is one of the most rewarding. With proper planning, quality materials, and attention to detail, homeowners can achieve professional-looking results while saving thousands of dollars in labor costs.
Remember:
✔ Focus on the base.
✔ Prioritize drainage.
✔ Use quality materials.
✔ Work safely.
✔ Take your time.
That’s how successful DIY projects are built.
At Conley’s Home Improvement, I’ve spent more than four decades learning that patience, preparation, and persistence often matter more than expensive tools. Measure twice, build once, and enjoy the results for years to come.


Leave a Reply