I remember the first time I looked at my dated kitchen and decided it was finally time for a major change. Diving into a diy home improvement project can feel a bit overwhelming at the start, but the results are always worth the effort. My goal is to show you that updating your space is completely doable with the right mindset and a few simple tools.
Choosing new surfaces is a huge step in making your house feel more like a modern home. I want to share my personal experience to help you avoid common mistakes during the renovation process. A little preparation goes a long way in ensuring a smooth and successful transformation.
I believe that Installing countertops-DIY Home Improvement Countertops is one of the most rewarding tasks any homeowner can tackle. It requires precision and a bit of patience, but I will guide you through every essential step. Planning your layout carefully is the real secret to achieving a professional-looking finish that you can be proud of for years.
Key Takeaways
- Proper planning is the foundation of any successful DIY project.
- Accurate measurements prevent costly mistakes during the installation.
- The right tools make the heavy lifting much more manageable for one person.
- Preparation of the base cabinets is just as important as the surface itself.
- Safety gear should always be your top priority when handling heavy materials.
- Patience during the leveling phase ensures a perfectly flat work area.
Planning Your Countertop Project
A successful countertop installation begins with thorough planning and preparation. Just like designing a beautiful pool deck, where you might consider diy pool deck ideas to enhance your outdoor living space, planning your countertop involves several key steps.
First, you need to assess your kitchen layout and needs. This involves measuring your space accurately and considering how you use your kitchen. Think about the workflow and how a new countertop can improve it.
Assessing Your Kitchen Layout and Needs
When assessing your kitchen, consider the layout and how you can optimize it with your new countertop. Think about the “work triangle” concept, which involves positioning your sink, stove, and refrigerator in a way that minimizes walking distances. You should also consider the style and material of your countertop and how it will fit with your kitchen’s aesthetic.
For example, if you have a small kitchen, a lighter-colored countertop can make the space feel larger. On the other hand, if you have a large kitchen, you might consider a bold, dark countertop to add some visual interest.
“The kitchen is the heart of the home, and the countertop is its crown jewel.”
Setting a Realistic Budget for Your Project
Setting a realistic budget is crucial for the success of your countertop project. You need to consider not just the cost of the countertop material itself, but also the cost of installation, any necessary tools or supplies, and potential contingencies.
| Component | Cost Consideration |
|---|---|
| Countertop Material | Material cost varies widely depending on type (laminate, granite, quartz, etc.) |
| Installation | Labor costs can vary based on complexity and location |
| Tools and Supplies | Additional costs for adhesives, fasteners, and safety equipment |
Just as you would budget for materials and labor when considering pool deck design ideas, you should carefully plan your countertop budget to avoid unexpected expenses.
Creating Your Installation Timeline
Creating a timeline for your countertop installation is essential to ensure that the project is completed on time and with minimal disruption to your daily routine. This involves scheduling the removal of your old countertop, the preparation of the space, and the installation of the new countertop.
Consider the following steps when creating your timeline:
- Measure and template your space
- Order your countertop material
- Schedule the removal of your old countertop
- Prepare the space for the new countertop
- Install the new countertop
By carefully planning your countertop project, you can ensure a successful installation that meets your needs and enhances your kitchen’s functionality and beauty.
Tools and Materials You’ll Need
Before diving into your countertop installation, it’s crucial to gather the necessary tools and materials. Having the right equipment at your disposal will make the process smoother and more efficient, much like build a pool deck projects that require careful planning and the right tools.
Essential Power and Hand Tools
To begin, you’ll need a variety of power and hand tools. These include a circular saw for making straight cuts, a jigsaw for curved cuts, and a drill for drilling holes for sinks and faucets. A router can be useful for edge profiling, and a sander will help you smooth out the countertop surface.
Here is a list of essential power and hand tools:
- Circular saw
- Jigsaw
- Drill
- Router
- Sander
- Tape measure
- Level
- Clamps
Safety Equipment and Protective Gear
Safety should be your top priority when working with power tools and materials. Ensure you have safety glasses, ear protection, and a dust mask to protect yourself from debris and noise. Gloves will help prevent injuries, and a first aid kit should be nearby in case of emergencies.
Just as in pool deck construction, safety equipment is vital to prevent accidents and ensure a safe working environment.
| Safety Equipment | Purpose |
|---|---|
| Safety glasses | Protect eyes from debris |
| Ear protection | Reduce noise exposure |
| Dust mask | Prevent inhalation of dust |
Adhesives, Fasteners, and Supplies
The right adhesives and fasteners are crucial for securing your countertop in place. Depending on your countertop material, you may need different types of adhesives. For example, laminate countertops require contact cement, while granite countertops may need epoxy-based adhesives.
Here is a summary of common adhesives and fasteners used in countertop installation:
| Material | Adhesive/Fastener |
|---|---|
| Laminate | Contact cement |
| Granite/Quartz | Epoxy-based adhesive |
| Butcher Block | Wood glue and screws |

Choosing the Right Countertop Material
With numerous countertop materials available, making the right choice can be a daunting task. The decision depends on several factors including budget, durability, maintenance, and aesthetic preferences.
Laminate Countertops for Budget-Friendly Projects
Laminate countertops are a cost-effective option for homeowners on a budget. They are made from synthetic materials and paper, pressed together under high pressure. Laminate countertops are available in a wide range of colors and patterns, making them a versatile choice.
Pros: Affordable, easy to install, and available in various designs.
Cons: Less durable, prone to scratches and heat damage.
Granite and Quartz for Durability
For those seeking durability and a luxurious look, granite and quartz countertops are excellent choices. Granite is a natural stone known for its strength and unique patterns, while quartz is an engineered stone offering consistent quality and low maintenance.
Pros: Durable, resistant to heat and scratches, aesthetically pleasing.

Butcher Block and Wood Surfaces
Butcher block and wood countertops bring warmth and a natural look to kitchens. They are made from glued-together wood strips. These countertops are ideal for those who prefer a rustic or traditional look.
Pros: Warm aesthetic, can be repaired, and is gentle on knives.
Cons: Requires regular maintenance, susceptible to water damage and scratches.
Solid Surface and Other Material Options
Solid surface countertops, such as Corian, are made from acrylic and resin. They offer a seamless appearance and are available in various colors. Other materials like stainless steel and concrete are also gaining popularity for their unique looks and durability.
| Material | Durability | Maintenance | Cost |
|---|---|---|---|
| Laminate | Low | Easy | $20-$40 per sqft |
| Granite | High | Moderate | $40-$100 per sqft |
| Quartz | High | Low | $50-$120 per sqft |
| Butcher Block | Medium | High | $30-$80 per sqft |
| Solid Surface | Medium | Easy | $40-$80 per sqft |
Just as a well-designed above-ground pool deck can enhance your outdoor living space, choosing the right countertop material can elevate your kitchen’s functionality and aesthetic. Similarly, the principles of a diy pool deck guide can be applied to planning and executing your countertop project, emphasizing the importance of careful planning and execution.
Measuring and Templating Your Space
Accurate measurements are the foundation of a successful countertop installation, and I’m here to guide you through the process. Just like building a pool deck requires step-by-step pool deck planning, measuring your countertop space demands attention to detail and a methodical approach.
To start, you’ll need to assess your kitchen layout and take precise measurements of your cabinets. This step is crucial in ensuring that your countertop fits perfectly and functions as intended.
Taking Accurate Cabinet Measurements
To take accurate cabinet measurements, follow these steps:
- Measure the length and width of each cabinet section.
- Record the measurements in a notebook or use a digital tool to store them.
- Take note of any obstructions, such as plumbing fixtures or electrical outlets.
“Measure twice, cut once” is a mantra that rings true in countertop installation. As a seasoned DIY enthusiast once said,
“The most critical part of any project is the preparation. If you get the measurements right, the rest will fall into place.”
Creating a Cardboard or Paper Template
Once you have your cabinet measurements, create a template using cardboard or paper to visualize your countertop layout. This step helps you identify any potential issues and make necessary adjustments before cutting your countertop material.
To create a template, follow these steps:
- Cut out cardboard or paper strips to match the dimensions of your cabinets.
- Assemble the strips to form a template that mirrors your countertop layout.
- Use the template to check for any discrepancies or areas that require adjustments.

Marking Cutouts for Sinks and Cooktops
With your template in hand, it’s time to mark cutouts for sinks and cooktops. Use a pencil to mark the locations of these fixtures on your template, taking care to measure carefully and avoid errors.
To ensure accurate cutouts, follow these tips:
- Double-check your measurements to avoid mistakes.
- Use a template or stencil specifically designed for sink and cooktop cutouts.
- Mark the cutout areas clearly on your template.
By following these steps and taking the time to measure and template your space accurately, you’ll be well on your way to a successful countertop installation that meets your needs and enhances your kitchen’s functionality.
Removing Old Countertops Safely
As you start your DIY home improvement journey, safely removing old countertops is essential for a successful renovation. This process involves several critical steps that must be executed with care to avoid damage to your kitchen and injury to yourself.
Removing old countertops is not just about tearing out the existing surface; it’s about doing so in a way that prepares your kitchen for the new installation. Before you begin, ensure you have the necessary tools and protective gear.
Disconnecting Plumbing and Electrical Fixtures
Before you start the removal process, it’s crucial to disconnect any plumbing and electrical fixtures connected to the countertop. This includes sinks, faucets, cooktops, and any other appliances integrated into the countertop.
- Turn off the water supply to the sink and disconnect the plumbing lines.
- Switch off the power to any electrical fixtures at your circuit breaker or fuse box.
- Carefully disconnect the electrical connections to cooktops or other appliances.
Detaching and Lifting the Old Countertop
After disconnecting the fixtures, you’ll need to detach the old countertop from the base cabinets. This often involves removing adhesive or fasteners that hold the countertop in place.
- Use a pry bar or a similar tool to gently loosen the countertop from the cabinets.
- Work your way around the countertop, carefully prying it loose.
- Once loose, use assistance to lift the countertop off the cabinets, taking care not to damage the surrounding area.

Cleaning and Inspecting Base Cabinets
With the old countertop removed, inspect the base cabinets for any damage or debris. Cleaning and inspecting the base cabinets is a crucial step before installing the new countertop.
- Remove any debris or old adhesive from the cabinet tops.
- Inspect the cabinets for any damage or needed repairs.
- Make any necessary repairs to ensure the cabinets are sturdy and level.
By following these steps, you can safely remove your old countertops and prepare your kitchen for the new installation, ensuring a smooth and successful DIY home improvement project.
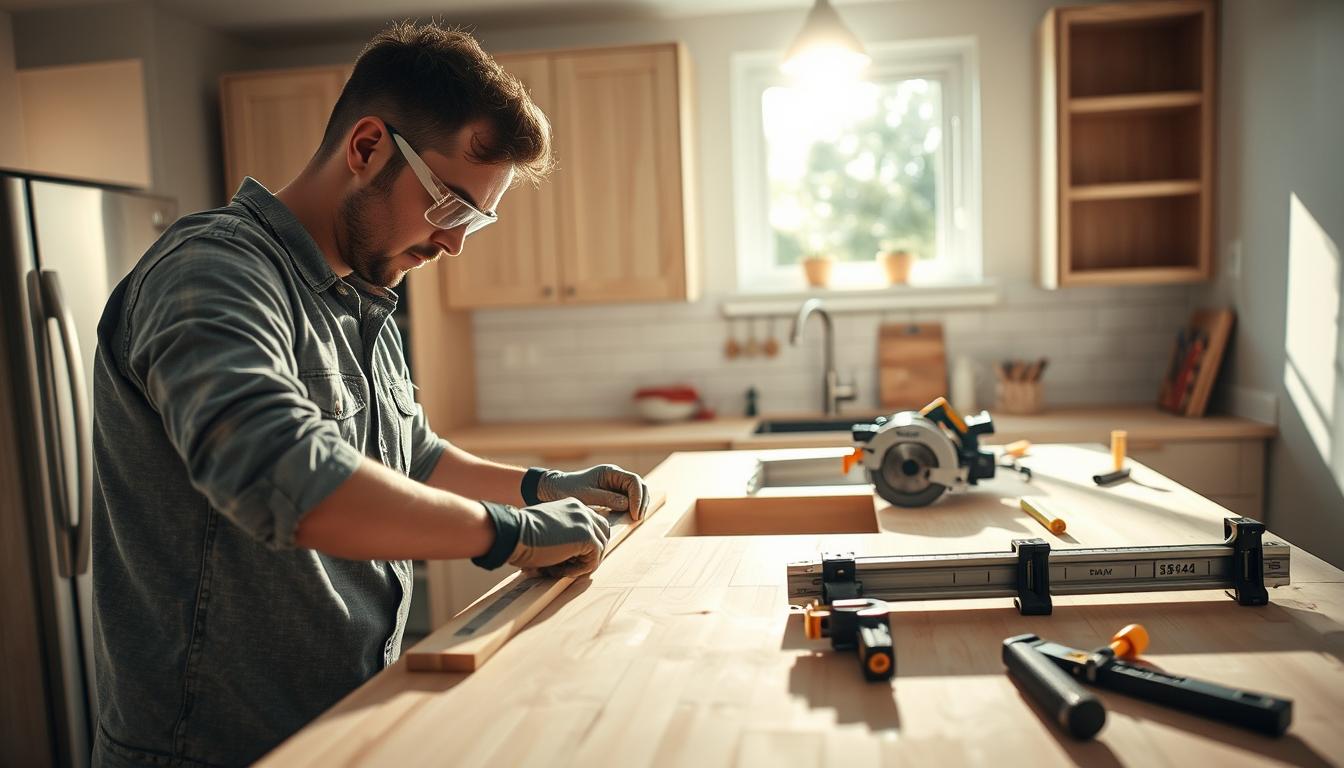
Installing Countertops-DIY Home Improvement Countertops
With our plans and materials in place, we can begin the exciting process of countertop installation. This step is crucial in our DIY home improvement project, requiring attention to detail and a bit of elbow grease.
Preparing and Leveling the Cabinet Tops
Before placing the new countertop, it’s essential to prepare and level the cabinet tops. This ensures a stable and even surface for the countertop. I start by inspecting the cabinets for any debris or old adhesive that might interfere with the new installation.
I then use a level to check if the cabinet tops are perfectly level. If necessary, I make adjustments using shims to create a level surface. This step is critical to prevent any unevenness or stress on the countertop.

Performing a Dry Fit Test
Once the cabinet tops are prepared, I perform a dry fit test to ensure the countertop fits perfectly. This involves placing the countertop on the cabinets without any adhesive to check for any gaps or misalignments.
The dry fit test allows me to make any necessary adjustments before applying the adhesive, ensuring a precise fit.
Applying Adhesive and Setting the Countertop in Place
With the countertop fitting correctly, I proceed to apply adhesive to the cabinet tops. It’s crucial to follow the manufacturer’s instructions for the correct amount and application method.
I then carefully set the countertop in place, ensuring it is aligned with the cabinets and the surrounding surfaces. This step requires patience and precision to avoid any mistakes.
Checking for Level and Making Adjustments
After setting the countertop in place, I check for level again to ensure it is perfectly aligned. If necessary, I make adjustments to achieve a level surface.
This final check is vital to ensure the countertop is properly installed and functions as expected.
Cutting and Fitting Your Countertop
Achieving a seamless installation starts with cutting and fitting your countertop with precision and care. This step is crucial in ensuring that your countertop fits perfectly around sinks, cooktops, and other fixtures, and that it complements your kitchen’s overall design, much like a well-planned pool deck design enhances your outdoor living space.

Making Precise Sink and Cooktop Cutouts
To make precise cutouts for sinks and cooktops, start by carefully measuring and marking the locations on your countertop. Use a template or the actual appliance to trace the cutout areas. For a clean cut, use a jigsaw or a circular saw with a fine-tooth blade, and always wear protective gear. The precision required for this task is similar to that needed for diy pool deck ideas that involve intricate designs or patterns.
When cutting, work slowly and make adjustments as needed to avoid mistakes. It’s also a good idea to test your cutouts with the actual appliances before finalizing the installation.
Cutting Countertops to the Correct Length
Cutting your countertop to the correct length involves measuring the space where the countertop will be installed and transferring those measurements to the countertop material. Use a straightedge and a pencil to mark the cut line clearly. For straight cuts, a circular saw is typically the best tool, while a jigsaw is better suited for curved cuts.
To minimize waste and ensure accuracy, double-check your measurements before making the cut. This attention to detail is crucial for a professional-looking finish.
Fitting Corners and Joining Seams
Fitting corners and joining seams requires patience and the right techniques. For corners, you may need to miter the edges to achieve a smooth, seamless joint. When joining two pieces of countertop, use a seam adhesive and clamp them together tightly until the adhesive sets.
Ensuring that the seams are properly aligned and the corners fit perfectly is key to a successful installation. This process can be likened to designing a cohesive outdoor space, where every element, like a pool deck, must fit together seamlessly.
Securing and Sealing the Countertop
The final stages of your countertop installation involve securing it firmly in place and sealing it for longevity. Much like building a sturdy foundation for a DIY pool deck guide recommends, a well-secured countertop is essential for withstanding daily wear and tear.

Fastening Countertops to Base Cabinets
To ensure your countertop is stable, it’s crucial to fasten it securely to the base cabinets. This involves using the appropriate fasteners, such as screws or adhesive, depending on the type of countertop material you’ve chosen. For instance, granite and quartz countertops often require a strong adhesive, while laminate countertops might use screws.
I recommend checking the manufacturer’s instructions for specific guidance on fastening your particular countertop material to the base cabinets.
Sealing Seams with Color-Matched Filler
Sealing the seams between countertop sections is vital for creating a seamless look and preventing moisture from seeping underneath. Using a color-matched filler helps to blend the seams with the rest of the countertop, making them less noticeable.
To achieve a professional finish, apply the filler carefully and wipe away any excess with a damp cloth. Allow the filler to dry according to the manufacturer’s instructions before proceeding.
Applying Caulk Along Backsplash and Walls
Finally, applying caulk along the backsplash and where the countertop meets the walls is essential for a watertight seal. This not only helps to prevent water damage but also gives your countertop installation a clean, finished appearance.
Choose a caulk that matches your countertop’s color as closely as possible, and apply it in a smooth, continuous bead. Use a damp finger or caulk tool to smooth out the caulk, ensuring it’s evenly spread and not excessive.
By following these steps, you can ensure your countertop is both securely fastened and properly sealed, much like the careful planning involved in deciding how to build a pool deck that complements your outdoor living space.
Adding Finishing Touches
As I near the completion of my countertop installation project, it’s time to add the finishing touches that will make it truly special. This stage is crucial as it not only enhances the aesthetic appeal of the countertop but also ensures its durability and functionality.
Installing or Attaching the Backsplash
One of the key elements in completing the countertop installation is installing or attaching the backsplash. This not only protects the walls from splashes and spills but also adds a decorative element to the kitchen. I ensure that the backsplash is aligned properly and securely attached to the wall. Just like when constructing an above-ground pool deck, where precision and attention to detail are crucial for both safety and aesthetics, installing a backsplash requires careful planning and execution.

Reconnecting Sink and Plumbing Fixtures
After the countertop is securely in place, the next step is to reconnect the sink and plumbing fixtures. This requires careful handling to avoid any leaks or damage to the new countertop. It’s a process that demands patience and attention to detail, similar to the meticulous care taken during pool deck construction to ensure all elements are properly secured and functional.
Final Cleanup and Quality Inspection
The final step involves a thorough cleanup of the area and a quality inspection to ensure that the installation meets the desired standards. I inspect the countertop for any imperfections or areas that may need additional attention. This stage is critical in delivering a high-quality finish that will last for years to come.
By following these steps and paying close attention to the details, I can ensure that my countertop installation project is completed to a high standard, providing a beautiful and functional kitchen space.
Conclusion
With the comprehensive guide provided in this article, you’re now well-equipped to tackle your countertop installation project. Just as a step-by-step pool deck building project requires careful planning and execution, your countertop installation demands attention to detail and patience. By following the steps outlined, from assessing your kitchen layout to adding the finishing touches, you’ll achieve a professional-looking result.
Remember, a successful DIY home improvement project like this is not just about the end result, but also about the process. Take your time, and don’t hesitate to seek help when needed. With the right tools and materials, and by adhering to pool deck building tips such as precision and patience, you’ll be able to enjoy your new countertops for years to come.
Embarking on this project with confidence, you’ll not only enhance the aesthetic appeal of your kitchen but also increase the value of your home. So, take the first step today, and get ready to admire your handiwork.