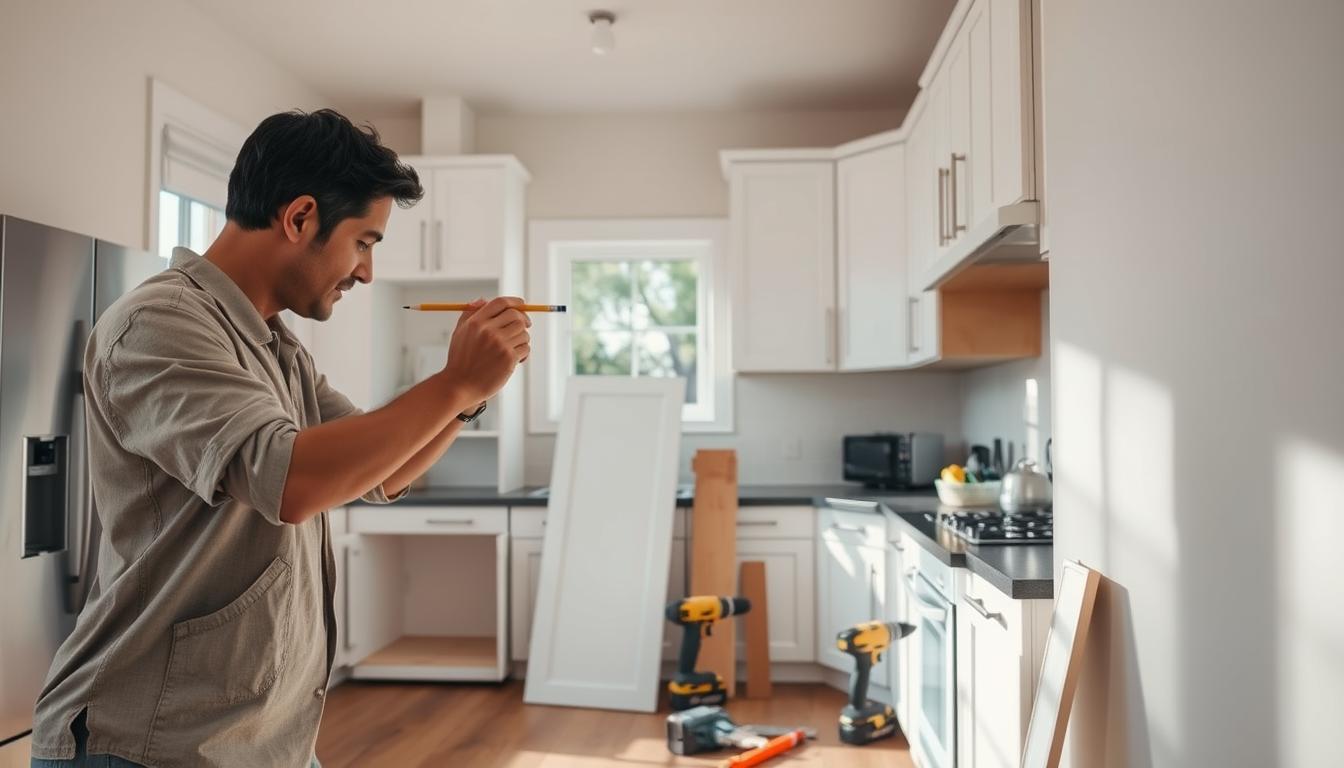
Upgrading your cooking area is a big job that adds value to your house. I know it feels scary to look at bare walls in your house. However, I believe that Installing kitchen cabinets-DIY Home Improvement Cabinets is a task you can master with patience.
I will help you plan every detail very carefully before we start. A successful diy home improvement project depends on your preparation and measurements. I will guide you so your new storage looks great and stays perfectly level.
I remember my first project and how excited I felt when the job was done. My goal is to make this simple and fun for you. Let us transform your living space together today.
Key Takeaways
- Careful planning is the most important step for success.
- Accurate wall measurements help you avoid costly mistakes.
- Always check that your base units are perfectly level.
- Use a partner to help with heavy lifting for safety.
- Gather all your tools before you begin the process.
- Follow local building codes to ensure a safe installation.
Planning Your Kitchen Cabinet Installation Project
The success of your kitchen cabinet installation project heavily relies on the planning phase. A thorough plan helps in avoiding common pitfalls and ensures a smooth execution of the project.
Effective kitchen cabinet installation planning involves several key steps. It begins with understanding the scope of your project and the resources available to you.
Assessing Your Kitchen Space and Layout
Before you start buying cabinets or hiring a contractor, it’s essential to assess your kitchen space accurately. This involves measuring the dimensions of your kitchen, noting the location of electrical outlets, plumbing fixtures, and any other obstacles that could affect the installation.
Take precise measurements of the walls, windows, and doors. Consider creating a sketch or diagram of your kitchen layout to visualize the space better. This step is crucial in determining the optimal layout for your cabinets and ensuring that they fit perfectly in the available space.
Creating a Detailed Cabinet Plan
With your kitchen measurements in hand, the next step is to create a detailed cabinet plan. This plan should include the type of cabinets you need, their sizes, and how they will be arranged in your kitchen. Consider factors such as storage needs, workflow, and the overall aesthetic you want to achieve.
It’s also important to decide on the style and material of your cabinets. Whether you prefer traditional, modern, or a mix of both, your choice will significantly impact the overall look and feel of your kitchen.
Setting a Realistic Timeline
Setting a realistic timeline for your kitchen cabinet installation project is vital. This involves estimating the time required for each stage of the project, from preparation to completion. Consider factors such as the complexity of the installation, the availability of materials, and the schedules of any contractors you might be working with.
A well-planned timeline helps in managing expectations and reducing stress throughout the project. It also allows you to prepare for any unexpected delays or challenges that might arise during the installation process.
Essential Tools and Materials for Installing Kitchen Cabinets
To ensure a smooth kitchen cabinet installation process, you’ll need to be well-prepared with the necessary kitchen cabinet installation tools and materials. Having the right equipment not only makes the job easier but also ensures that the installation is done correctly and safely.
When it comes to installing kitchen cabinets, the task can be daunting without the proper tools. In my experience, having a well-stocked toolkit is crucial for the success of the project.
Power Tools That Make the Job Easier
Power tools are indispensable for efficient and precise cabinet installation. Some of the essential power tools include:
- A cordless drill for drilling holes and driving screws
- A circular saw for making straight cuts in wood
- A jigsaw for curved cuts
- A sander for smoothing out surfaces
These power tools not only save time but also reduce the physical strain associated with manual labor.
Hand Tools and Fastening Hardware
In addition to power tools, various hand tools and fastening hardware are necessary for a successful installation. These include:
- Tape measure and level to ensure accurate measurements and alignment
- Clamps to hold cabinets in place
- Screwdrivers and wrenches for driving fasteners
- Nails and screws as fastening hardware
Having these hand tools and fastening hardware on hand ensures that you can tackle any aspect of the installation process.
Safety Equipment I Always Use
Safety should always be a top priority when working with power tools and performing physical labor. Some essential safety equipment includes:
- Protective eyewear to prevent eye injuries
- Hearing protection to safeguard against noise-induced hearing loss
- A dust mask to prevent inhalation of dust and debris
- Steel-toed boots for foot protection
By wearing the appropriate safety gear, you can significantly reduce the risk of injury and ensure a safe working environment.

Preparing Your Kitchen Space for New Cabinets
Before installing new kitchen cabinets, it’s essential to prepare your kitchen space properly. This step is crucial for a successful kitchen renovation preparation and ensures that the installation process goes smoothly.
First, you need to clear the area of any obstructions and protect the surrounding spaces. This includes covering the floors and any remaining furniture with protective sheets or plastic covers.
Removing Old Cabinets and Countertops
The first step in preparing your kitchen is to remove the old cabinets and countertops. This can be a challenging task, as it involves disconnecting plumbing and electrical connections. I recommend turning off the main water and electricity supply before starting the removal process.
Use appropriate tools to dismantle the old cabinets without damaging the walls. If the countertops are granite or another heavy material, consider hiring professionals to avoid injury.

Repairing and Patching Wall Surfaces
After removing the old cabinets, inspect the wall surfaces for any damage. Repair any holes or cracks with spackling compound and sand the area smooth. This ensures a seamless finish for your new cabinets.
If you find any water damage, address it immediately by checking for leaks and making necessary repairs. A dry and stable wall surface is essential for secure cabinet installation.
Locating and Marking Wall Studs
To securely fasten your new cabinets, you need to locate the wall studs. Use a stud finder to identify the stud positions and mark them with a pencil. This step is critical for ensuring that your cabinets are firmly attached to the wall.
Typically, wall studs are spaced 16 inches apart. Marking their positions will guide you during the cabinet installation process, helping you to avoid mistakes.
By following these steps, you’ll be well-prepared for the cabinet installation process, ensuring a successful outcome for your kitchen renovation project.
Finding the High Point and Establishing Level Reference Lines
To ensure a level kitchen cabinet level installation, understanding the topography of your kitchen floor is essential. This involves identifying the high point, which serves as a reference for the entire installation process.
How I Measure the Floor to Find High Points
Measuring the floor to find its high point is a straightforward process that requires a level and a laser level tool. I start by dividing the kitchen floor into sections and using a laser level to determine the relative heights of different areas. This step is crucial because it helps in establishing a baseline for the cabinet installation.
To measure the floor, I follow these steps:
- Divide the kitchen into grid sections.
- Use a laser level to take readings at various points.
- Record the measurements to identify the highest point.
Marking Horizontal Reference Lines on Walls
Once the high point is identified, the next step is to mark horizontal reference lines on the walls. This is done using a level and a pencil. The reference line indicates where the bottom of the upper cabinets or the top of the base cabinets will be, ensuring they are perfectly level.
To mark the reference lines:
- Transfer the high point measurement to the walls.
- Use a level to draw a horizontal line.
- Ensure the line is consistent around the kitchen.

By following these steps, you can achieve a perfectly level installation, which is fundamental for both the functionality and aesthetics of your kitchen cabinets.
My Step-by-Step Process for Installing Upper Cabinets
Upper kitchen cabinet installation can be a manageable task with the right guidance. I’ll walk you through my process, which involves several key steps to ensure a successful installation.
Starting with the Upper Corner Cabinet
When installing upper cabinets, it’s essential to begin with the corner cabinet. This cabinet serves as a reference point for the rest of the installation. To start, ensure the corner cabinet is level and plumb. I use a level tool to verify its position and make any necessary adjustments.
Installing a Temporary Ledger Board for Support
Before placing the upper cabinets, I install a temporary ledger board to provide support. This ledger board is a critical component, as it helps to hold the cabinets in place while I secure them to the wall. The ledger board should be level and aligned with the bottom of where the upper cabinets will sit.

Securing Upper Cabinets to Wall Studs
Securing the upper cabinets to the wall studs is crucial for stability and safety. I use screws that are long enough to penetrate through the cabinet back and into the wall studs. It’s vital to locate the wall studs before starting the installation. I use a stud finder to identify the stud positions and mark them on the wall.
Connecting Adjacent Cabinet Boxes
Once the first cabinet is securely in place, I proceed to connect the adjacent cabinet boxes. This involves using screws to join the cabinets together. It’s essential to ensure the cabinets are properly aligned before tightening the screws. I also check that the doors will be able to open and close smoothly without any obstruction.
| Step | Description | Tools Required |
|---|---|---|
| 1 | Start with the upper corner cabinet | Level, Drill |
| 2 | Install a temporary ledger board | Ledger board, Level, Drill |
| 3 | Secure cabinets to wall studs | Drill, Screws, Stud finder |
| 4 | Connect adjacent cabinet boxes | Screws, Drill |
By following these steps and using the right tools, you can achieve a professional-looking upper kitchen cabinet installation.
How I Install Base Cabinets Like a Pro
With the upper cabinets in place, it’s time to focus on the base cabinets, which provide essential storage and support for your countertops. Installing base cabinets is a critical phase of your kitchen renovation, requiring attention to detail to ensure they are perfectly level and securely attached to the wall.
Beginning with the Corner Base Cabinet
I always start the base cabinet installation with the corner cabinet. This approach helps establish a solid reference point for the rest of the cabinets. To begin, I carefully measure and mark the location of the corner cabinet on the floor, ensuring it is aligned with my pre-determined layout plan.
Using a level, I verify that the floor is even and make any necessary adjustments before proceeding. The corner cabinet serves as a crucial anchor for the subsequent cabinets, so it’s vital to get it positioned correctly.
Using Shims to Level Base Cabinets Perfectly
Leveling base cabinets is a task that requires patience and the right tools. I use shims to adjust the cabinets to the perfect level, ensuring they are even with the surrounding cabinets and the countertop that will be installed later.
To level a base cabinet, I place it in its designated position and check its levelness. If necessary, I insert shims between the cabinet and the floor to make the necessary adjustments. This step is crucial for the stability and appearance of the cabinets.

Fastening Base Cabinets to the Wall
Once the base cabinets are level and in their correct positions, the next step is to secure them to the wall. This is a critical step to prevent the cabinets from shifting or toppling over.
I use screws to fasten the cabinets to the wall studs. It’s essential to locate the wall studs before drilling to ensure a secure hold. I typically use a stud finder for this purpose, marking the stud locations on the wall before proceeding with the installation.
Installing the Sink Base and Appliance Cabinets
Special consideration is given to sink base and appliance cabinets, as they require specific accommodations for plumbing and electrical connections. I ensure that these cabinets are properly positioned to accommodate the sink, appliances, and necessary connections.
For sink base cabinets, I verify that there is adequate space for the sink and plumbing fixtures. Similarly, for appliance cabinets, I ensure that there is sufficient clearance for the appliances and their respective connections.
Hanging Cabinet Doors and Installing Drawer Fronts
With the cabinet boxes securely in place, my next task is to hang the cabinet doors and install the drawer fronts. This step is crucial as it not only enhances the aesthetic appeal of the kitchen but also ensures the functionality of the cabinets.
Mounting Hinges and Attaching Doors
The first step in hanging cabinet doors is to mount the hinges. I prefer using soft-close hinges for their durability and smooth operation. To mount the hinges, I carefully measure and mark the door and cabinet frame, ensuring accurate placement.
Accurate hinge placement is key to ensuring that the doors hang properly and operate smoothly. I use a template to mark the screw holes on both the door and the cabinet frame, making sure they align perfectly.
Adjusting Doors for Proper Alignment and Gap Spacing
Once the doors are attached, I adjust them for proper alignment and gap spacing. This involves tweaking the hinges to ensure the doors are level and evenly spaced from the surrounding cabinets.
A well-aligned door not only looks better but also functions more smoothly. I check the gap between the doors and the cabinet frame, making adjustments as necessary to achieve a consistent and visually appealing spacing.
“The devil is in the details.” This old adage is particularly true when it comes to cabinet installation, where the alignment and spacing of doors can make or break the overall look of the kitchen.
Installing Drawer Fronts and Slides
Installing drawer fronts and slides is another critical step. I start by attaching the drawer slides to the cabinet frame and the drawer box, ensuring they are level and securely fastened.
| Component | Installation Tip |
|---|---|
| Drawer Slides | Ensure they are level and securely attached to both the cabinet frame and drawer box. |
| Drawer Fronts | Align them carefully with the drawer box, ensuring even spacing and proper attachment. |
Finally, I attach the drawer fronts to the drawer boxes, making sure they are aligned with the surrounding cabinet doors and evenly spaced.
By following these steps and paying close attention to detail, I can ensure that my kitchen cabinets not only look great but also function smoothly and efficiently.
Adding Crown Molding, Trim, and Decorative Elements
The finishing touches, such as crown molding and toe kick boards, are what transform kitchen cabinets from functional to fantastic. As I put the final elements in place, I feel a sense of satisfaction knowing that these details will elevate the entire kitchen.
One of the most impactful finishing touches is crown molding on upper cabinets. It adds a level of sophistication and completes the look of the kitchen. To install crown molding effectively, it’s crucial to measure carefully and cut precisely.
Installing Crown Molding on Upper Cabinets
To start, I measure the length of the cabinets where the crown molding will be installed. I use a miter saw to cut the molding at the correct angle, ensuring a seamless fit. It’s essential to use the right type of nails and a nail gun to secure the molding without damaging it.

Attaching Toe Kick Boards and End Panels
Toe kick boards not only add a finished look to the base cabinets but also protect the area from dust and debris. I measure the space where the toe kick will be installed and cut the board to size. Attaching it securely with the appropriate fasteners ensures it stays in place.
End panels serve a similar purpose, covering the exposed ends of the cabinets and creating a cohesive appearance. I make sure to match the material and finish of the cabinets to maintain a uniform look.
Filling Gaps and Applying Caulk
Filling gaps and applying caulk are crucial steps in achieving a professional finish. I inspect the cabinets and surrounding areas for any gaps or openings. Using a high-quality caulk that matches the color of the cabinets, I fill in these gaps to create a seamless joint.
This attention to detail not only enhances the appearance but also helps in maintaining the cleanliness and durability of the kitchen cabinets. By following these steps, you can achieve a polished look that complements your kitchen’s overall design.
Installing Cabinet Hardware, Knobs, and Pulls
Installing cabinet hardware is a crucial step that can make or break the look of your kitchen cabinets. It’s the final touch that brings your DIY kitchen renovation together. When done correctly, it enhances the functionality and aesthetic appeal of your cabinets.
To achieve a professional finish, it’s essential to focus on the details. This involves measuring and marking the hardware placement accurately and then drilling the holes and mounting the hardware.
Measuring and Marking Consistent Hardware Placement
Consistency is key when it comes to hardware placement. To ensure that your cabinet hardware is evenly spaced and aligned properly, you need to measure and mark the placement carefully. I recommend using a template or a jig to make this process easier and more accurate.
Here’s a simple method to measure and mark hardware placement:
- Decide on the hardware position based on the cabinet design and your personal preference.
- Measure the distance between the screw holes on the hardware.
- Use a level and a pencil to mark the spot where you will drill the holes.
- Double-check your measurements to ensure consistency across all cabinets.

Drilling Holes and Mounting the Hardware
Once you have marked the hardware placement, the next step is to drill the holes and mount the hardware. It’s crucial to use the right drill bit size to avoid splitting the cabinet material.
To drill holes and mount the hardware effectively:
- Choose a drill bit that matches the screw size.
- Drill slowly and carefully to avoid mistakes.
- Mount the hardware according to the manufacturer’s instructions.
- Tighten the screws firmly but avoid over-tightening.
By following these steps, you can achieve a professional-looking finish for your kitchen cabinets, enhancing the overall look and feel of your kitchen.
Common Cabinet Installation Mistakes I’ve Learned to Avoid
As I’ve learned from my experience with kitchen cabinet installation, there are several common mistakes that can be easily avoided with the right knowledge. Installing kitchen cabinets is a complex process that requires careful planning and execution. In this section, I’ll discuss some of the most common mistakes I’ve encountered and provide tips on how to avoid them.

Failing to Check Level Throughout the Process
One of the most critical mistakes is failing to check the level throughout the installation process. This can lead to cabinets being installed unevenly, which can cause problems with the doors and drawers. To avoid this, I always use a level to ensure that my cabinets are perfectly level before securing them to the wall.
Tip: Use a laser level to ensure accuracy and make adjustments as needed.
Ignoring Appliance Clearances and Door Swing
Another common mistake is ignoring appliance clearances and door swing. This can result in cabinets being installed too close to appliances, making it difficult to open doors or drawers. To avoid this, I always measure the space carefully and plan the cabinet layout accordingly.
For example, when installing a cabinet near a refrigerator, ensure there’s enough clearance for the door to open fully.
Over-Tightening Screws and Damaging Cabinets
Over-tightening screws is a mistake that can damage the cabinets or the wall. To avoid this, I use the correct screwdriver and tighten screws just until they’re snug.
- Use the correct type of screwdriver for the job.
- Avoid over-tightening by using a screwdriver with a torque limiter.
Not Planning for Electrical and Plumbing Access
Not planning for electrical and plumbing access is another common mistake. This can result in difficulties when trying to access pipes or electrical outlets behind the cabinets. To avoid this, I always plan the cabinet layout with access in mind.
Tip: Consider using removable panels or access doors to provide easy access to pipes and electrical components.
Conclusion
Completing a DIY kitchen cabinet installation project can be a rewarding experience, transforming your kitchen into a more functional and beautiful space. By following this DIY kitchen cabinet installation guide, you’ve gained the knowledge to tackle each step with confidence.
From planning your kitchen renovation to installing cabinet hardware, every detail matters. Remember to assess your kitchen space carefully, use the right tools, and avoid common mistakes to ensure a successful outcome.
With these kitchen renovation tips in mind, you’re now ready to start your project. Take your time, stay focused, and enjoy the process of creating your dream kitchen.