It began in a dusty 1970s shop class. While others played sports, I learned to love the smell of fresh cedar and the steady hum of a table saw — and I discovered that diy home improvement is more about patience, attention, and steady practice than about fancy equipment.
I adopted one simple rule early on: measure twice and cut once. That habit of careful measurement and deliberate work became the backbone of four decades of projects and hands-on learning.
I came to value honest craftsmanship over quick fixes. Each renovation and repair project became a practical lesson — a way to sharpen focus, master tools, and improve quality with every step. True skill grows through consistent effort and learning from mistakes.
Over time I built a practical toolkit of skills and know-how. I’ll share those skills, the tools I rely on, planning tips, and realistic project guidance so you can tackle home improvement projects with confidence.
Key Takeaways
- My foundation started in a 1970s shop class, where basic skills mattered more than speed.
- Patience and accurate measurement beat expensive equipment every time.
- Respect for tools, safety, and process makes for better, longer-lasting work.
- Consistent practice over time builds confidence to take on bigger projects.
- Legacy grows one well-done project at a time — focus on quality and value.
- Mindset and craftsmanship matter more than online branding; real improvement happens in the workshop.
Where It All Began: A 1970s Shop Class and the Seeds of Craftsmanship
Looking back on 40+ years of DIY home improvement, the lessons that mattered most started in a 1970s shop class. That classroom introduced me to basic tool handling and hands‑on problem solving — the fundamentals that would guide dozens of home projects for decades.
The shop class was immersive: we learned how to read simple plans, use a tape and a square, and match material choices to the job at hand. I learned early on the value of measuring accurately and the patience required to craft lasting work. Those habits — measure deliberately, plan ahead, and respect materials — became the operating system for every future project.
Under patient instructors I learned essential safety practices and how to think through a project: pick the right tools, estimate materials, and stage the work so each step flows to the next. These same principles apply whether you’re repairing a window, replacing a door, or remodeling a room in your house.
I’ve also pulled together modern resources that echo those shop‑class lessons (video demonstrations, materials checklists, and tool guides). Jump to the Tools & Materials section to see a practical checklist you can download and use on your next project.
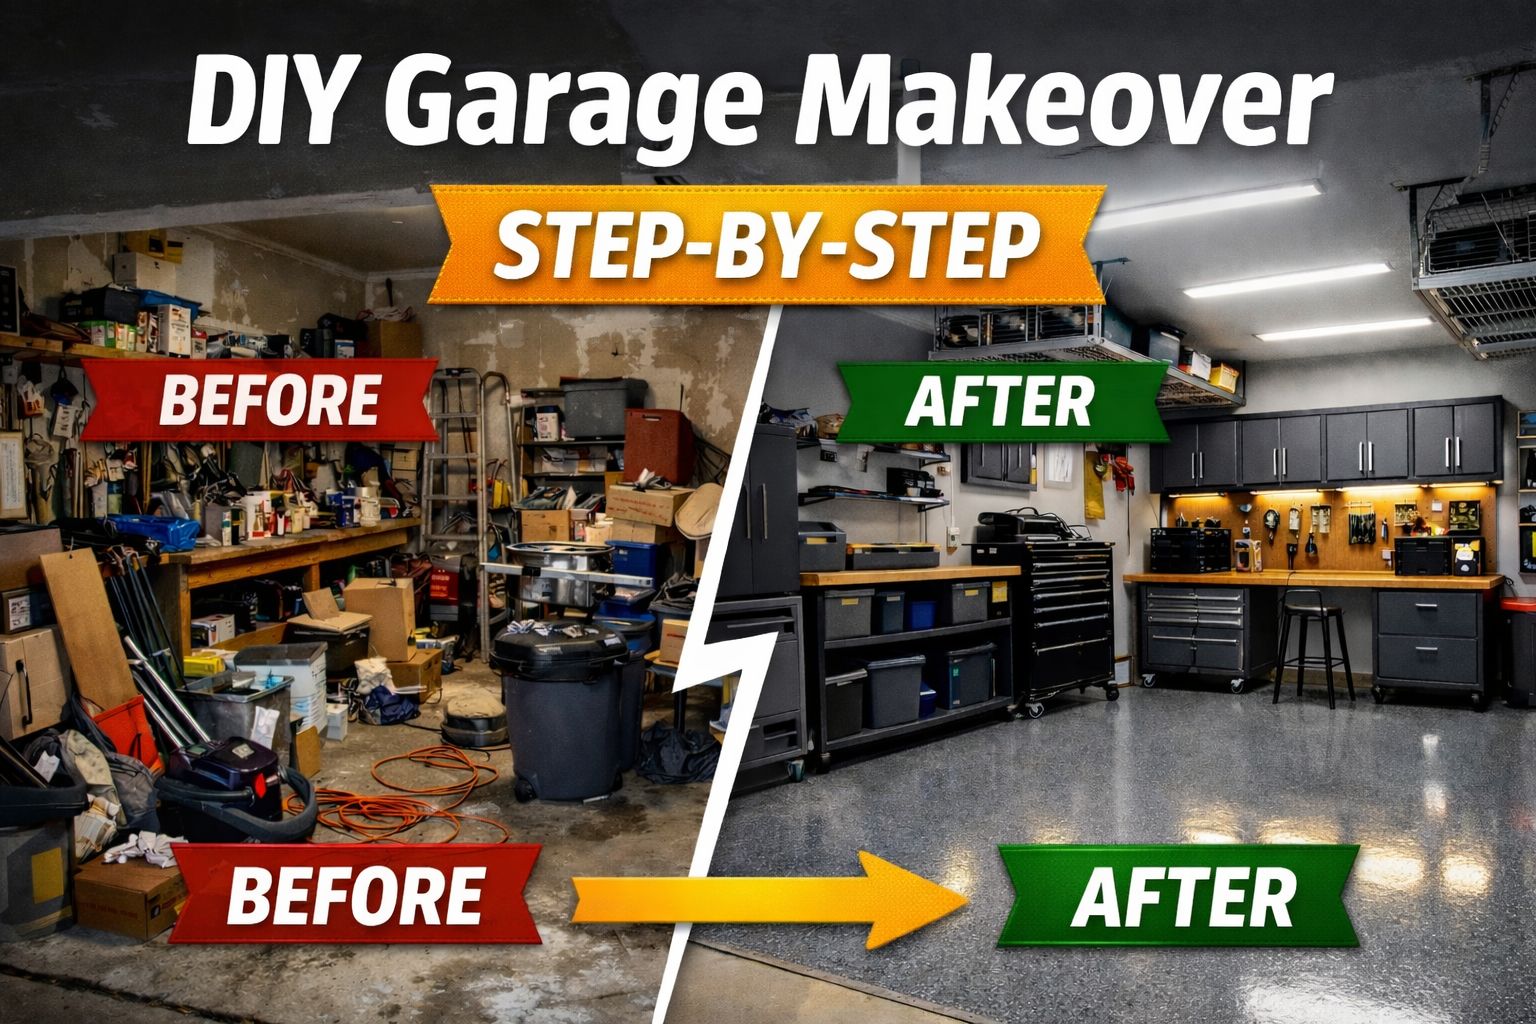
The Foundation Years: Learning Tools, Mistakes, and Respect for the Craft
The foundation years of my DIY journey were a stretch of steady learning — full of small mistakes, adjustments, and growing confidence. Those early projects taught me not just how to swing a hammer, but how to think through a project from design to finish.

Measuring Twice, Cutting Once — And Why I Had to Learn That the Hard Way
Precision became my watchword. The mantra “measure twice, cut once” isn’t a cliché — it’s a workflow that saves time, materials, and frustration. I learned to use a tape measure at two points (start and end), check with a level, and mark clearly before bringing a saw to the board.
Once, while building a simple shelving unit, I rushed a measurement and ended up with a shelf an inch too short. That wasted board taught me more than any successful build: pause, re-measure, and confirm your layout before cutting. Today I always re-check dimensions and verify fit in the actual space — whether it’s a closet shelf or a living-room built-in.
Understanding Materials Before Understanding Projects
Early on I discovered that materials drive design. Each material—oak, pine, MDF, or composite—has strengths and trade-offs. Oak is hard and holds detail; pine is softer and budget‑friendly. Choosing the right material up front saves headaches later and improves longevity, whether you’re repairing a wall, building a cabinet, or redoing a bathroom vanity.
That practical material sense also affected how I planned plumbing or wiring runs in a remodel: anticipate the areas you’ll need access to, route pipes and cables before closing up walls, and select the right fasteners and sealants for the environment.
The Teacher Effect: Mentors Who Shaped My Approach
Mentors accelerated my learning. Seasoned DIYers taught me shop tricks — how to read a simple plan, prepare a work area, and stage tasks so each step flows into the next. One veteran showed me how to square a frame and brace a post; his tip on temporary supports prevented a later collapse and saved the project.
These mentor moments were practical and humbling. They reinforced three core practices I still use: plan the work, gather the right tools (tape measure, level, saw, chisels), and break big jobs into manageable stages. See the Tools & Materials checklist below for a starter list you can print and bring to your next project.
My DIY Home Improvement Journey Through the Decades
From simple repairs to more ambitious builds, my DIY timeline has been steady growth — a series of projects that taught me new skills and pushed my confidence. Over the years my work moved from small fixes to whole‑room renovations and outdoor improvements, and each decade brought different lessons about planning, materials, and design.

The 1980s: First Home, First Real Projects
Buying my first home in the 1980s forced me to move beyond hobby projects and into real maintenance. My first major tasks were practical — fixing sections of roof, patching siding, and learning the basics of plumbing and wiring so I could handle everyday repairs. As Bob Vila said, “The right tool for the job makes all the difference” — and I learned to match the right tools to each task and to respect safety.
Starter projects for beginners at this level: repairing a small roof leak with flashing, replacing a broken window pane, or installing new bathroom fixtures under basic supervision.
The 1990s: Expanding Skills Beyond Basic Repairs
In the 1990s I took on more involved renovations: kitchen updates, built‑in shelving, and replacing interior doors. These projects required better planning, more accurate measurements, and coordination across trades (for example, routing wiring before closing walls). That decade taught me how design choices and material selection affect both look and longevity.
Try these intermediate projects: refacing kitchen cabinets, installing a new interior door and trim, or updating bathroom hardware and tile work.
The 2000s and Beyond: Structural and Outdoor Improvements
By the 2000s I was ready for structural and outdoor projects that required stronger planning and coordination. Instead of pool‑specific builds, I focused on longer‑lasting outdoor improvements — building a pergola, replacing a back deck (non‑pool), and installing retaining walls that improved landscape drainage. Each project required thinking about foundations, material durability, and how the new work would tie into the rest of the house.
Advanced projects to consider as your skills grow: constructing a pergola or sunshade structure, replacing exterior siding, or rebuilding a deck platform (pay attention to local building codes and consult professionals when structural changes are involved).
Across all decades the same threads held true: plan carefully, pick appropriate materials, and stage work so each step flows into the next. Jump to the Tools & Materials and Planning sections for checklists and downloadable templates to help you choose the right project for your current skill level.
The Shift from Fixing Things to Building Things
A turning point in my DIY home improvement journey came when maintenance stopped being the goal and creation took its place. That shift wasn’t instant — it grew over years of small repairs and growing competence — but once it happened I started seeing the home as a place to design and improve, not just to patch.

When Maintenance Became Creation
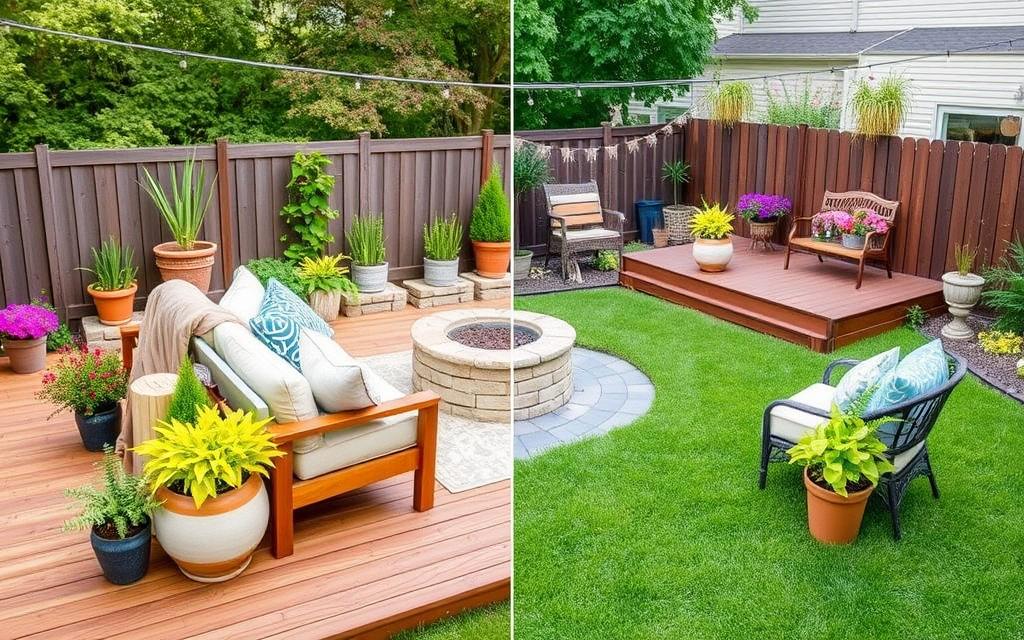
The mindset change was liberating. Instead of only fixing problems, I began asking, “How can this space work better?” or “What design would make this room more useful?” That question led to projects that combined function and style — redesigning a backyard patio, building a freestanding deck platform (non‑pool), and crafting built‑in storage that freed up floor space in a small room.
Planning was the difference between a good outcome and a headache. For any outdoor living or interior design project I now follow a short planning checklist:
- Site evaluation: measure the space, note drainage and sun/shade patterns.
- Zoning & permits: check local rules early — it saves time and money.
- Materials & budget: pick materials that match the climate and your maintenance tolerance.
- Timeline & staging: sequence tasks so demolition, rough‑in (wiring/plumbing), and finishing don’t conflict.
Discovering the Joy of Designing My Own Spaces
Designing my own spaces shifted the focus from repair to creation. It meant sketching simple layouts, using basic measurements to size furniture and walkways, and choosing materials that balance cost and quality. For those starting out: begin with a single small area — a side platform, a pergola, or a backyard seating nook — rather than a whole‑yard overhaul. That way you learn the process without taking on excessive costs or complexity.
These projects taught me a practical lesson: thoughtful design plus solid execution equals long‑term value. Over time, the habits of planning, measuring, and choosing the right materials become the most reliable way to turn an improvement project into a lasting upgrade to your home.
Building My First Defining Project: A Backyard Pergola
One of the defining projects that pushed my skills and planning ability was building a backyard pergola. It tested my ability to move from repairs into full design and small‑scale construction — and it taught me valuable lessons about planning, execution, and patience.
Why I Decided to Build It Myself
I took on the pergola as a way to expand my DIY skill set. After years of smaller home improvement projects, I wanted a project that combined design, structural work, and finish carpentry. Doing it myself let me control materials, costs, and the overall look while learning new construction techniques along the way.
Design Considerations and the Planning Process
Design and planning made the project manageable. I measured the space, sketched a simple design, and chose materials that balanced cost and durability. I opted for pressure‑treated posts for the supports and higher‑grade lumber for visible beams to keep long‑term maintenance down and quality high. Early planning also included checking local permitting requirements — always confirm local building codes before starting structural work and hire a pro when in doubt.
Step-by-Step Construction: From Layout to Finish
The build followed a clear sequence so each step flowed into the next. I worked methodically, completing one phase before moving on:
- Preparation: Clear and level the site; mark layout lines and locate underground utilities.
- Foundations: Set post pads or concrete footings to the depth recommended for your climate and soil.
- Framing: Install posts, beams, and cross rafters; use temporary bracing to keep everything square.
- Detailing: Cut and fit decorative elements, trim, and any attached features (like a shade or bench).
- Finishing: Sand exposed surfaces, apply a sealer or stain, and fasten stainless or coated hardware for longevity.
What Worked and What I’d Change Today
Reflecting on the pergola, several choices stood out as wins — and a few I’d tweak next time. The basic approach and sequencing worked well, but material choices and some details could be improved for lower maintenance and better aesthetics.
| AspectWhat WorkedWhat I’d Change | ||
| Material | Pressure‑treated posts for durability | Use capped composite or cedar for visible elements to reduce future maintenance |
| Design | Simple, open design sped construction | Add integrated lighting and a more refined beam profile for visual interest |
| Planning | Stepwise plan kept timeline on track | Build a more detailed materials list and contingency budget for unexpected items |
Final notes: treat any structural home improvement project as a combination of design and construction. The process — measure, plan, stage, and execute — applies equally to a pergola, a porch rebuild, or many other home improvement projects. Keep a concise materials list and a realistic cost estimate before you begin, and don’t hesitate to consult a structural pro for load‑bearing questions.
Outdoor Deck & Platform Building Tips from Four Decades of Experience
After decades of DIY work, I’ve condensed what matters most when building an outdoor deck or freestanding platform: solid planning, sensible material choices, and thoughtful sequencing. These three factors determine whether a project delivers long‑term value or becomes a costly maintenance headache.

Planning and Permit Navigation
Thorough planning up front saves time and money later. Before you cut lumber, measure the site, sketch a simple plan, and check local zoning and permit requirements. Permits and setback rules vary by municipality, so contacting your local building department early is a smart move — it prevents surprises and costly rework.
Key planning steps:
- Measure the space and note drainage, slope, and obstacles.
- Create a basic design and materials list (use a tape measure and sketch to scale).
- Check local building codes and apply for permits if required.
Materials: Pros, Cons, and Longevity
Material choice affects cost, maintenance, and lifespan. Here’s a quick compare-and-contrast to help you decide:
- Pressure‑treated lumber: Affordable and durable for structural elements (posts, framing) but requires routine sealing for best life.
- Cedar or redwood: Naturally rot‑resistant and attractive; higher upfront cost but lower chemical treatment needs.
- Capped composite: Low maintenance and won’t splinter; higher initial cost but can save time and money on upkeep.
Choose materials that match your climate and how much maintenance you’re willing to do. For example, coastal homes often benefit from composite or stainless‑fastener builds to resist corrosion.
Common Mistakes to Avoid
Over many projects I’ve seen recurring errors that derail timelines and budgets:
- Skipping a proper site evaluation and underestimating drainage needs.
- Picking materials based only on upfront cost without considering maintenance.
- Ignoring permit requirements or local code that affects structural or railing design.
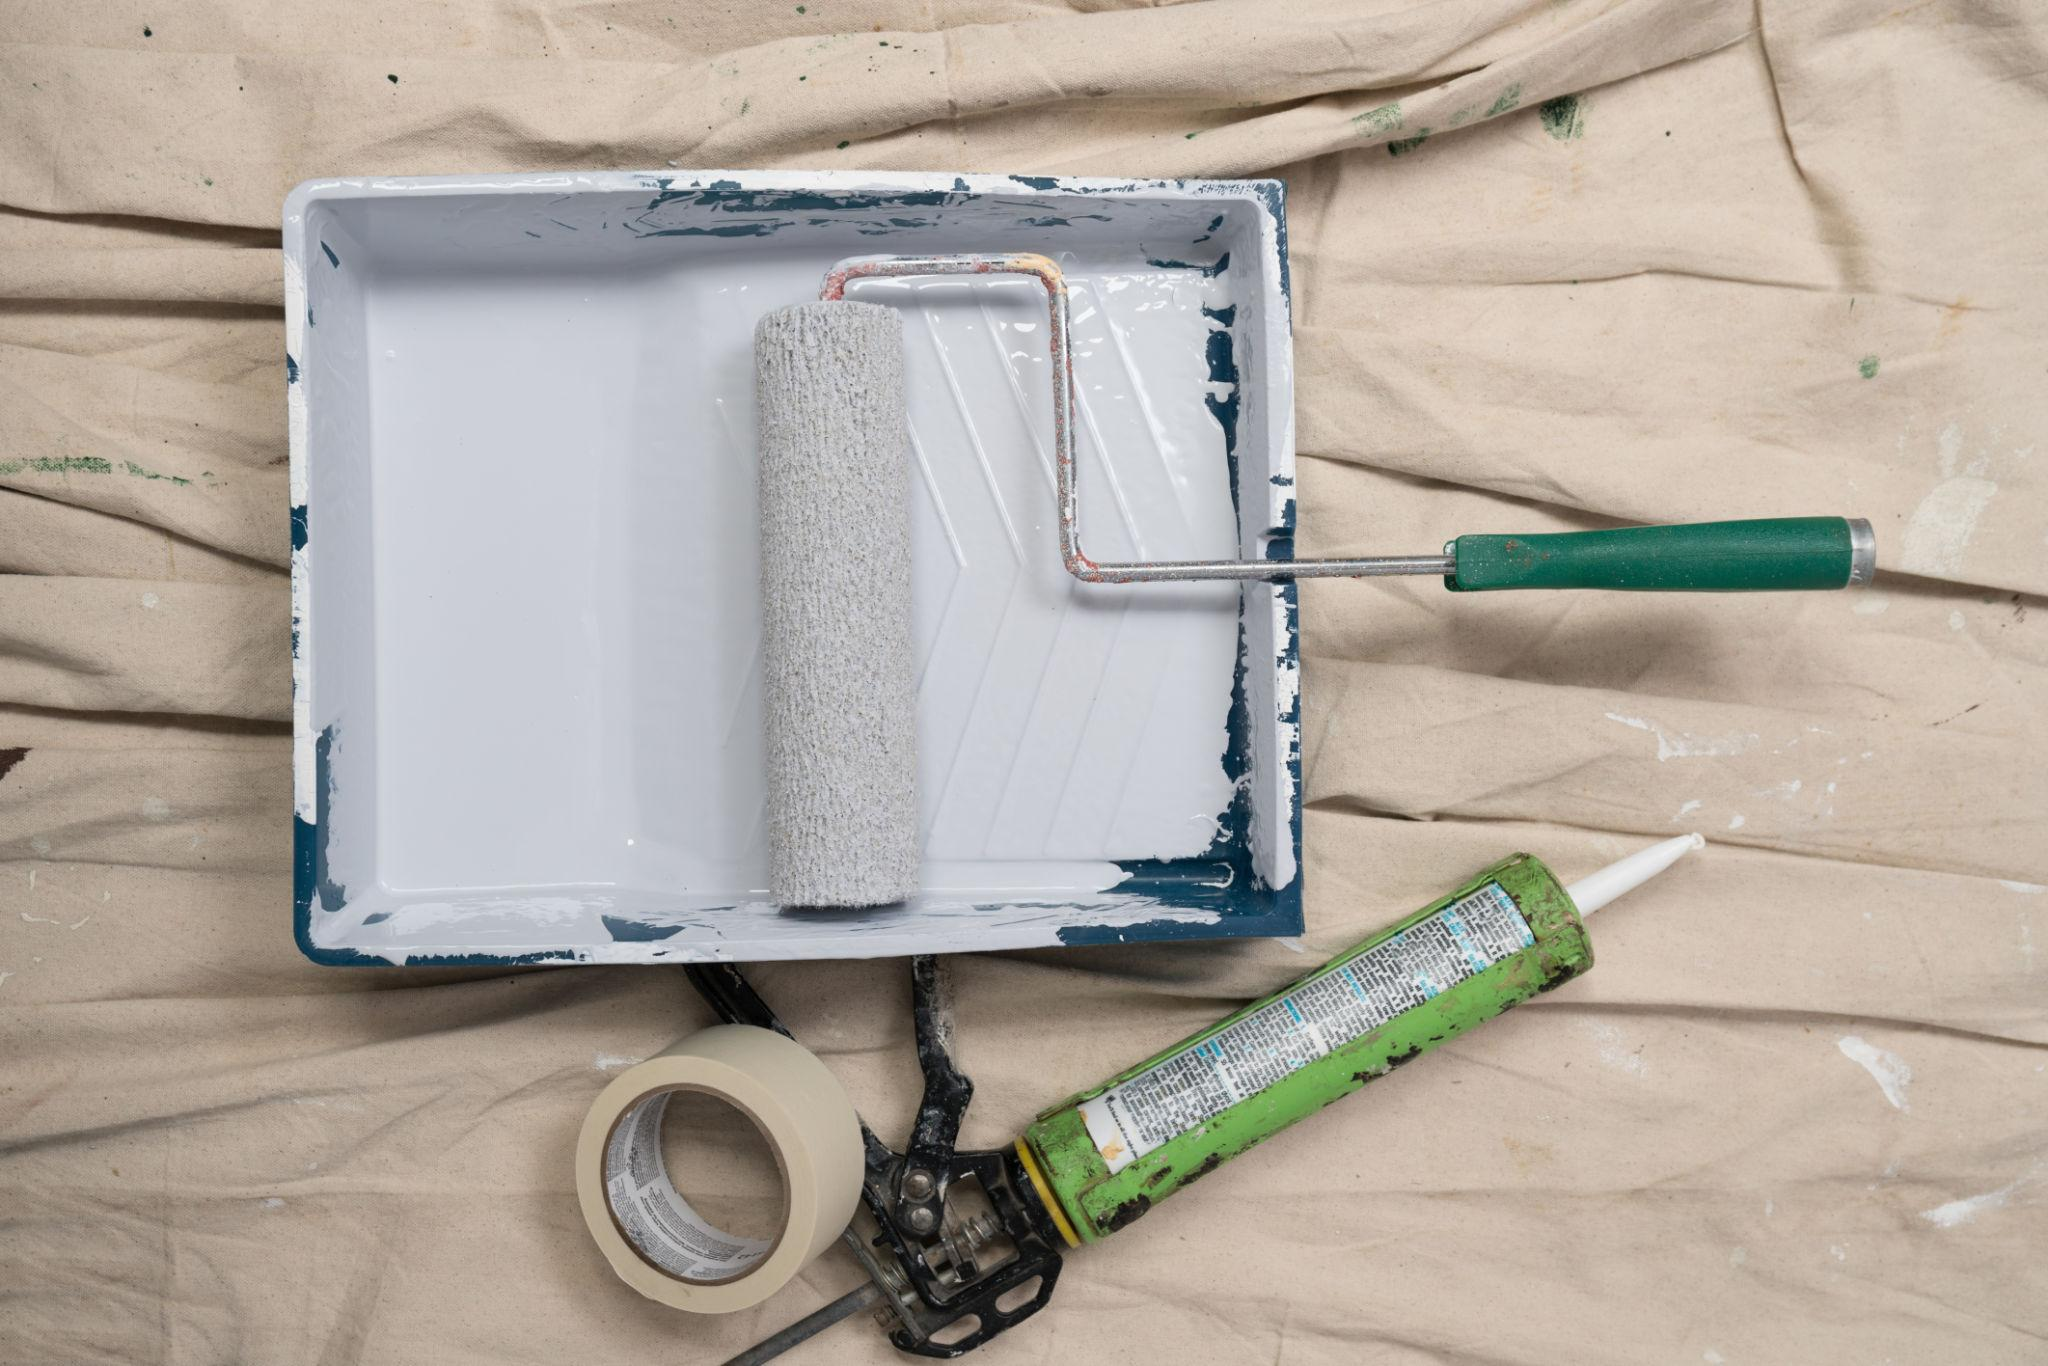
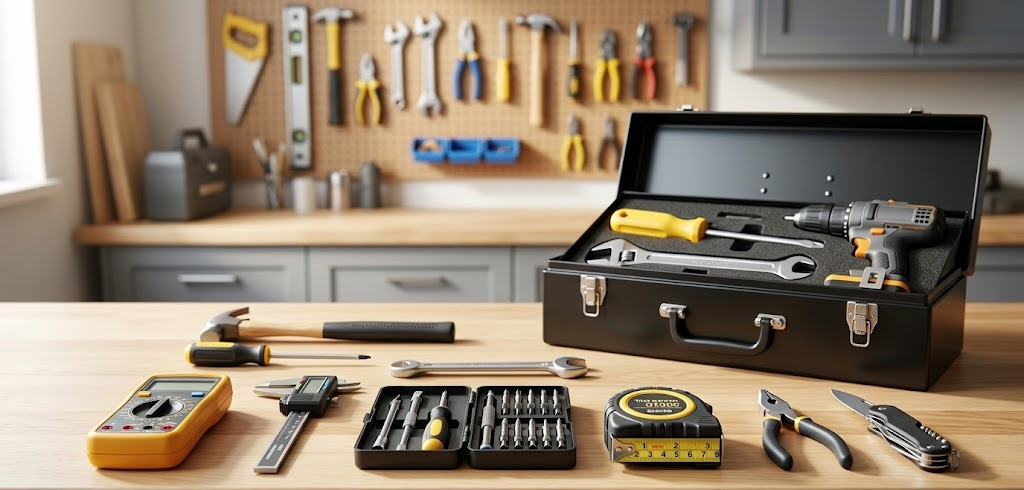
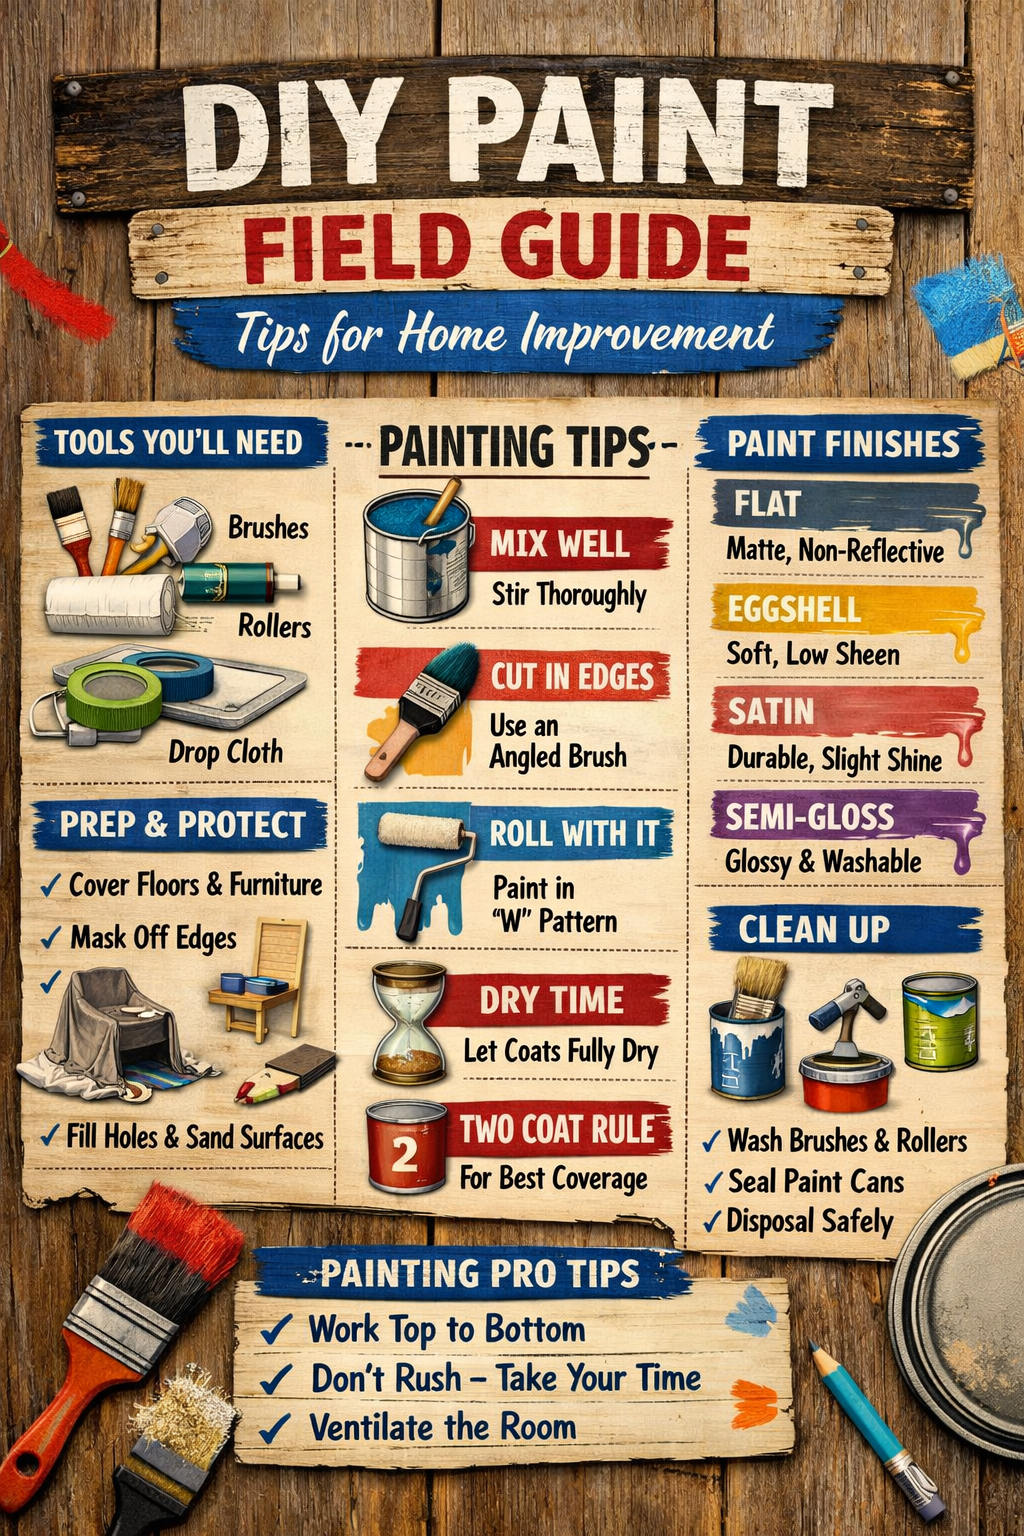
Tools, Equipment, and Safety
Have the right tools on hand and use proper PPE. A simple tools checklist for most deck or platform projects includes:
- Tape measure, framing square, and level
- Circular saw or miter saw, drills, and impact driver
- Work gloves, eye protection, and hearing protection
- Sturdy screws/fasteners, post anchors, and appropriate sealants
Safety note: if your project involves electrical, significant footing work, or grading, consult a pro and check codes first.
Budget‑Friendly Ideas That Balance Cost and Quality
You don’t need to overspend to get a lasting result. Consider these cost‑savvy approaches:
- Phase the build: start with a simple platform or side deck, then add features later.
- Use pressure‑treated lumber for hidden structural components and a higher‑grade surface material only where it shows.
- Create a detailed materials list and contingency line item in your budget to avoid mid‑project surprises.
If you want practical help, download the materials list and budget planner templates in the Resources section (see link at the end of this guide). They’ll help you move from idea to a realistic, executable plan.
How DIY Home Improvement Built My Confidence More Than My House
After four decades of hands‑on work, the most important thing I built wasn’t brick or timber but confidence. The steady progression from small repairs to larger projects taught me a reliable problem‑solving approach and a quiet trust in my own judgment that carries into other areas of life.

The Problem-Solving Mindset That Transfers to All Life Areas
Every project forces you to break a problem into parts: diagnose the issue, weigh options, choose materials, and execute a sequence of steps. That habit of analysis — paired with a willingness to try, fail, and iterate — translates directly to work, relationships, and everyday decisions. When something goes off‑plan on a remodel, the same calm method I use to reroute wiring or rework a trim detail helps me tackle non‑DIY challenges with less stress.
Example: Replacing a faulty light switch taught me how to read basic wiring diagrams and follow safety procedures — a small win that made me comfortable with larger electrical tasks later on.
Learning to Trust My Own Judgment and Skills
Early on I second‑guessed every step. Over time, completing projects end‑to‑end — even imperfectly — built a track record I could rely on. That track record makes it easier to estimate time, pick suitable materials, and decide when to call a pro. For instance, after successfully installing several interior doors and trim, I trusted my ability to measure accurately and cut clean miters without feeling overwhelmed.
To help others grow confidence gradually, try this simple progression:
- Beginner: Replace a switch plate, install a curtain rod, patch a small hole in the wall.
- Intermediate: Install an interior door, reface a cabinet, or replace a small section of flooring.
- Advanced: Manage a full room remodel, update basic wiring (with code compliance), or lead an exterior build with permit oversight.
Overcoming the Fear of Expensive Mistakes
Fear of costly errors is common, but experience reframes mistakes as learning, not catastrophe. I mitigate risk by planning, budgeting a contingency, and practicing techniques on scrap material before committing to visible surfaces. That approach turned expensive anxiety into manageable steps and opened the door to creative projects I once thought were out of reach.
Share your first DIY success in the comments or use the Planning & Tools checklist to pick a beginner project and build confidence — one small, well-executed project at a time.
The Discipline of Craftsmanship: Lessons Beyond Construction
My decades-long work in DIY home improvement taught me that craftsmanship is as much about discipline as it is about final results. Across simple repairs and larger structural or outdoor projects, the habits I developed — patience, precision, and consistency — became the real return on investment, shaping how I approach every room and job in the house.
Those traits matter whether you’re fixing a wall, rebuilding a porch, or tackling a medium-scale construction task: patience keeps you from cutting corners, precision ensures fit and function, and consistency turns skills into reliable outcomes.
Patience, Precision, and Showing Up Consistently
Early on I rushed to finish projects; fast results often meant sloppy edges or work that didn’t last. I learned to slow down: measure carefully, verify with a level, and think through each step before committing. Precision isn’t just aesthetic — it’s about making sure a door closes properly, a wall is plumb, and a staircase is safe.
Consistency matters too. Showing up day after day and doing the work steadily builds capability and reduces costly rework.

Why Finishing Matters More Than Starting
Starting a project is exciting; finishing it is where the real value appears. Completing details — sanding, sealing, checking fastenings, and cleaning up — protects your investment and ensures the work functions as intended. Finishing is the difference between a temporary fix and a lasting improvement.
Here’s a quick “finish‑line” checklist I run through before calling a job complete: paint or finish coats applied, all exposed fasteners checked, moving parts tested, and any trim or seals installed to prevent water intrusion.
| Project PhaseKey ChallengesAction Step | ||
| Planning | Designing, budgeting, and scheduling | Create a materials list, draw a simple plan, and add a 10–15% contingency to the budget |
| Execution | Overcoming unexpected obstacles, maintaining quality | Work in staged tasks, check alignments with a level/tape, and test fit before fastening |
| Completion | Staying motivated, finalizing details | Follow the finish‑line checklist: paint, seal, inspect fastenings, and do a final walk‑through |
Quality Over Speed: A Lesson That Took Years to Fully Embrace
I used to prize speed; now I prioritize quality. Taking the extra time to ensure a wall is straight or a joint is tight prevents callbacks and maintenance headaches down the road. That slower approach produces better work and raises the long-term value of any home improvement project.
In short: treat the process as reliably as the product. Measure, plan, stage, and finish — and you’ll find that the discipline of craftsmanship pays dividends across every area of your home. If you want a quick refresher, jump to the Tools & Materials checklist for the essential tape, level, and measuring gear I use on nearly every job.
Building a Legacy: Teaching the Next Generation
The true value of DIY home improvement isn’t just the projects themselves—it’s the people they touch. Looking back, the most rewarding part of this journey has been sharing what I know and helping others build skills, confidence, and a practical mindset for solving problems around the house.
Over the years I’ve worked on projects ranging from simple repairs to more involved builds like a backyard pergola and a workshop renovation. Each project taught lessons about planning, materials, and persistence, and each one was an opportunity to pass hands‑on knowledge to family and friends.
Passing Down Skills to Family and Friends
Teaching is deeply satisfying. I’ve shown my children and friends how to measure and cut, how to use a level, and how to approach a project step by step. Watching someone install their first interior door or complete a small repair gives them practical independence and helps preserve a legacy of self‑reliance.
“The best way to learn is by doing” has guided my approach: start with small, supervised tasks and build complexity as confidence grows.
Why DIY Knowledge Is Worth More Than the Projects Themselves
Projects come and go, but the skills and mindset you develop last a lifetime. DIY home improvement teaches problem solving, resourcefulness, and resilience—qualities that translate to work and life beyond the house. I value the ability to assess a problem, plan a project, and execute it responsibly more than any single finished item.
“The moment you doubt whether you can fly, you cease forever to be able to do it.”
Creating Teaching Moments in Every Project
I try to create intentional teaching moments on every job. A simple “how to” checklist makes lessons clear and safe:
- Safety demo: PPE, site hazards, and tool handling
- Tool basics: how to use a tape measure, level, and drill
- Small supervised tasks: mark, cut, and fit on scrap before working on final pieces
- Review: walk through what went well and what to try differently next time
These steps build competence without overwhelming a new learner. If you want to bring others into your projects, consider running a short workshop or printing a one‑page checklist to guide hands‑on practice—small, repeatable tasks create big learning gains over time.
The Modern DIY Landscape: YouTube, Resources, and Community
The world of home improvement looks very different than when I first picked up a hammer. Today, YouTube videos, forums, and manufacturer guides put a vast amount of practical knowledge within reach — which is fantastic, but it also changes how we learn and approach projects.
Where I once relied on books and the advice of a neighbor, a quick search now surfaces tutorials, material lists, and step‑by‑step guides for nearly any project. That accessibility helps hobbyists and serious DIYers alike move from curiosity to action faster than ever.
How DIY Has Changed in 40 Years (and How It Hasn’t)
Some things remain timeless: the satisfaction of creating with your hands, the pride in solving a problem, and the practical value of learning by doing. What’s changed is the way we access knowledge and the speed at which novices can become competent.
Today many people take on home improvement projects as a creative outlet or to add value to their homes, not only out of necessity. The modern DIYer blends traditional shop skills with digital resources to plan, source materials, and troubleshoot in real time.
Resources I Wish I Had Four Decades Ago
There are a few resources I would have loved to have sooner. Consider adding these to your toolbox:
- Curated YouTube channels with credentials or long histories of accurate how‑tos (look for creators who show complete projects, not just highlights).
- Manufacturer planning guides and calculators (great for accurate material lists and product compatibility).
- Active DIY forums and community groups where experienced users post real problem/solution threads.
- Blogs and downloadable guides that include materials lists, suggested tools, and realistic time estimates.
How to Vet Online Tutorials (A Short Guide)
Not every video or post is reliable. Use this quick vetting checklist:
- Check the creator’s track record — do they complete whole projects and show mistakes?
- Scan comments for recurring reliability signals or warnings from viewers.
- Look for a detailed materials list and tool list — good tutorials show quantities and specs.
- If a project involves wiring, plumbing, or structural changes, confirm it references codes or advises consulting a pro.
| Benefits of Instant InformationDrawbacks of Instant Information | |
| Access to a vast amount of knowledge | Difficulty in determining accuracy |
| Ability to learn from others’ experiences | Potential for information overload |
| Opportunities for global connections and community | Risk of analysis paralysis |
Practical Next Steps
Use online resources to build a reliable plan, then translate that plan into a concise materials list and timeline. If you like, download the trusted tools & materials guide in the Resources section to get started — it’s a simple, practical way to move from research to actual work.
Embrace the best of both worlds: the hands‑on lessons of traditional shop work and the modern efficiency of curated online guides. That combination gives you the fastest, most reliable path to successful home improvement projects.
Conclusion: What 40+ Years of DIY Has Taught Me About Life
After more than four decades of diy home improvement, the projects themselves feel secondary to what I gained along the way: practical skills, steady confidence, and a way of thinking that tackles problems step by step. The specific builds—whether a workshop renovation, a backyard pergola, or a kitchen refinish—were milestones, but the real value was in the growth they enabled.
From those early shop-class days to larger home improvement projects, I learned three lasting lessons: patience beats haste, careful planning prevents waste, and consistent effort produces quality. These principles apply to any room or area of your house and to life beyond the workshop.
If there’s one practical takeaway: choose projects that match your current skill level, build a simple materials list, allow extra time in your schedule, and treat mistakes as part of the learning process. Over time, small, well-executed projects add real value to your home and your capabilities.
Want to get started? Download the Planning & Tools checklist in the Resources section, pick a manageable project, and commit to finishing it. The satisfaction of completing a project — and the confidence you’ll gain — is worth the time and effort.