
Home > Paint > Power Paint Rollers
Traditional rollers permit faster paint application than brushes. At intervals, it becomes necessary to halt the process and recharge the roller by dipping it into the paint bucket or tray, which incurs time. Nowadays, multiple systems have been created to dispense with this step.
The main disadvantage of power rollers lies in the moderately higher initial investment in equipment and the need for fastidious post-use cleaning to maintain the equipment properly. However, when dealing with large projects, the time saved outweighs these disadvantages.
High-quality rollers feature either a hollow handle that stores paint internally or a flexible plastic tube that runs from the paint can to the roller. The paint enters the roller cover through small holes in the cylinder, allowing for continuous painting as long as the paint can remains filled.
These are somewhat more expensive than standard rollers, but they last longer save time. From the ourside, the specialized roller covers look the same as regular covers. They are more expensive but they can be washed and reused. Don’t try to use regular roller covers with a power roller-they won’t work.

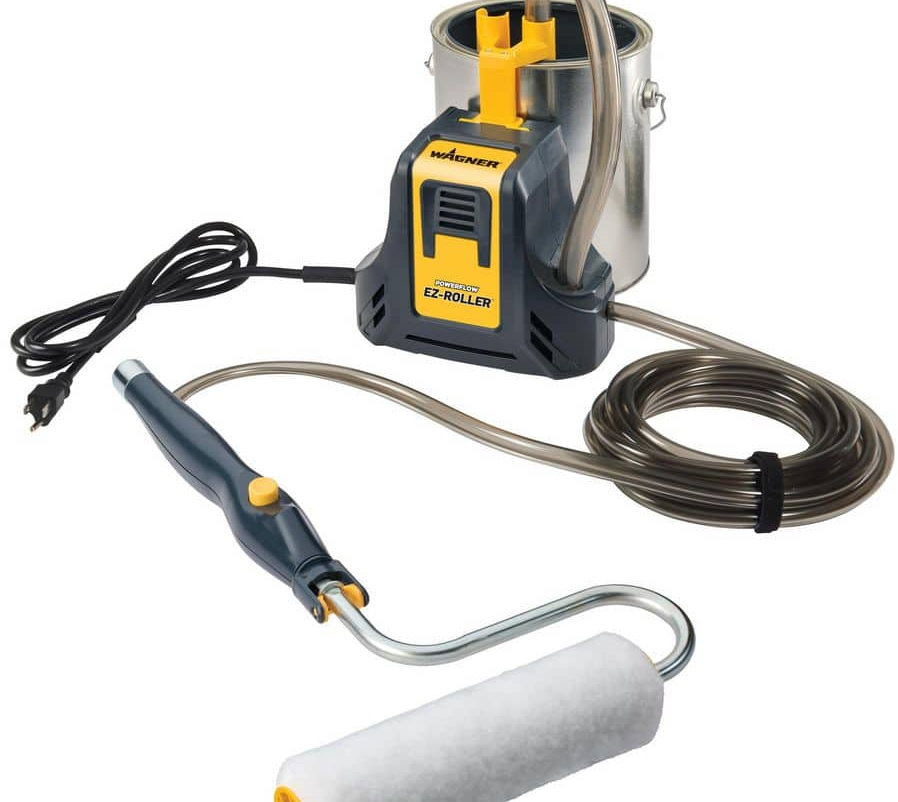
🔺 There are several different systems for continuous paint rolling. This one features a flexible tube that connects to the paint can; a pump extracts paint from the bottom of the can into the tube until the can is empty.

🔺 Although it looks conventional, the roller cover is distinct from standard types. There are hundreds of small holes inside that permit paint from the roller mechanism to flow through to the nap for continuous painting.

🔺 Set up the equipment. Place the paint can on the pump and seal it with the specially designed lid. A tube connects the bottom of the can to the roller. The pump draws paint through the tube and into the roller, where it is released into the nap through holes on the underside. This continuous flow enables painting without frequent interruptions to reload the roller.

🔺Control the flow by starting and stopping it. Painting the entire room without stopping is not necessary; the flow is regulated by a button on the handle. Each time you press the button, more paint is dispensed; when you are not pressing the button, you are painting with the paint already in the roller. Observe the spatter-guard, which can be adjusted to prevent paint splatters.




Leave a Reply