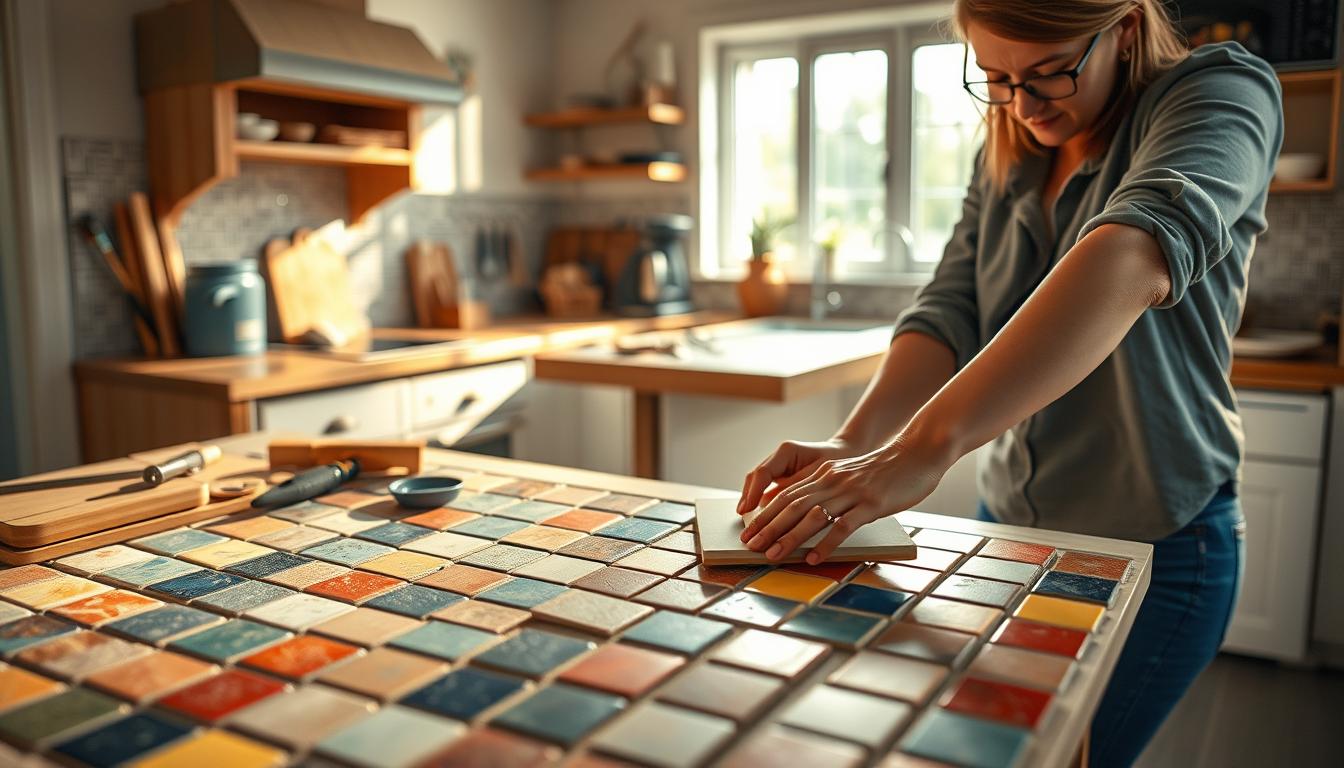
I believe that updating every kitchen should feel exciting rather than stressful. Last summer, I decided to tackle one specific diy home improvement task that completely changed my cooking area.
By tiling a countertop, you can achieve high-end looks without spending huge fortunes. It is one great way to express your style and add value to your house.
I want to show you how simple it is to get beautiful results with the right tools. This comprehensive guide will walk you through the entire process from start to finish.
I will share my best tips to ensure your new surface looks professional and lasts for years. My goal is to help individuals feel confident throughout every single stage of the project.
Let’s dive into the steps needed to refresh your room. You can do this!
Key Takeaways
- Plan your layout before starting.
- Choose durable materials for longevity.
- Proper surface preparation is essential.
- Use the right adhesive for your tile type.
- Take time with the grout.
- Always seal the finished surface.
Why I Love Tiling My Own Countertops
As I reflect on my DIY journey, tiling my countertops stands out as a highlight, offering numerous benefits. Tiling my own countertops has been an empowering experience, allowing me to take control of my kitchen renovation.
The Money I Save on DIY Countertop Tiling
By choosing to tile my countertops myself, I’ve saved a significant amount on labor costs. Here are some key cost-saving benefits:
- Reduced labor costs
- Ability to shop around for materials
- Avoiding markup on professional services
These savings can be substantial, allowing for allocation to other aspects of the renovation.
Durability and Heat Resistance I Can Count On
Tiling offers durability and heat resistance, making it an ideal choice for kitchen countertops. With proper installation and maintenance, tile countertops can last for decades.
https://www.youtube.com/watch?v=0pv617HgFNg
Creative Freedom to Design My Dream Kitchen
One of the most rewarding aspects of DIY countertop tiling is the creative freedom it offers. I can choose from a wide range of tile styles, materials, and patterns to create a unique look that reflects my personal taste.
How I Plan My Countertop Tile Project
Before diving into the tiling process, I make sure to plan my countertop project meticulously. This phase is crucial as it lays the groundwork for a successful and stress-free installation.
Planning involves several key steps that help ensure my project turns out as envisioned. It’s not just about picking the right tiles; it’s also about understanding the scope of the project.
Taking Accurate Measurements of My Countertop
The first step in planning is taking accurate measurements of my countertop. This involves measuring the length, width, and any cutouts for sinks or cooktops. I use a tape measure to get precise dimensions and record them carefully.
Accurate measurements are vital because they help me determine the number of tiles I’ll need and avoid costly mistakes.
Selecting the Perfect Tile Size and Style
Next, I focus on selecting the perfect tile size and style for my countertop. The size and style of the tile can dramatically affect the overall look and feel of my kitchen. I consider factors like durability, maintenance, and aesthetic appeal.
For a cohesive look, I also think about how my tile choice will complement other kitchen elements, such as the backsplash and flooring.

Calculating the Right Amount of Materials
Once I have my measurements and tile selection, I calculate the right amount of materials needed. This includes tiles, adhesive, grout, and any necessary tools. To avoid running short or having too much leftover material, I use a tile calculator or consult with a professional.
Proper planning and calculation not only save me money but also reduce waste and ensure a smoother installation process.
By carefully planning my countertop tile project, I’m able to achieve a professional-looking result that enhances my kitchen’s beauty and functionality, much like a well-executed diy pool deck guide can transform an outdoor space.
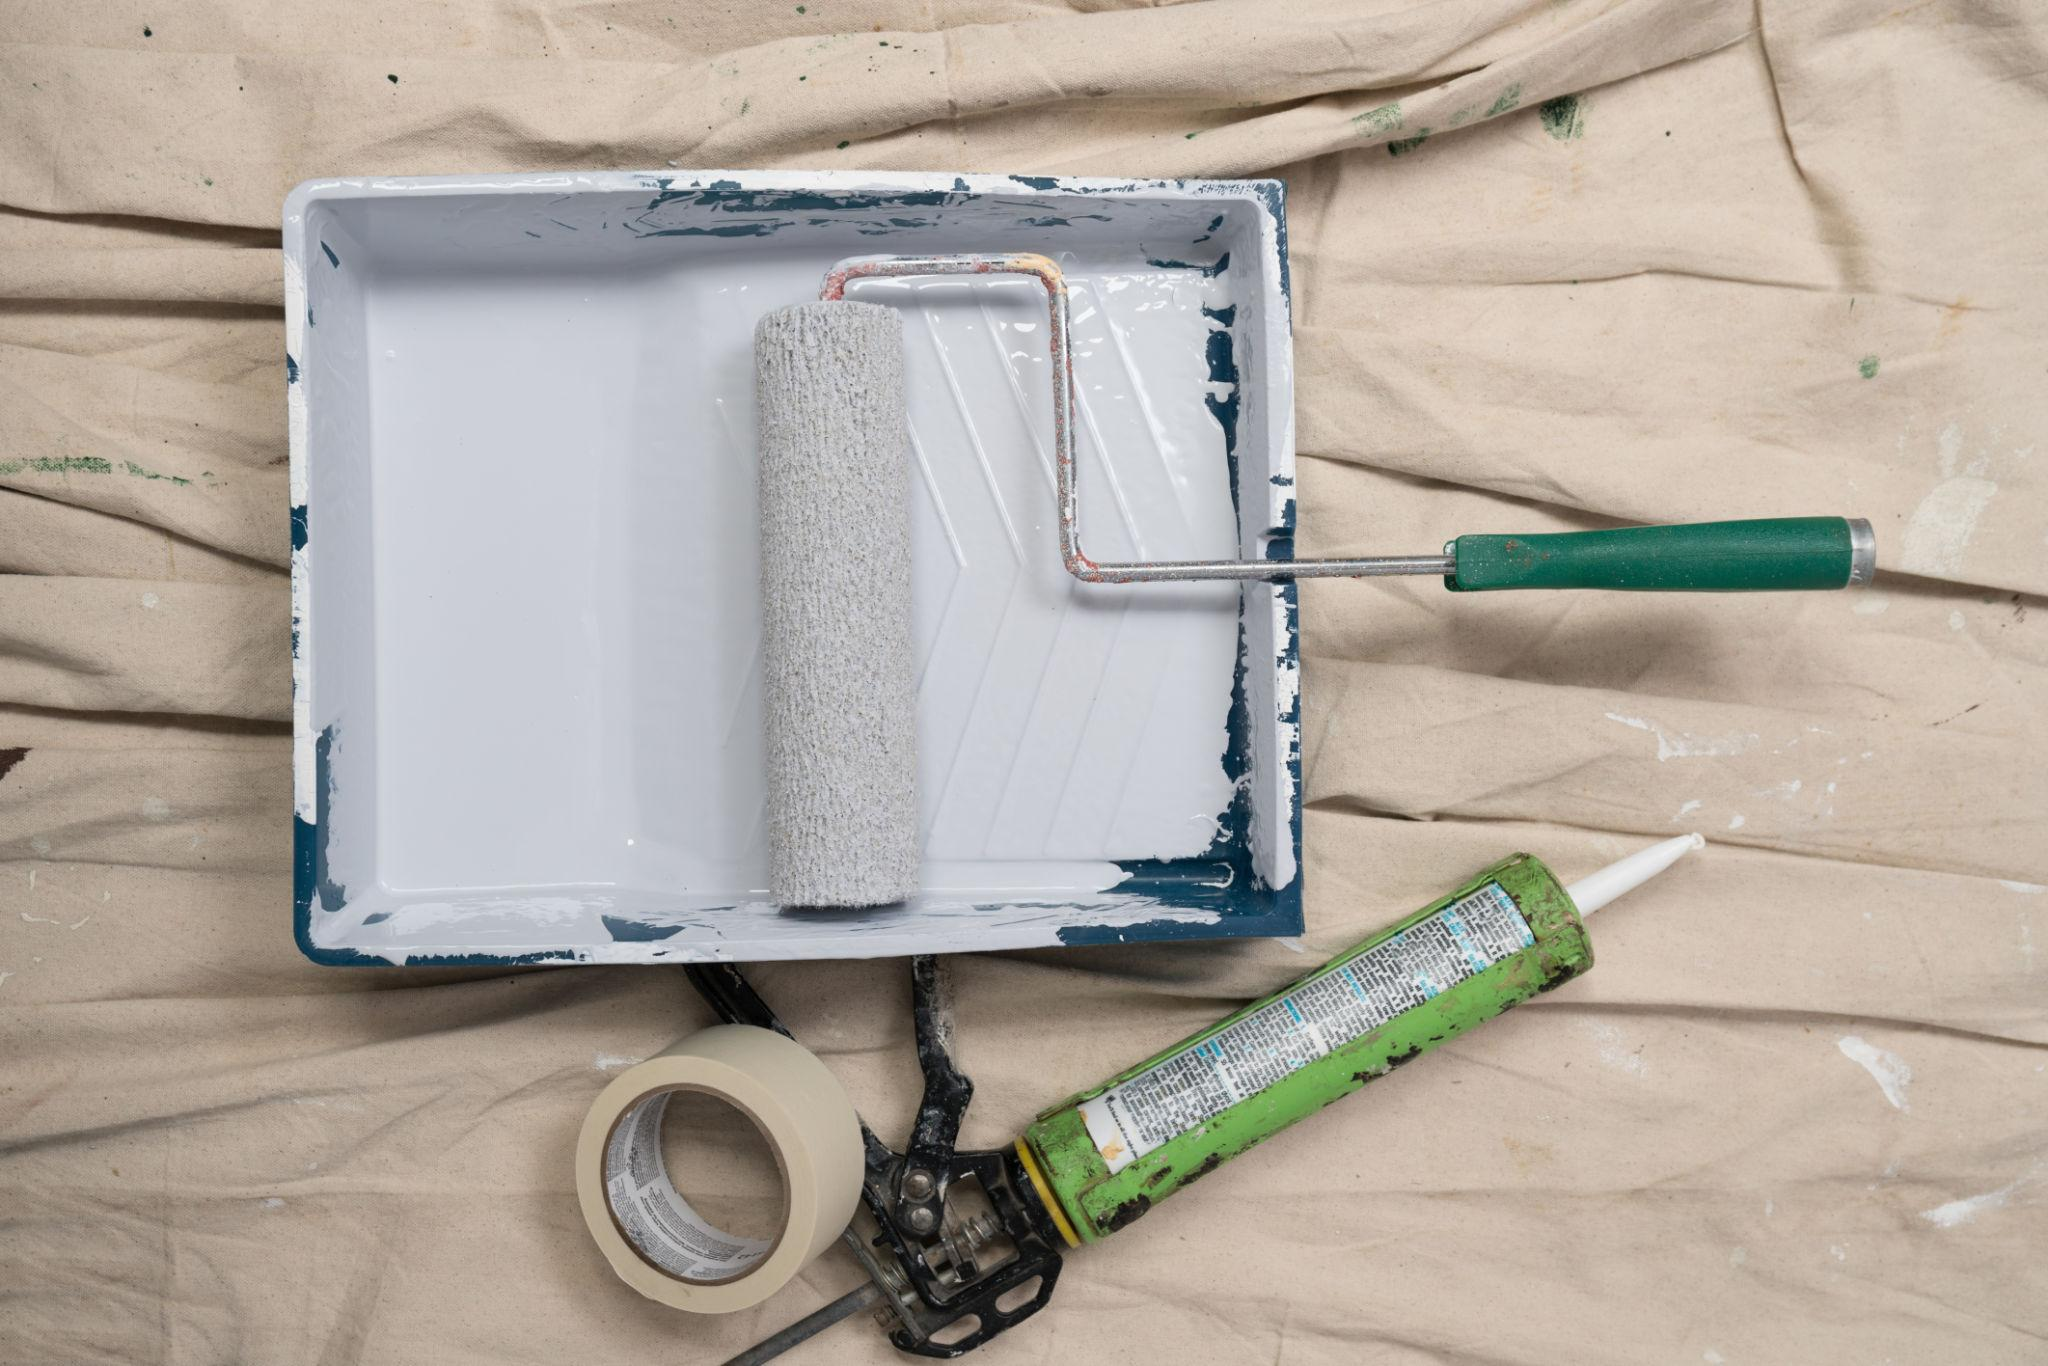
Essential Tools and Materials for Tiling a Countertop–DIY Home Improvement Countertops
As I embark on my DIY home improvement journey, I’ve learned that having the essential tools and materials is crucial for tiling a countertop. Whether you’re building a pool deck or renovating your kitchen, the right equipment makes all the difference.
The Cutting and Installation Tools I Need
To start, you’ll need the right tools for cutting and installing tiles. This includes a wet saw for making precise cuts and tile nippers for handling smaller, more intricate cuts.
My Wet Saw and Tile Nipper Setup
A wet saw is indispensable for cutting tiles accurately. I use it to make straight cuts, and it’s been a game-changer for my DIY projects, including my above-ground pool deck.
Tile nippers, on the other hand, are perfect for cutting small pieces or making adjustments to fit tiles around edges or corners.
Notched Trowels and Tile Spacers
Notched trowels are used to apply adhesive to the countertop, ensuring a strong bond between the tile and the surface. The size of the notches depends on the tile size and type.
Tile spacers are crucial for maintaining even grout lines. They come in various sizes to accommodate different grout line widths.

The Best Adhesives, Grout, and Sealers I Use
Choosing the right adhesive, grout, and sealer is vital for a durable and long-lasting tile installation.
| Material | Description | Usage |
|---|---|---|
| Thinset Mortar | A type of adhesive used to bond tiles to the countertop surface. | Apply with notched trowel. |
| Grout | Fills the gaps between tiles, providing a finished look and preventing tile movement. | Apply with grout float, then wipe excess with damp sponge. |
| Sealer | Protects grout and porous tiles from stains and water damage. | Apply according to manufacturer’s instructions, usually after grout has cured. |
Safety Gear I Never Skip
Safety should always be a top priority when working on DIY home improvement projects. Essential safety gear includes safety glasses, gloves, and a dust mask.
Safety Glasses protect your eyes from debris when cutting tiles.
Gloves provide grip and protect your hands from sharp edges and adhesive chemicals.
A dust mask is crucial when working with materials that generate dust, such as when cutting tiles or mixing grout.
How I Prepare My Countertop Surface for Tiling
A well-prepared countertop surface is the foundation of a successful tiling project. Just like building a pool deck, where pool deck building tips can make a significant difference, preparing a countertop requires careful planning and execution.
To start, I need to remove the old countertop material. This step is crucial as it allows me to inspect the underlying surface for any damage or rot.
Removing the Old Countertop Material
I carefully pry off the old countertop material, taking care not to damage the underlying surface. This process can be messy, so I make sure to wear protective gear.
Installing My Cement Backer Board Foundation
Once the old material is removed, I install a cement backer board to provide a solid foundation for my tiles. This step is essential for ensuring the tiles adhere properly and last long.
To illustrate the process, here’s a simple table outlining the materials needed for installing a cement backer board:
| Material | Quantity | Purpose |
|---|---|---|
| Cement Backer Board | As required | Provides a solid foundation for tiles |
| Screws | Enough to secure the board | Secures the backer board to the countertop |
| Thinset Mortar | Sufficient for the job | Adheres the backer board to the countertop |
Making Sure My Surface Is Level and Clean
After installing the cement backer board, I ensure the surface is level and clean. This involves checking the surface with a level tool and cleaning it thoroughly to remove any debris or dust.

Properly Sealing All Edges and Corners
Finally, I seal all edges and corners to prevent water from seeping underneath the tiles. This step is crucial for maintaining the integrity of the countertop and preventing damage over time.
By following these steps and incorporating DIY pool deck ideas for inspiration, I can ensure my countertop surface is properly prepared for tiling, resulting in a beautiful and durable finish.
Creating the Perfect Tile Layout
A well-planned tile layout is the foundation of a beautiful and functional countertop. When I’m working on a DIY home improvement project like tiling a countertop, I know that a good layout makes all the difference in the final result.
To achieve this, I follow a step-by-step process that ensures my countertop looks great and is durable. Here’s how I do it:
Finding and Marking My Countertop’s Center Point
The first step in creating a perfect tile layout is finding and marking the center point of my countertop. This is crucial because it serves as the starting point for my tile installation. I measure the length of my countertop and mark the center point with a pencil. This simple step helps me achieve a balanced look.
Tip: Use a tape measure to ensure accuracy when finding the center point.
Dry Fitting Tiles to Visualize My Pattern
Before applying any adhesive, I dry fit my tiles to visualize the pattern. This step allows me to make any necessary adjustments to the layout before it’s too late. I lay out the tiles along the center line, ensuring that the pattern looks balanced and visually appealing.

Planning My Edge Tiles and Backsplash Transition
Planning the edge tiles and backsplash transition is critical for a seamless look. I decide on the type of edge finish I want, such as bullnose or trim tiles, and plan how the tiles will transition to the backsplash. This step requires careful consideration to avoid cuts that are too small or uneven.
As Tile Magazine suggests, “A well-planned edge can make or break the look of your tile installation.” This emphasizes the importance of taking the time to get this step right.
Drawing Reference Lines to Guide My Work
To ensure my tiles are straight and evenly spaced, I draw reference lines on the countertop. These lines guide my tile placement and help me maintain a consistent pattern. I use a level and a pencil to draw these lines, making sure they are precise and aligned with my center point.
| Step | Description |
|---|---|
| 1 | Find and mark the center point of your countertop. |
| 2 | Dry fit tiles to visualize the pattern. |
| 3 | Plan edge tiles and backsplash transition. |
| 4 | Draw reference lines to guide tile placement. |
By following these steps, I can create a tile layout that is both beautiful and functional, making my DIY home improvement project a success.
Applying Thinset Mortar the Right Way
To ensure a durable and long-lasting tile installation, it’s essential to apply thinset mortar the right way. This step is crucial in the tiling process, as it directly affects the overall quality and appearance of the final result. As someone who has undertaken DIY projects like pool deck construction, I can attest to the importance of getting this step right.

How I Mix Thinset to Perfect Consistency
Mixing thinset to the perfect consistency is a delicate process. If it’s too dry, it won’t adhere properly, and if it’s too wet, it will be difficult to work with. I follow the manufacturer’s instructions to achieve the right mix, usually starting with a ratio of 1 part water to 2 parts thinset powder, and then adjusting as needed.
“The key to a good thinset mix is to add the powder to the water, not the other way around,” as expert tilers often advise. This helps prevent lumps and ensures a smooth, even consistency.
My Technique for Spreading Mortar Evenly
Spreading thinset mortar evenly is critical for a successful tile installation. I use a notched trowel to spread the mortar, holding it at a 45-degree angle to ensure the right amount of coverage. This technique helps to create a strong bond between the tile and the countertop.
Why I Work in Small Manageable Sections
Working in small, manageable sections is a strategy I’ve learned from my DIY pool deck guide experiences. It allows me to maintain even coverage and avoid having the thinset set before I’m ready to place the tiles. This approach also helps in maintaining the cleanliness of the workspace.
Common Mortar Mistakes I’ve Learned to Avoid
Over the years, I’ve encountered several common mistakes when applying thinset mortar. One of the most significant errors is not preparing the surface properly before applying the mortar. Ensuring the surface is clean, dry, and free of debris is crucial for a strong bond.
Another mistake is applying too much thinset, which can lead to uneven tile placement and excessive mess. As I’ve learned, less is often more when it comes to thinset application.
Setting and Spacing Tiles Like a Pro
With the right techniques and tools, setting and spacing tiles can be a manageable task, even for a novice DIY enthusiast looking to build a pool deck or tile a countertop. As I start this process, I focus on achieving a professional finish that will last.
Placing My First Tile at the Center Reference Point
I begin by placing my first tile at the center reference point I previously marked. This ensures that my tile pattern is symmetrical and visually appealing. To do this accurately, I use a level and a rubber mallet to gently tap the tile into place.
Accuracy is key in this step, as it sets the stage for the rest of the tile installation.
Using Spacers to Create Uniform Grout Lines
To maintain uniform grout lines, I use tile spacers. These small plastic or metal pieces are placed between tiles to ensure even spacing. The size of the spacer depends on the desired grout line width.
Cutting Edge and Corner Tiles for Perfect Fit
Cutting tiles to fit around edges and corners requires precision. I use a tile cutter or a wet saw for this purpose. It’s essential to measure carefully and cut slowly to avoid chipping the tile.
For complex cuts, I sometimes use a tile nipper to make small adjustments.
Checking Level Throughout the Installation Process
Throughout the installation, I regularly check that my tiles are level. This involves using a spirit level to ensure that the tiles are perfectly horizontal and vertical.
“A level is a tile installer’s best friend. It ensures that your tiles are straight and your grout lines are even.”
Waiting the Right Amount of Time Before Grouting
After setting all the tiles, I wait for the recommended amount of time before grouting. This allows the thinset mortar to set properly, ensuring a strong bond between the tiles and the countertop.
| Tile Type | Waiting Time Before Grouting |
|---|---|
| Ceramic Tiles | 24 hours |
| Porcelain Tiles | 24-48 hours |
| Natural Stone Tiles | 48 hours |
By following these steps and being patient, I can achieve a professional-looking tile installation that enhances my DIY home improvement project.
The Grouting Process I Follow
As I embark on tiling my countertop, the grouting process is where the magic happens, turning individual tiles into a cohesive surface. Grouting is a step that requires patience, the right materials, and a bit of technique. It’s not just about filling the gaps between tiles; it’s about creating a durable and visually appealing finish.

Choosing the Best Grout Color and Formula
Selecting the right grout color and formula is crucial. The grout color can either blend with the tiles or contrast with them, depending on the desired aesthetic. I consider the overall design of my kitchen, including the color scheme and style, to make this decision. For instance, a grout color that matches the tiles can create a seamless look, while a contrasting color can highlight the tile pattern.
When it comes to the grout formula, there are several types to choose from, including cement-based, epoxy-based, and pre-mixed grout. Cement-based grout is the most common and suitable for most tile installations. Epoxy-based grout, on the other hand, is more durable and resistant to stains, making it ideal for areas that are exposed to heavy use or moisture, much like the surroundings of an above-ground pool deck where durability is key.
How I Mix and Apply Grout Between Tiles
Mixing grout correctly is vital for its performance. I follow the manufacturer’s instructions to achieve the right consistency, which is usually similar to that of thick peanut butter. Overmixing can lead to a weakened grout, so I mix it just until the powder is fully incorporated into the water.
Applying grout involves using a grout float to spread it evenly across the tiles, ensuring that the grout fills the gaps completely. I work in small sections to maintain even coverage and to prevent the grout from drying out before I can clean it off the tiles.
My Grout Float Technique for Even Application
Using a grout float at a 45-degree angle, I press the grout into the gaps between the tiles, making sure to fill them completely. Then, I scrape off the excess grout from the surface of the tiles by holding the float at a 90-degree angle. This technique helps in achieving an even application and minimizes the amount of grout that needs to be cleaned off.
Cleaning Tile Surfaces Without Disturbing Grout
After applying grout, I wait for about 20 to 30 minutes before cleaning the tiles. Using a damp sponge, I gently wipe away the excess grout from the tile surfaces, rinsing the sponge frequently to avoid spreading the grout around. It’s a delicate balance between cleaning the tiles and not disturbing the grout.
Shaping Grout Lines for a Polished Look
Once the grout is partially set, I use a grout tool or a damp sponge to shape the grout lines. This step is crucial for achieving a professional finish. For a pool deck design or any outdoor tile installation, this step can make a significant difference in the overall appearance and durability of the surface.
By following these steps and paying close attention to detail, I can achieve a beautifully grouted countertop that complements my kitchen’s design and stands the test of time.
Sealing and Protecting My New Tile Countertop
With the tiles in place and the grout set, I’m ready to apply a sealant to protect my countertop. Sealing is a critical step that not only enhances the appearance of my tile countertop but also provides a layer of protection against stains and spills.

The Right Time to Apply Grout Sealer
Before applying grout sealer, I make sure that the grout is completely dry. The waiting time can vary depending on the type of grout used, but it’s usually between 24 to 48 hours. I also ensure that the grout is free from dust and debris, as this can affect the sealer’s adhesion.
Applying grout sealer is a straightforward process. I use a small brush to apply the sealer directly to the grout lines, making sure to follow the manufacturer’s instructions for application and drying times.
How I Seal Porous Tiles Against Stains
Some types of tiles, like natural stone, are porous and require sealing to protect them from stains. I identify if my tiles need sealing by performing a simple water test: if the tile absorbs water, it’s porous and needs sealing.
To seal porous tiles, I apply a tile sealant using a clean, lint-free cloth or applicator, following the manufacturer’s instructions. This helps to prevent stains and makes maintenance easier.
Finishing Edges with Bullnose or Trim Tiles
Finishing the edges of my countertop with bullnose or trim tiles not only adds a professional touch but also protects the edges from chipping. I choose between bullnose tiles, which have a rounded edge, and trim tiles, depending on the design and style I’m aiming for.
To install bullnose or trim tiles, I apply thinset mortar to the back of the tile and press it firmly into place, ensuring it’s level and aligned with the surrounding tiles. I then grout these tiles as I would the rest of the countertop.
By following these steps, I can ensure that my tile countertop is not only beautiful but also durable and resistant to stains. This final step completes my DIY countertop tiling project, and I’m proud to have a countertop that I can enjoy for years to come.
Keeping My Tile Countertop Beautiful for Years
To keep my tile countertop looking its best, I’ve developed a routine that includes daily cleaning, periodic resealing, and occasional repairs. This not only maintains its aesthetic appeal but also ensures its durability.

My Daily Cleaning and Care Routine
Daily cleaning is essential to prevent dirt and grime from building up on my tile countertop. I use a mild detergent and warm water to wipe down the surface. For tougher stains, I occasionally use a gentle scrubber to remove them without damaging the tiles.
It’s also important to dry the countertop thoroughly after cleaning to prevent water spots. I’ve found that using a microfiber cloth is effective for this purpose.
The Resealing Schedule I Stick To
Resealing my tile countertop is crucial to protect it from stains and spills. The frequency of resealing depends on the type of tile and grout used, as well as the amount of use the countertop gets. Generally, I reseal my countertop every 12 to 18 months.
Before resealing, I make sure to clean the countertop thoroughly and let it dry completely. This ensures that the sealer adheres properly and provides the best protection.
How I Fix Cracked Grout or Loose Tiles
Over time, grout can crack, and tiles can become loose. To fix cracked grout, I remove the old grout using a grout saw and then apply new grout. For loose tiles, I check the adhesive and reapply thinset mortar if necessary, ensuring the tile is securely fastened.
These maintenance tasks not only keep my countertop looking great but also prevent more significant problems from developing. By following these steps, I can enjoy my beautiful tile countertop for years to come, and I’m confident that with the right diy home improvement techniques, anyone can achieve similar results.
Conclusion
Tiling a countertop is a DIY home improvement project that can be both challenging and rewarding. By following the steps outlined in this article, you can achieve a beautiful and durable countertop that enhances the overall look and feel of your kitchen.
From planning and preparing the surface to applying thinset mortar and grouting, each step requires attention to detail and patience. With the right tools and materials, you can successfully tile your countertop and enjoy the benefits of a DIY home improvement project.
As I reflect on my own experience with tiling a countertop, I’m reminded of the sense of accomplishment and pride that comes with completing a project on your own. By taking on this challenge, you can not only save money but also develop new skills and confidence in your ability to tackle future DIY projects.
Whether you’re a seasoned DIY enthusiast or just starting out, tiling a countertop is a project that’s definitely worth considering. So, take the first step, gather your tools and materials, and start creating your dream kitchen with a beautifully tiled countertop.