Category: Uncategorized

  • Top 5 DIY Projects That Add Home Value

    Top 5 DIY Projects That Add Home Value

    If there’s one thing I’ve learned over 40+ years of DIY—from my first shop class projects in the 1970s to building decks, patios, and finishing basements—it’s this:

    👉 Not all projects are created equal.

    Some upgrades feel good…
    But others actually increase your home’s value and pay you back.

    This post breaks down the Top 5 DIY projects that deliver real return on investment (ROI) and DIY projects that increase home value, based on hands-on experience—not theory.


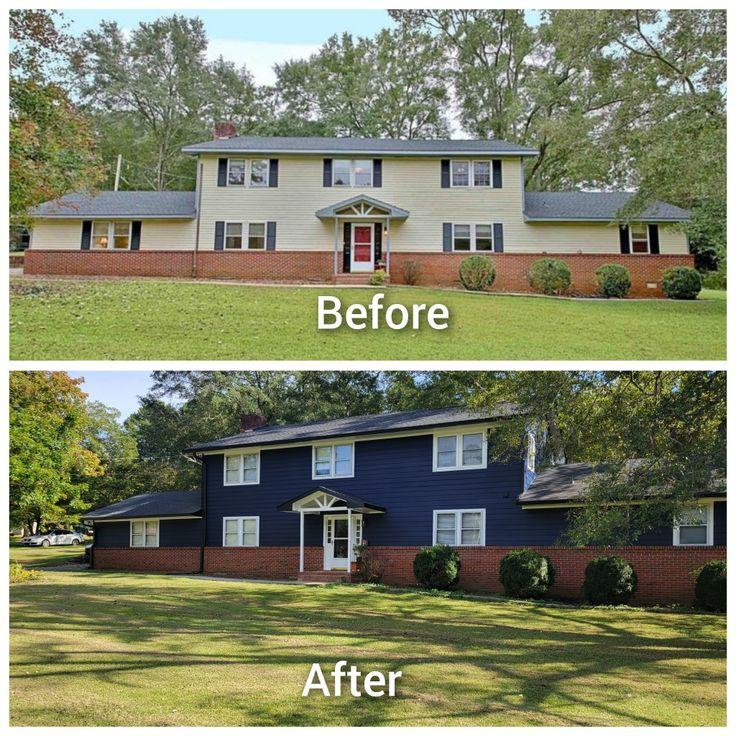
    1. Fresh Paint (Interior & Exterior)

    Why it adds value:

    Paint is one of the highest ROI projects you can do. It instantly improves:

    • Cleanliness
    • Brightness
    • Perceived space
    • First impressions

    My Experience:

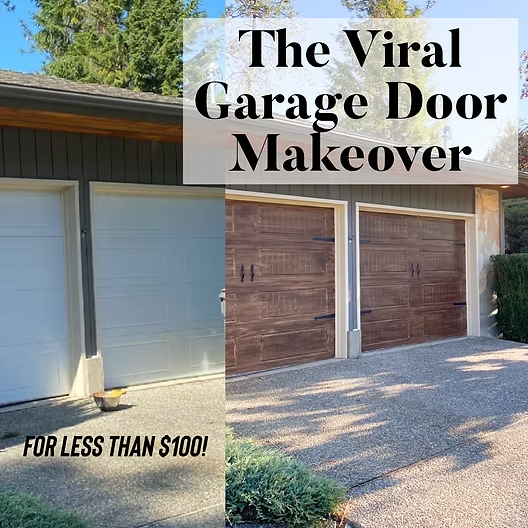
    Back in 2005, when I bought my home, one of the first projects I did was painting the garage with my two sons. It wasn’t just about the paint—it was about transforming a neglected space into something functional and clean.

    Pro Tips:

    • Stick with neutral colors (buyers love them)
    • Use satin or semi-gloss for durability
    • Don’t skip prep work—this is where most DIYers go wrong

    2. Kitchen Refresh (Without Full Remodel)

    Why it adds value:

    The kitchen sells the house. But you don’t need a $20K remodel.

    What to upgrade:

    • Paint cabinets
    • Replace hardware
    • Update lighting
    • Add backsplash

    DIY Insight:

    I’ve always believed in working smarter—not just harder. A budget-friendly kitchen refresh can deliver a huge visual impact without tearing everything apart.

    Pro Tips:

    • Matte black or brushed nickel hardware = modern look
    • Soft-close hinges are a small upgrade with big impact
    • Lighting alone can completely change the feel

    3. Bathroom Upgrade

    Why it adds value:

    Bathrooms are another major decision point for buyers.

    Simple upgrades that work:

    • New vanity
    • Updated faucet
    • Modern mirror & lighting
    • Fresh caulk and grout

    From My Projects:

    When finishing my basement, the bathroom transformation made the entire space feel complete. It turned a basic layout into something that felt like a finished living environment—not just extra space.

    Pro Tips:

    • Keep it clean and modern—not flashy
    • Focus on function AND appearance
    • Caulk lines matter more than you think

    4. Outdoor Living Space (Deck, Patio, Pergola)

    Why it adds value:

    Outdoor space is no longer optional—it’s expected.

    What adds the most value:

    • Decks
    • Patios
    • Pergolas
    • Functional seating areas

    My Experience:

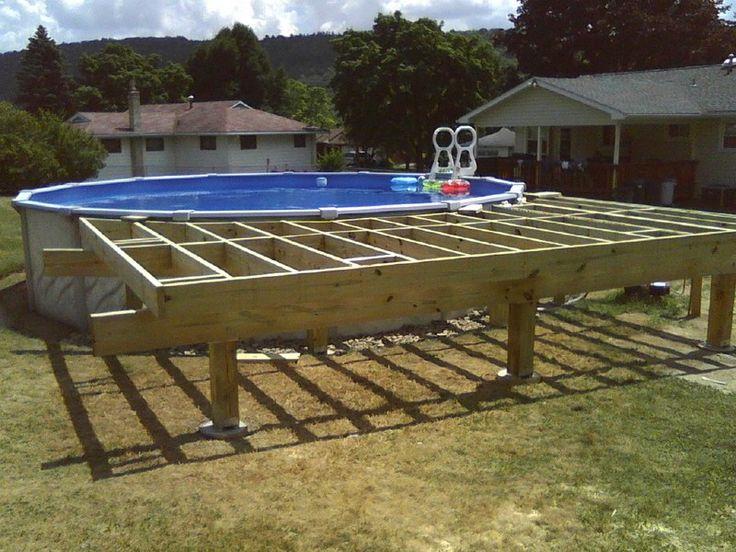
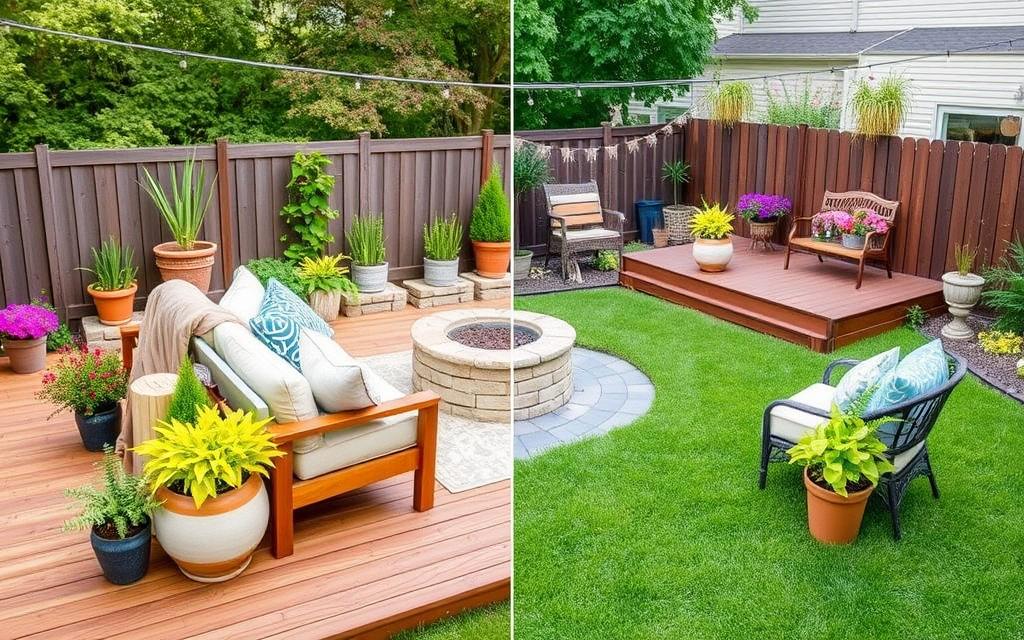
    Building my deck around the pool and adding a patio and pergola completely changed how we use the backyard. It became a staycation space, not just a yard.

    Pro Tips:

    • Use pressure-treated or composite materials
    • Plan layout before building (flow matters)
    • Add lighting for nighttime usability

    5. Finished Basement or Bonus Space

    Why it adds value:

    This is where you gain livable square footage—and that directly impacts home value.

    What to include:

    • Entertainment area
    • Bathroom
    • Storage
    • Gym or office

    From My Build:

    Finishing my basement—from framing to flooring to the kitchenette—was one of the biggest value-adding projects I’ve done. It turned unused space into a functional extension of the home.

    Pro Tips:

    • Moisture control is critical
    • Plan electrical and plumbing early
    • Think long-term layout

    Final Thoughts: Build Smart, Not Just Big

    Over the years, I’ve learned something important:

    👉 Value isn’t about how much you spend—it’s about what you improve.

    The best DIY projects:

    • Solve real problems
    • Improve daily living
    • Appeal to future buyers

    Whether you’re painting a garage, building a deck, or finishing a basement…

    You’re not just working on a house.
    You’re building equity, skills, and legacy.


    Your Next Step

    If you’re planning your next project, start here:

    • Pick ONE project from this list
    • Plan it out properly
    • Execute it with precision

    And remember what I learned back in shop class:

    👉 Measure twice. Cut once. Build it right the first time.

  • Fix This Before It Costs Thousands

    Fix This Before It Costs Thousands

    By Conley’s Home Improvement

    If there’s one thing I’ve learned over 40+ years of DIY—from my early shop class days to building decks, finishing basements, and raising two boys on hands-on projects—it’s this:

    👉 Small problems don’t stay small.

    Most expensive home repairs don’t come out of nowhere…
    They start as something minor—something easy to ignore.

    And if you catch it early?
    You save thousands of dollars, stress, and time.

    Let’s break down the biggest issues you should fix right now before they turn into budget-breaking disasters.


    1. Water Damage & Leaks (Your #1 Enemy)

    Water is the silent destroyer of homes.

    I’ve seen it firsthand—what starts as a small drip under a sink or a faint ceiling stain can turn into:

    • Mold growth
    • Rotting wood
    • Structural damage
    • Full drywall replacement

    💡 Real Talk:
    When I was finishing my basement, I made it a habit to check for moisture before closing up walls. That simple step prevented what could’ve been a full tear-out later.

    What to Fix Now:

    • Ceiling stains
    • Musty smells
    • Loose or damp drywall
    • Leaky faucets or pipes

    👉 Pro Tip: Fix the source first—don’t just paint over the problem.


    2. Cracks in Walls or Foundation

    Not all cracks are equal—but ignoring them is a mistake.

    Hairline cracks? Usually normal settling.
    But wider cracks or horizontal ones?

    ⚠️ That’s where things get serious.

    Watch For:

    • Cracks wider than 1/8 inch
    • Horizontal foundation cracks
    • Doors and windows sticking

    💡 From Experience:
    When building my deck and working around my home’s foundation, I learned quickly—structure matters. If the base isn’t right, nothing else will be.

    👉 Fix early with sealant or bring in a pro before it becomes a structural repair bill.


    3. Electrical Issues (Don’t Ignore These)

    This isn’t just about money—this is about safety.

    Common warning signs:

    • Flickering lights
    • Warm or discolored outlets
    • Breakers constantly tripping

    🔥 These can lead to electrical fires if ignored.

    Quick Fixes:

    • Replace damaged outlets
    • Avoid overloading circuits
    • Upgrade old wiring if needed

    💡 DIY Rule I Live By:
    If it feels unsafe—don’t guess. Electrical work is one area where calling a licensed pro is the smart move.


    4. Poor Ventilation (Hidden Damage Builder)

    Bad airflow creates:

    • Mold
    • Peeling paint
    • Warped wood
    • Rusted tools

    I’ve seen garages and basements take a beating because of trapped moisture.

    Fix It Fast:

    • Install exhaust fans
    • Open vents in attic/garage
    • Use a dehumidifier in damp areas

    💡 Garage Tip:
    If you’re planning a garage makeover (like I’ve done), ventilation is just as important as paint.


    5. Rotting Wood (Decks, Trim, and Framing)

    Wood rot spreads fast—and it weakens everything it touches.

    I’ve worked on decks, bridges, and outdoor builds long enough to know:

    👉 If it’s soft, it’s already too late.

    Check These Areas:

    • Deck boards and railings
    • Window trim
    • Door frames
    • Outdoor structures

    💡 From My Projects:
    When I built my pool deck, sealing and protecting the wood wasn’t optional—it was essential. That’s what keeps a project lasting for years.


    Final Thoughts: Fix It Now or Pay Later

    At Conley’s Home Improvement, I’ve always believed:

    👉 “Do it right the first time—or do it twice later.”

    Most homeowners don’t run into $5,000–$20,000 repairs because they lack skill…

    They run into them because they waited too long.

    🔑 Your Action Plan:

    • Walk your home this weekend
    • Look for these warning signs
    • Fix at least ONE issue immediately

    Closing Message

    This isn’t just about saving money—
    It’s about protecting what you’ve built.

    From my first shop project in the 1970s…
    to building decks, finishing basements, and working alongside my sons…

    I’ve learned this:

    👉 Every solid home starts with attention to the small details.


    If you found this helpful, follow Conley’s Home Improvement for more real-world DIY advice, step-by-step projects, and lessons learned the hard way—so you don’t have to.

  • Beginner Painting Mistakes           (and How to Avoid Them Like a Pro)

    Beginner Painting Mistakes (and How to Avoid Them Like a Pro)

    If there’s one thing I’ve learned over 40+ years of DIY—from a 1970s shop class to building decks, finishing basements, and painting my own garage with my sons—it’s this:

    👉 Most painting mistakes aren’t about skill—they’re about preparation and patience.

    At Conley’s Home Improvement, I’ve seen (and made) just about every mistake in the book. The good news? Every one of them is avoidable.

    Let’s walk through the most common beginner painting mistakes—and how you can get professional-looking results the first time.


    1. Skipping Surface Prep

    This is the #1 mistake beginners make.

    Painting over dirt, grease, or damaged surfaces is like building a deck on loose soil—it won’t last.

    What happens:

    • Paint won’t stick properly
    • You get peeling, bubbling, or uneven coverage

    What to do instead:

    • Clean walls with mild soap and water
    • Patch holes and cracks
    • Lightly sand rough areas

    👉 Measure twice, cut once… and prep twice before you paint.


    2. Using the Wrong Tools

    Back in my early days, I thought any brush would do. I learned quickly—that’s not the case.

    What happens:

    • Streaks and lint in your paint
    • Uneven finishes
    • More time fixing mistakes

    What to do instead:

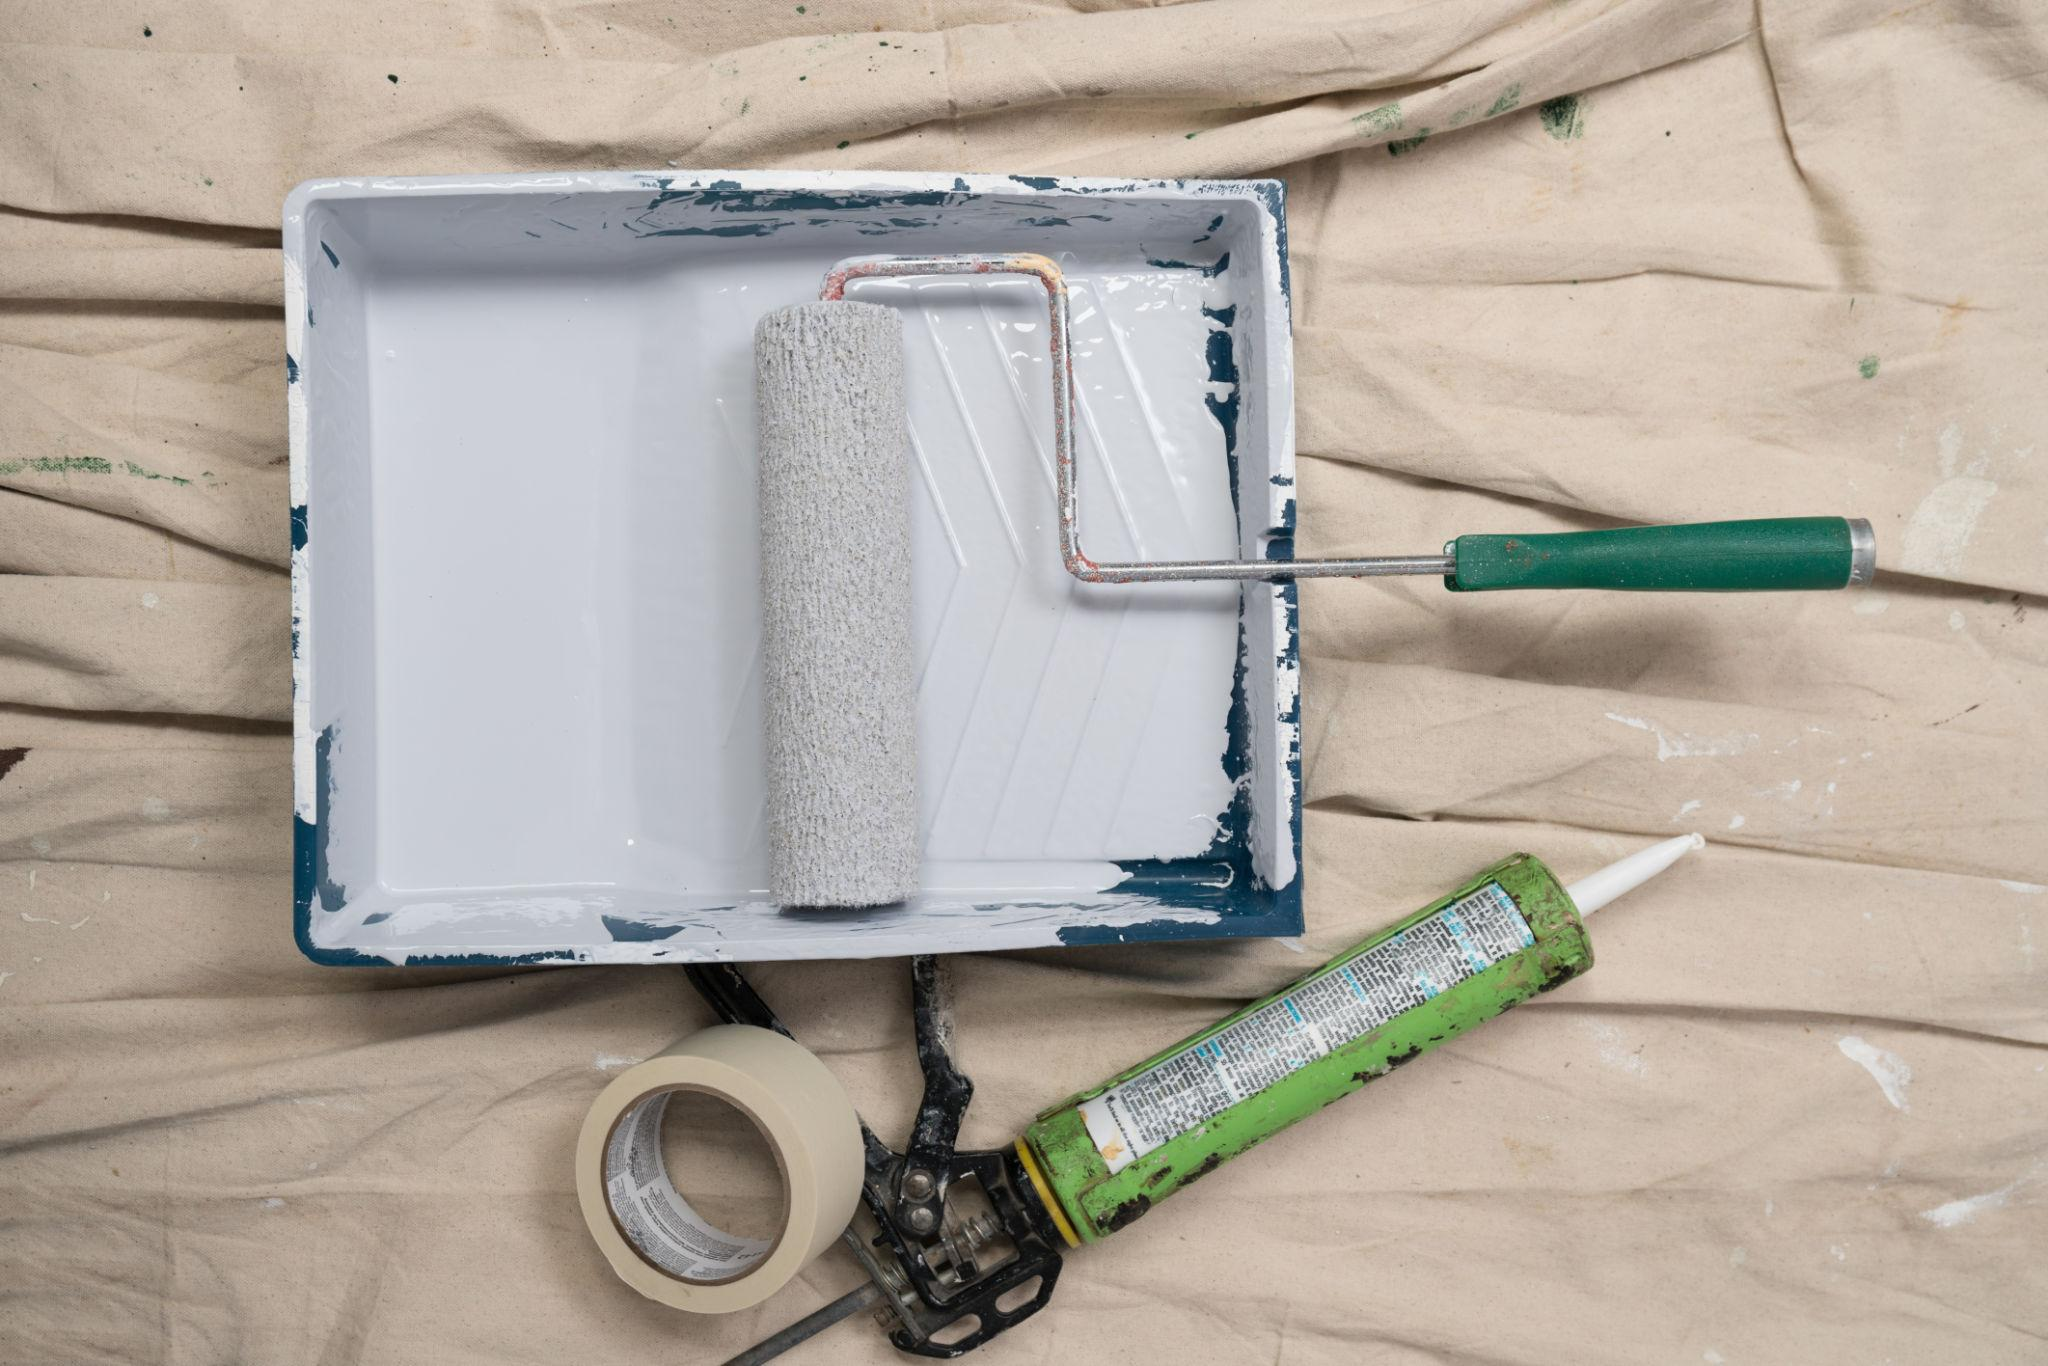
    • Use quality brushes for edges
    • Rollers for large surfaces
    • Extension poles to save your back (trust me on this one)

    👉 The right tools don’t just make it easier—they make it look professional.


    3. Skipping Primer

    I’ve seen people try to paint over dark walls or stained surfaces without primer… and regret it immediately.

    What happens:

    • Blotchy color
    • Extra coats (more time and money)
    • Poor durability

    What to do instead:

    • Always prime:
      • New drywall
      • Dark colors
      • Stained or repaired areas

    👉 Primer is your foundation—don’t skip it.


    4. Applying Paint Too Thick (or Too Fast)

    This one comes from impatience—and I get it. You want to finish.

    What happens:

    • Drips and runs
    • Uneven texture
    • Longer drying times

    What to do instead:

    • Apply thin, even coats
    • Let each coat dry fully before the next

    👉 Good painting is a marathon, not a sprint.


    5. Ignoring Painter’s Tape (or Using It Wrong)

    Clean lines separate DIY from professional work.

    What happens:

    • Paint bleeds under edges
    • Crooked lines
    • Messy trim and ceilings

    What to do instead:

    • Apply tape firmly
    • Remove it while paint is still slightly wet
    • Don’t rush the edges

    👉 This is one of those small details that makes a BIG difference.


    6. Not Testing Paint Colors First

    What looks great in the store can look completely different in your home.

    What happens:

    • Regret after full application
    • Wasted time and money

    What to do instead:

    • Test samples on your wall
    • Check in:
      • Daylight
      • Evening lighting

    👉 Paint is all about light and environment.


    7. Rushing the Job

    This is the mistake that ties all the others together.

    When I painted my garage back in 2005 with my sons, it wasn’t about speed—it was about doing it right. That project still stands as one of my favorite memories and one of the cleanest finishes we achieved.

    What happens:

    • Missed steps
    • Sloppy finish
    • Rework later

    What to do instead:

    • Plan your project
    • Work in stages
    • Take your time

    👉 The more you build, the more you realize: slow is smooth, and smooth is fast.


    Final Thoughts: Paint Like You Mean It

    DIY painting isn’t just about putting color on a wall.

    It’s about:

    • Discipline
    • Attention to detail
    • Pride in your work

    At Conley’s Home Improvement, every project—whether it’s a garage makeover, a basement finish, or a backyard build—comes down to doing the basics right.

    👉 Avoid these beginner mistakes, and you won’t just paint—you’ll transform your space.


    🔧 Quick Recap Checklist (Save This)

    • ✔ Clean and prep surfaces
    • ✔ Use the right tools
    • ✔ Don’t skip primer
    • ✔ Apply thin coats
    • ✔ Use painter’s tape properly
    • ✔ Test colors first
    • ✔ Take your time
  • $200 vs $2000 Renovation Test

    $200 vs $2000 Renovation Test

    What Really Makes the Difference? | Conley’s Home Improvement


    The Real Question Every Homeowner Asks

    Is it better to spend $200 and DIY it yourself, or drop $2000 and go all-in for a more polished renovation?

    After 40+ years of DIY home improvement, building everything from basement finishes to a full pool deck in my backyard… I can tell you this:

    👉 It’s not just about the money.
    👉 It’s about strategy, skill, and intention.

    Let’s break this down the real-world way—Conley style.


    The $200 Renovation Mindset: Skill Over Spending

    When you’re working with $200, you’re forced to lean on something more powerful than money:

    👉 Creativity
    👉 Experience
    👉 Work ethic

    This is where I started—and honestly, it’s where the real foundation is built.

    What $200 Can Actually Do:

    • Paint a garage (I’ve done it—with my sons back in 2005 👊)
    • Refresh a room with new color + trim touch-ups
    • Upgrade lighting fixtures
    • Add curb appeal with landscaping basics
    • Small wood builds (shelves, benches, accents)

    What You Gain:

    • Confidence
    • Hands-on skills
    • Problem-solving ability
    • Pride in ownership

    Truth: A well-executed $200 project can outperform a sloppy $2000 job.


    The $2000 Renovation Mindset: Speed + Scale

    Now when you step into the $2000 range, the game changes.

    This is where you can:

    • Take on larger structural upgrades
    • Use premium materials
    • Speed up timelines dramatically

    What $2000 Can Do:

    • Build or upgrade a deck section
    • Install a paver patio
    • Upgrade flooring (like vinyl plank in a basement)
    • Add a pergola or outdoor feature
    • Refresh a full room with higher-end finishes

    What You Gain:

    • Durability
    • Visual impact
    • Increased home value
    • Faster completion

    Truth: $2000 doesn’t guarantee quality—it just gives you more opportunity to do it right.


    ⚖️ The Real Test: What Actually Matters?

    The Real Test: What Actually Matters?

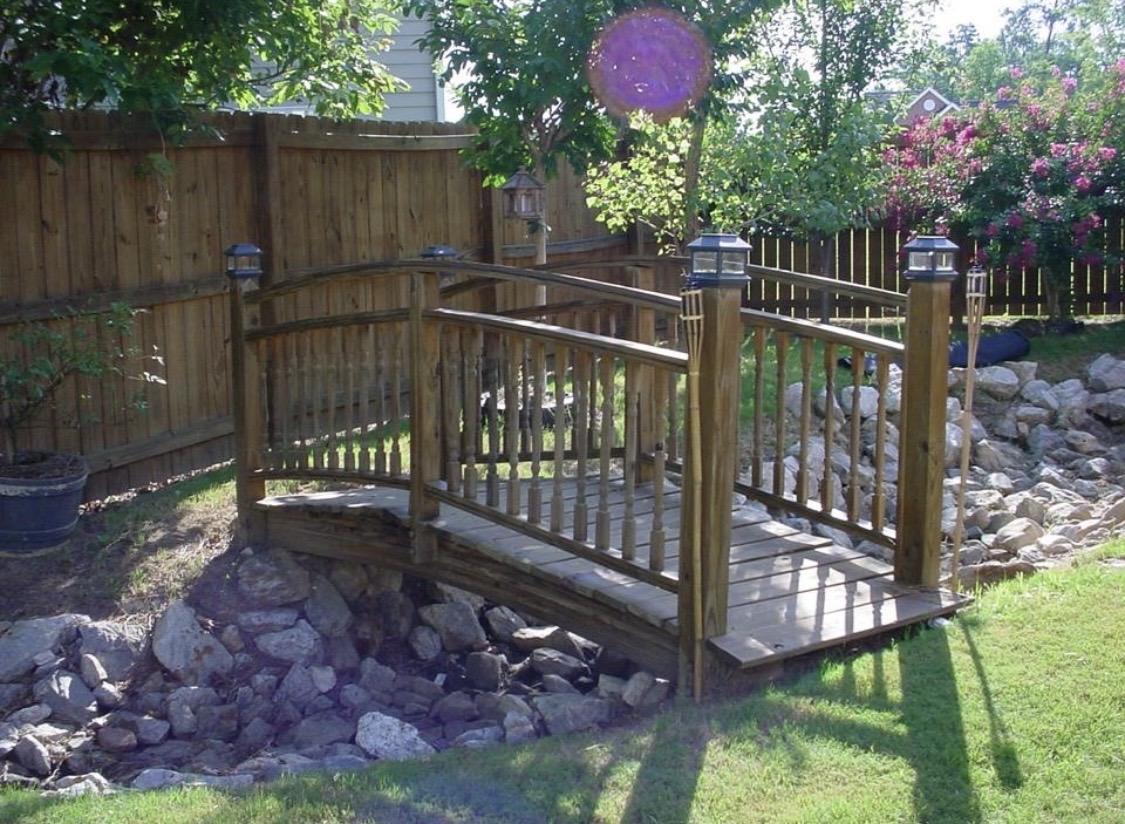
    After decades of projects—including turning a rocky backyard into a full-blown oasis with a pool deck, patios, and a bridge—here’s what I’ve learned:

    1. Skill Beats Budget

    You can hand someone $2000 and still get poor results.
    Give a skilled DIYer $200, and they’ll make it shine.


    2. Planning Is Everything

    Whether it’s $200 or $2000:

    • Assess the space
    • Choose the right materials
    • Plan your steps

    That’s how you avoid wasting money.


    3. Sweat Equity Is Priceless

    The work you put in yourself?

    That’s where the real value lives.

    That’s what I taught my sons during that garage project—and it still applies today.


    4. Layer Your Renovations

    Here’s a pro move most people miss:

    👉 Start with a $200 upgrade
    👉 Build over time into a $2000 transformation

    That’s exactly how my backyard evolved—from nothing… to something incredible.


    My Personal Take: The Conley Strategy

    If I had to choose?

    I’d take the $200 mindset with a $2000 vision.

    That means:

    • Start small
    • Learn the craft
    • Build momentum
    • Reinvest into bigger projects

    That’s how you go from:
    ➡️ Painting a garage
    ➡️ To building decks, patios, and full living spaces


    Final Verdict: Which One Wins?

    👉 $200 wins for learning, growth, and foundation
    👉 $2000 wins for impact, speed, and scale

    But the real winner?

    💥 The person willing to pick up the tools and get to work.


    If you’re building your own DIY journey…

    🔹 Start where you are
    🔹 Use what you have
    🔹 Build what you can

    And remember—every expert started with a small project.


    Want More Real DIY Lessons?

    Follow Conley’s Home Improvement for:

    • Real projects
    • Budget transformations
    • Step-by-step builds
    • Lessons from 40+ years in the game

    👉 And if this helped you, share it with someone ready to stop waiting—and start building.

  • Tools Every Homeowner Should Own

    Tools Every Homeowner Should Own

    Built from 40+ Years of DIY Experience – Conley’s Home Improvement

    If there’s one thing I’ve learned over the last 40+ years—from a dusty 1970s shop class to building decks, finishing basements, and transforming my backyard into an oasis—it’s this:

    👉 The right tools don’t just make the job easier… they make the job possible.

    You don’t need a truck full of expensive equipment to get started. What you do need is a solid foundation of reliable, go-to tools that can handle 90% of the work around your home.

    Whether you’re just getting started or leveling up your DIY game, these are the essential tools every homeowner should own—the same types of tools I’ve relied on across decades of real hands-on projects.


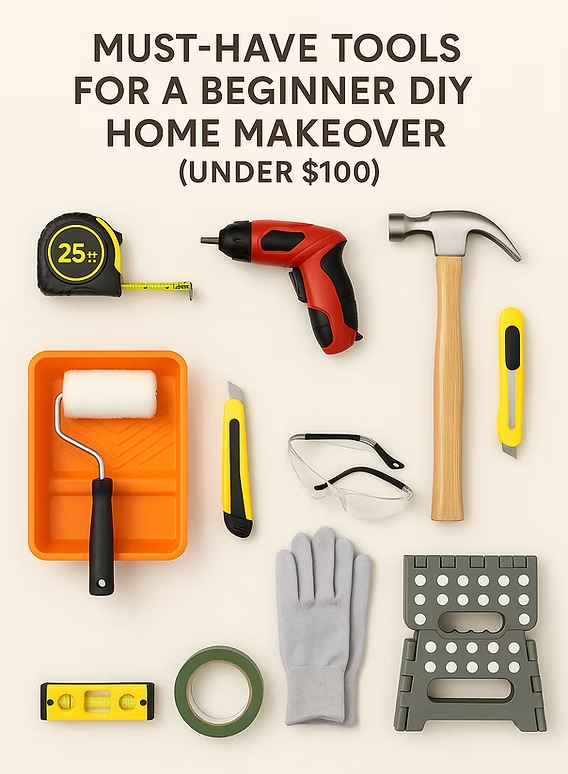
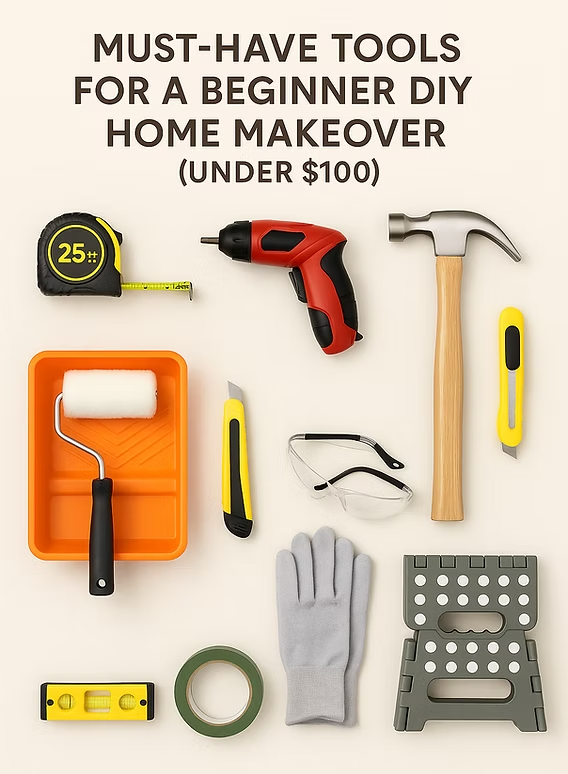
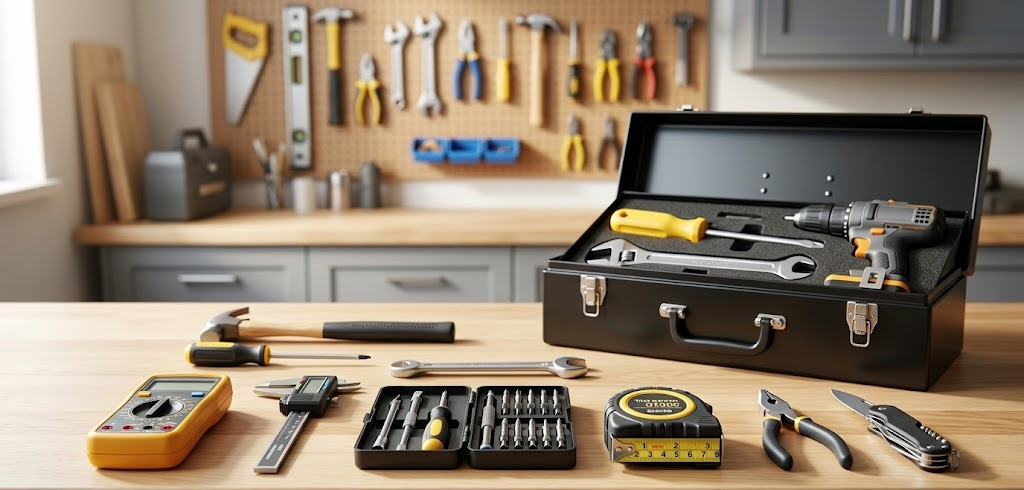
    1. Claw Hammer – The Foundation Tool

    Every homeowner needs a solid claw hammer. This is where it all begins.

    From hanging pictures to framing structures, this tool has been in my hand since my early shop class days—and it still gets used on almost every project.

    What to look for:

    • Comfortable grip
    • Balanced weight
    • Durable steel head

    👉 Pro Tip: A good hammer isn’t just about strength—it’s about control.


    2. Screwdriver Set – Small Tool, Big Impact

    Loose cabinet hinges, outlet covers, furniture assembly—you’ll reach for these constantly.

    You’ll want:

    • Phillips head
    • Flathead
    • Magnetic tips (game changer)

    👉 From experience: I’ve fixed more problems with a screwdriver than any other tool in my garage.


    3. Cordless Drill – The Real Workhorse

    If there’s one tool that changed DIY forever—it’s the cordless drill.

    From building my pool deck to installing shelving, this tool has saved me countless hours.

    Must-haves:

    • Variable speed
    • Rechargeable batteries
    • Full drill bit set

    👉 Pro Tip: Always keep a charged backup battery—you don’t want to stop mid-project.


    4. Tape Measure – Measure Twice, Cut Once

    This is one lesson that stuck with me since day one:

    👉 Measure twice. Cut once.

    Whether you’re cutting lumber, spacing deck boards, or planning a room layout—accuracy is everything.

    Look for:

    • At least 25 feet
    • Easy lock mechanism
    • Clear markings

    5. Hand Saw – Old School Still Works

    Power tools are great—but sometimes, a simple hand saw gets the job done faster and cleaner.

    Especially useful for:

    • Quick cuts
    • Tight spaces
    • Small projects

    👉 Real talk: Not every job needs electricity.


    6. Adjustable Wrench – One Tool, Many Uses

    From plumbing fixes to tightening bolts, this tool earns its place quickly.

    Why it matters:

    • Replaces multiple wrench sizes
    • Great for emergency repairs

    👉 Every homeowner should have one within arm’s reach.


    7. Level – The Difference Between DIY and Professional

    Nothing screams “DIY mistake” like a crooked shelf.

    A level ensures:

    • Straight installations
    • Professional-looking results

    👉 Lesson learned: Take the extra 30 seconds to level it—you’ll save hours fixing it later.


    8. Utility Knife – The Underrated Essential

    This is one of the most used—and most overlooked—tools in any home.

    Perfect for:

    • Opening boxes
    • Cutting drywall
    • Trimming materials

    👉 Keep extra blades on hand—sharp tools are safer tools.


    9. Flashlight or Work Light – See What You’re Doing

    From under-the-sink fixes to attic work, good lighting makes all the difference.

    👉 You can’t fix what you can’t see.


    10. Stud Finder – Find What’s Behind the Wall

    If you’re mounting anything heavy—TVs, shelves, cabinets—this tool is critical.

    👉 One mistake here can cost you drywall repair.


    Build Your Toolbox, Build Your Confidence

    When I look back—from building a garage with my dad in the early days…
    to painting with my sons…
    to building decks and backyard projects—

    👉 It all comes down to this:

    Tools don’t just help you build projects. They help you build skills, confidence, and legacy.

    You don’t need everything at once. Start with these essentials. Learn them. Use them. Respect them.

    And over time, just like I did…

    👉 You’ll go from fixing small things… to building things you never thought possible.


    If you’re ready to level up your DIY skills:

    • Follow Conley’s Home Improvement
    • Start building your own tool kit today
    • And remember…

    👉 Every expert started with a single tool in their hand.

  • DIY Garage Makeover Step-by-Step

    DIY Garage Makeover Step-by-Step

    Turning an Overlooked Space into a Functional Powerhouse

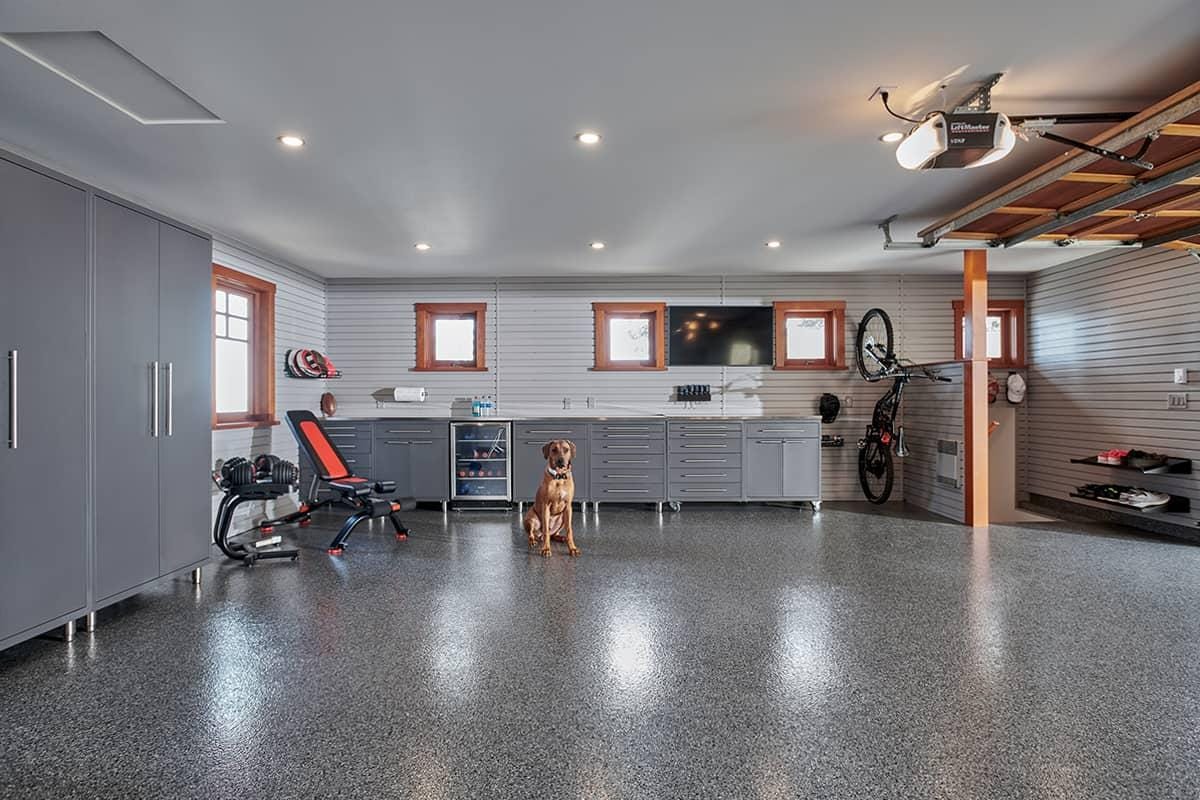
    If you’ve followed my journey over the years, you already know—I don’t believe in wasted space. Back in spring 2005, I tackled one of my most memorable projects: a full garage makeover with my two sons. It wasn’t just about paint and tools—it was about building something together, learning responsibility, and creating a space we were proud of.

    This guide walks you through the exact step-by-step process I’ve used (and refined over 40+ years) to transform a garage from cluttered chaos into a clean, functional workspace.

    Step 1: Clear It Out Completely

    Before you pick up a paintbrush or tool—clear everything out.

    What to do:

    • Remove all items (yes, everything)
    • Sort into: keep, donate, trash
    • Sweep and vacuum thoroughly

    Pro Tip: This is where most people cut corners. Don’t. A clean slate gives you clarity and better results.


    Step 2: Assess the Condition

    Take a hard look at your garage.

    Check for:

    • Cracks in walls or floors
    • Water damage or stains
    • Peeling paint
    • Mold or mildew

    From experience: Fixing problems early saves you time, money, and frustration later.


    Step 3: Make Necessary Repairs

    Now it’s time to fix what you found.

    Common repairs:

    • Patch holes with spackle or joint compound
    • Fill concrete cracks
    • Sand rough surfaces
    • Replace damaged trim if needed

    Step 4: Paint for a Fresh Start

    This is where the transformation really begins.

    Steps:

    1. Use painter’s tape for clean lines
    2. Prime if needed
    3. Apply 2 coats of quality paint

    Color Tips:

    • Light gray or white = brighter space
    • Neutral tones = clean, professional look

    Step 5: Upgrade the Flooring

    Don’t ignore the floor—it’s half the look.

    Options:

    • Epoxy coating (durable and professional)
    • Concrete paint (budget-friendly)
    • Interlocking tiles (quick install)

    My go-to: Epoxy for long-term durability.


    Step 6: Install Smart Storage Solutions

    A clean garage won’t stay clean without organization.

    Must-haves:

    • Wall-mounted shelves
    • Pegboards for tools
    • Overhead storage racks

    Rule I live by: “Everything has a place—and it goes back there.”


    Step 7: Improve Lighting & Functionality

    Good lighting turns your garage into a true workspace.

    Upgrades:

    • LED shop lights
    • Task lighting over workbench
    • Motion sensor lights

    Game changer: Brighter lighting = safer and more productive projects.


    Step 8: Add Your Personal Touch

    Now make it yours.

    Ideas:

    • Workbench setup
    • Tool layout system
    • Personal decor or branding
    • Project display area

    This is where your garage becomes more than storage—it becomes a reflection of your craftsmanship.


    Final Thoughts: More Than Just a Makeover

    A DIY garage makeover isn’t just about paint and shelves—it’s about discipline, pride, and legacy.

    For me, it was about teaching my sons how to work with their hands…
    how to finish what they start…
    and how to take pride in building something real.

    At Conley’s Home Improvement, that’s what it’s always been about.


    Ready to Start Your Garage Makeover?

    If this guide helped you, here’s your next step:

    ✔️ Start with Step 1 this weekend
    ✔️ Take before and after photos
    ✔️ Turn your project into your own story


    👍 Like, Share & Subscribe for More DIY Content

    Follow Conley’s Home Improvement for real projects, real lessons, and real results.

  • Painting Blogs

    Painting Blogs

    Home > Home Improvement Blogs >> Painting Blogs

    If you’re looking for some great painting blogs for home improvement, DIY projects, and techniques, my painting blogs are a fantastic way to get inspiration and learn new skills.

    These blogs cover a broader range of painting topics and they’re great for inspiration, project ideas, and step-by-step tutorials.

    Happy painting, and enjoy exploring the wealth of knowledge with the following painting blogs:

    Painting Blog Topics:

    1. Decoding the Can: A Guide to Different Types of Paint for Your Home
    2. DIY Paint Field Guide: Tips for Home Improvement

    Most recent Posts

  • Home Improvement Blogs

    Home Improvement Blogs

    Home > Home Improvement Blogs

    If you’re looking for some great blogs for home improvement, DIY projects, and techniques, my blogs are a fantastic way to get inspiration and learn new skills.

    These blogs cover a broader range of home improvement painting topics and they’re great for inspiration, project ideas, and step-by-step tutorials.

    Happy home improving, and enjoy exploring the wealth of knowledge with the following home improvement blogs:

    Home Improvement Blog Topics:

    1. Painting Blogs
    2. DIY Garage Makeover Step-by-Step
    3. Tools Every Homeowner Should Own
    4. $200 vs $2000 Renovation Test
    5. Beginner Painting Mistakes (and How to Avoid Them Like a Pro)

    Comments