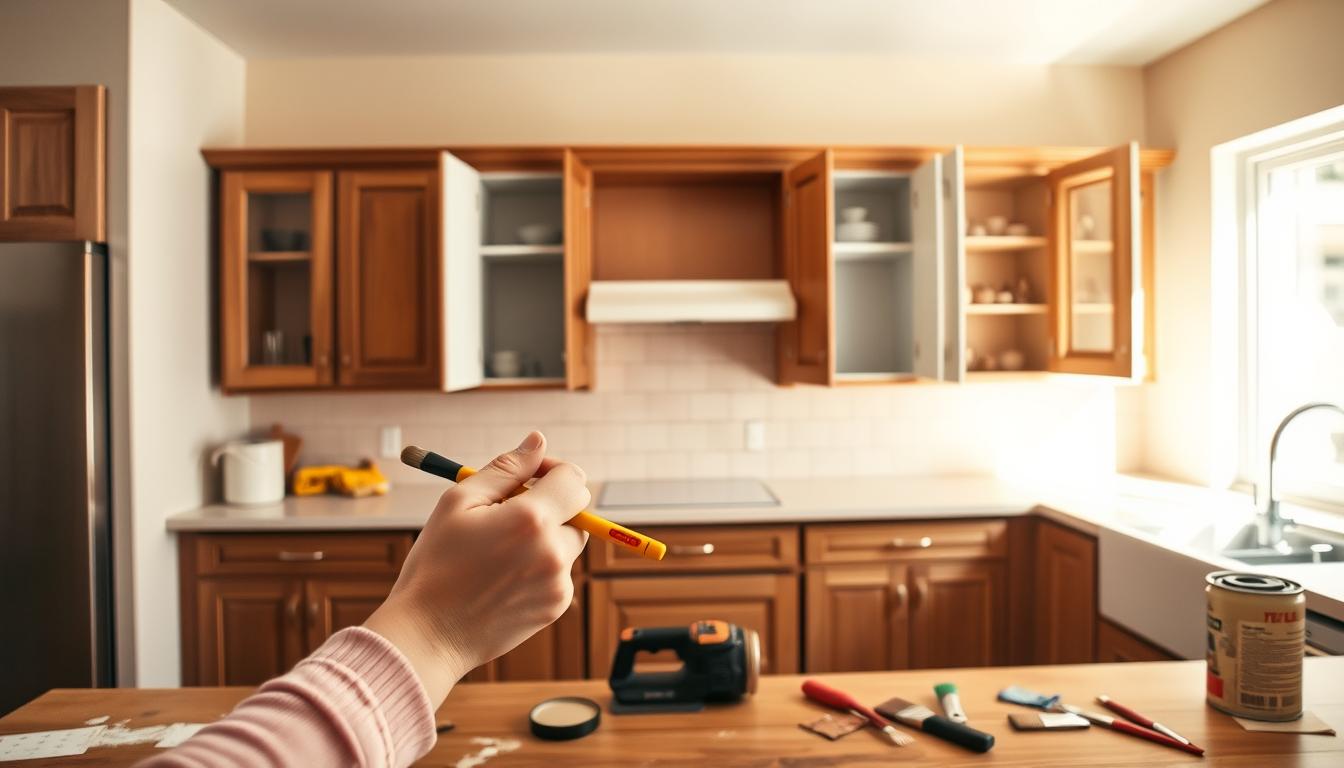
I often look at my kitchen and dream of a fresh, modern look. If you want a stylish space without the massive bill, diy home improvement tasks are your best friend.
Choosing to reface your storage units is a brilliant financial move. It saves you thousands of dollars compared to buying everything new. I love that this project also helps the planet by keeping old wood out of the trash.
I found that simply swapping the doors and drawer fronts creates a total transformation. This method is much quicker than a full kitchen overhaul. Let me show you how to give your home a beautiful facelift using simple techniques.
Taking on this project gives me a huge sense of pride. You can choose from many textures and colors to match your vision. It is the perfect weekend task for anyone who enjoys working with their hands.
Key Takeaways
- Saves up to 50% of the cost compared to a full replacement.
- Reduces environmental waste by reusing existing frames.
- Completes the transformation much faster than a total remodel.
- Allows you to keep your current kitchen layout.
- Provides endless customization with various door styles and colors.
- Requires only basic tools and manageable effort for beginners.
1. What Cabinet Refacing Is and Why I Choose It
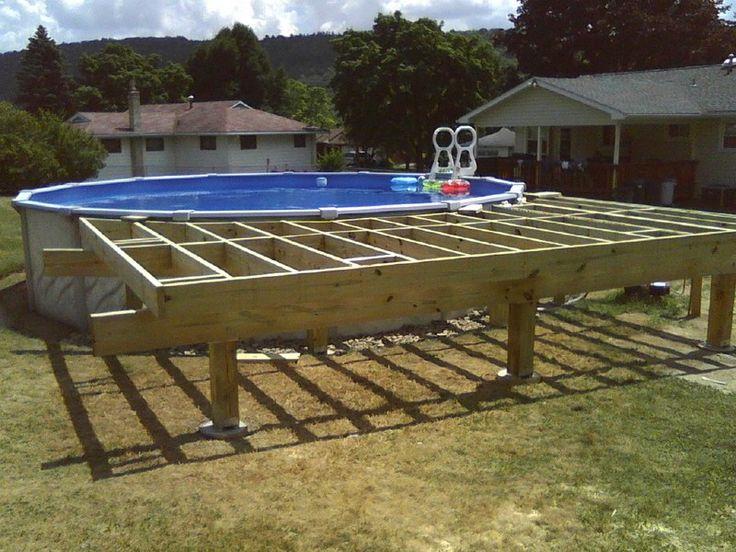
The process of cabinet refacing is something I now swear by, especially after seeing the results in my own home. Much like when I decided to build a pool deck and completely transformed my outdoor living space, refacing my cabinets gave my kitchen a fresh new look without the need for a full renovation.
Cabinet refacing involves updating the exterior of your cabinets with new veneer, doors, and hardware, while keeping the existing cabinet structure intact. This approach not only saves time but also significantly reduces the cost compared to replacing the cabinets entirely.
Understanding the Cabinet Refacing Process
The cabinet refacing process begins with assessing the condition of your existing cabinets to determine if they’re suitable for refacing. This involves checking for any structural damage or issues that might need to be addressed before proceeding.
Once you’ve confirmed that your cabinets are good candidates for refacing, the next step is to choose your new veneer, doors, and hardware. This is where you can get creative and personalize your kitchen to fit your style and preferences.
Cost Savings Compared to Full Cabinet Replacement
One of the main reasons I opted for cabinet refacing was the cost savings. By reusing the existing cabinet structure, you can save a significant amount of money compared to a full replacement. This is similar to how I saved by choosing to refurbish my existing deck instead of building a new one from scratch when I decided to build a pool deck.
The cost savings come from not having to purchase entirely new cabinets, as well as reducing the labor involved in the renovation.
The Environmental Benefits I Appreciate
Cabinet refacing is also an environmentally friendly choice. By reusing the existing cabinets, you’re reducing the amount of waste that ends up in landfills. This approach aligns with my preference for sustainable living practices, much like choosing materials for my pool deck that were eco-friendly.
Additionally, refacing reduces the demand for new materials needed for full cabinet replacement, further minimizing its environmental footprint.
2. Evaluating If Your Cabinets Are Right for Refacing
Not all cabinets are created equal, and some may not be good candidates for refacing. I’ve learned that assessing your cabinets’ condition is a crucial step before starting the project.
Just like when you’re planning to build an above-ground pool deck and need to evaluate the yard’s terrain, you must inspect your cabinets’ current state. This involves checking for any damage, wear, and tear that could affect the refacing process.
Signs Your Cabinets Are Good Candidates
If your cabinets are in relatively good condition but just need a cosmetic update, refacing might be an excellent option. Here are some signs that your cabinets are good candidates:
- The cabinet boxes are sturdy and well-constructed.
- The doors and drawers are still functional.
- You like the overall layout and structure of your current cabinets.
If these conditions apply to your cabinets, refacing can be a cost-effective way to give your kitchen a fresh new look without the expense of completely replacing the cabinets.
Structural Issues That Need Fixing First
However, if your cabinets have significant structural issues, refacing might not be the best choice. Issues such as water damage, rotting wood, or significant warping need to be addressed before considering refacing.
In such cases, it’s essential to repair or replace the damaged parts to ensure that your refaced cabinets are not only beautiful but also durable and functional.
By carefully evaluating your cabinets’ condition and addressing any structural issues, you can ensure a successful refacing project that enhances your kitchen’s appearance and functionality.
3. Planning Your DIY Cabinet Refacing Project
As I embark on my DIY cabinet refacing project, planning is key to achieving a successful outcome. A well-planned project not only ensures that the work is done efficiently but also helps in avoiding costly mistakes. Just like a well-designed pool deck construction project requires careful planning, so does cabinet refacing.
To start, it’s essential to have a clear vision of what you want to achieve with your cabinet refacing project. This involves considering the style, finish, and overall aesthetic you wish to accomplish. Much like choosing the right materials and design for a pool deck design, selecting the appropriate cabinet style and finish is crucial.
Selecting Your Cabinet Style and Finish
The first step in planning your cabinet refacing project is to decide on the style and finish of your cabinets. You can choose from a variety of styles, ranging from modern to traditional, and finishes that include paint, stain, or veneer. It’s crucial to select a style and finish that complements the overall design of your kitchen.
When choosing a style, consider the existing décor and the look you want to achieve. For instance, if you’re going for a modern look, you might opt for sleek, handle-less cabinets. On the other hand, a traditional look might involve more ornate details and classic hardware.

Choosing New Hardware and Accessories
Another important aspect of planning your cabinet refacing project is selecting new hardware and accessories. This includes knobs, pulls, hinges, and drawer slides. The right hardware can significantly enhance the look and functionality of your cabinets.
When choosing hardware, consider the style and finish of your cabinets, as well as the overall aesthetic of your kitchen. For example, modern kitchens often feature sleek, minimalist hardware, while traditional kitchens might incorporate more ornate or antique pieces.
Setting a Realistic Project Timeline
Finally, setting a realistic timeline is vital for the success of your DIY cabinet refacing project. This involves breaking down the project into manageable tasks and estimating the time required for each step.
To create a realistic timeline, start by listing all the tasks involved in your project, from removing the cabinet doors and hardware to applying the finish. Then, estimate the time needed for each task based on your skill level and the complexity of the work.
4. Gathering the Right Tools and Materials
To ensure a smooth and efficient cabinet refacing experience, preparing the appropriate tools and materials is key. Having everything you need at your fingertips will save you time and reduce frustration during the project.
Essential Tools I Use for Cabinet Refacing
When it comes to cabinet refacing, having the right tools is crucial. Here are some of the essentials:
- Measuring Tape: For accurate measurements of your cabinets and the materials you’ll be using.
- Utility Knife: Useful for cutting various materials, including veneer and old adhesive.
- Screwdrivers and Drill: Necessary for removing hardware and making any necessary adjustments or repairs.
- Sanding Block: Helps in smoothing out surfaces before applying new veneer or finish.
- Clamps: Essential for holding veneer in place while the adhesive sets.

Complete Materials List: Veneer, Doors, and Adhesives
The materials you’ll need can vary depending on the scope of your project, but here are the basics:
| Material | Description | Quantity |
|---|---|---|
| Veneer | Thin layer of material to cover cabinet surfaces | Dependent on cabinet size |
| New Cabinet Doors | Replacement doors for your cabinets | Matches the number of existing doors |
| Adhesives | Specialized glue for bonding veneer to cabinets | Dependent on veneer quantity |
| Hardware | Knobs, pulls, or handles for your cabinets | Matches the number of existing hardware |
Safety Equipment You Shouldn’t Skip
Safety should always be your top priority when working on a DIY project. Here are some essential safety items:
- Dust Mask: Protects you from inhaling dust and debris during sanding and other processes.
- Safety Glasses: Shields your eyes from flying particles and debris.
- Work Gloves: Provides grip and protects your hands from cuts and abrasions.
By gathering all the necessary tools and materials before starting your cabinet refacing project, you’ll be well-prepared to tackle the task efficiently and safely.
5. Preparing Your Kitchen Workspace
Preparing your kitchen workspace is a critical step that sets the stage for a smooth cabinet refacing experience. Just like a DIY pool deck guide emphasizes the importance of preparation, a well-prepared kitchen is essential for a successful refacing project.
Emptying Cabinets and Protecting Countertops
The first step in preparing your kitchen is to empty your cabinets completely. Remove all dishes, utensils, and food items, and store them in a safe location outside your kitchen. This not only gives you clear access to the cabinets but also protects your belongings from dust and debris.
Next, protect your countertops with drop cloths or plastic sheets. This will prevent damage from adhesives, veneer scraps, and other materials used during the refacing process. As a precautionary measure, tape the protective covering to the countertops to prevent it from shifting while you work.

Creating an Efficient Work Area
An efficient work area is crucial for productivity. Clear a space on your countertops or floor where you can lay out your tools and materials. Organize your tools in a way that they are easily accessible, and keep frequently used items within arm’s reach.
Consider the workflow of your project and arrange your workspace accordingly. For instance, designate a specific area for cutting veneer, another for applying adhesives, and another for assembling parts. This will streamline your work process and reduce fatigue.
“A cluttered workspace can lead to a cluttered mind. Keep your workspace organized, and you’ll find the task at hand much more manageable.”
To further enhance your workspace, consider the following checklist:
- Ensure good lighting in your work area.
- Keep a trash can and a damp cloth handy to clean up spills and debris.
- Use a workbench or a sturdy table for tasks that require precision.
| Workspace Element | Purpose | Tips for Implementation |
|---|---|---|
| Clear Workspace | Enhances productivity and reduces accidents. | Remove unnecessary items and organize tools. |
| Protected Countertops | Prevents damage from project materials. | Use drop cloths or plastic sheets and secure with tape. |
| Efficient Tool Organization | Streamlines workflow and saves time. | Designate specific areas for different tasks and tools. |
6. Removing Cabinet Doors, Drawers, and Hardware
The first step in refacing your cabinets is removing the doors, drawers, and hardware, a process that requires patience and attention to detail. As I embarked on my cabinet refacing project, I realized that this initial step is crucial for a successful renovation. It’s a bit like planning a pool deck renovation; you need to start with a clean slate to achieve the best results.
My Labeling System for Keeping Parts Organized
To ensure that reassembly is straightforward, I used a labeling system to keep track of the various parts. I labeled each door, drawer front, and piece of hardware with a corresponding number or letter, noting its original position. This system is akin to organizing your tools before starting a complex project, like building a deck, where pool deck building tips can be invaluable.
“A place for everything, and everything in its place,” as the saying goes. This approach saved me a lot of time when it came to putting everything back together.
Safe Removal Techniques to Prevent Damage
When removing the cabinet doors, drawers, and hardware, it’s essential to use techniques that prevent damage to the components and the cabinet boxes themselves. I used a screwdriver to remove the hinges and other hardware, taking care not to strip the screws. For the drawers, I pulled them out fully and lifted them slightly to disengage them from their slides.
- Remove hardware carefully to avoid damaging the surrounding material.
- Support the weight of heavy doors and drawers to prevent them from falling.
- Take your time to avoid stripping screws or damaging the cabinet structure.
Cleaning and Inspecting the Cabinet Boxes
Once the doors, drawers, and hardware were removed, I cleaned the cabinet boxes thoroughly. This step is often overlooked but is crucial for ensuring that the new veneer or finish adheres properly. I used a gentle cleaner and a soft cloth to wipe down the interiors and exteriors of the cabinet boxes, removing grease, dust, and any other debris.
As I cleaned, I also inspected the cabinet boxes for any signs of damage or wear. This inspection allowed me to identify and address any issues before proceeding with the refacing process, ensuring a smoother and more successful project.
7. Prepping Cabinet Surfaces for Refacing
Before applying new veneer or finishes, prepping your cabinet surfaces is a crucial step that ensures a professional-looking result. Just as a well-planned DIY project, such as incorporating diy pool deck ideas into your backyard renovation, can enhance your home’s value, a properly prepared cabinet surface is essential for a successful refacing project.
Proper surface preparation involves several key steps that help create a smooth, durable finish. It’s not just about aesthetics; a well-prepared surface ensures that the new veneer or finish adheres properly, extending the life of your cabinets.
Thoroughly Cleaning and Degreasing All Surfaces
The first step in prepping your cabinet surfaces is to thoroughly clean and degrease them. Over time, kitchen cabinets accumulate grease, grime, and food particles that can interfere with the adhesion of new finishes. I use a gentle cleanser and a soft cloth to wipe down all surfaces, paying special attention to areas around handles and hinges where grime tends to accumulate.
Sanding Cabinet Frames for Better Adhesion
After cleaning, I sand the cabinet frames to create a surface that is conducive to bonding with the new veneer or finish. Using a medium-grit sandpaper, I gently sand all surfaces, working in the direction of the wood grain to avoid scratches. This process not only helps the new finish adhere better but also smooths out any imperfections.
Repairing Chips, Cracks, and Damaged Areas
Next, I inspect the cabinets for any chips, cracks, or damaged areas that need repair. Using a wood filler that matches the color of my cabinets as closely as possible, I fill in these imperfections. After the filler dries, I sand it down to a smooth finish, ensuring that the surface is even and ready for the new finish.
When and How to Prime Your Cabinets
Priming is an optional but often recommended step, especially if you’re switching to a significantly different color or finish. I prime my cabinets using a high-quality primer suitable for my cabinet material. This helps to create a uniform base for the new finish, ensuring that it adheres well and looks its best.
By following these steps, I ensure that my cabinet surfaces are properly prepared for refacing, resulting in a professional-looking finish that will last for years to come.
8. Applying Veneer to Cabinet Boxes and Frames
The veneer application process is where your cabinet refacing project starts to take shape. This step requires precision and patience, but with the right techniques, you can achieve professional-looking results. As you embark on this DIY home improvement project, remember that accuracy and attention to detail are key.
Measuring and Cutting Veneer Pieces Accurately
To ensure a seamless fit, it’s crucial to measure and cut your veneer pieces accurately. Start by measuring the dimensions of each cabinet box and frame, taking note of any obstructions or irregularities. Use a sharp utility knife or a veneer saw to cut the veneer, leaving a little extra material around the edges for trimming later.
My Step-by-Step Veneer Application Technique
Applying veneer requires a systematic approach to avoid bubbles and wrinkles. Here’s my step-by-step guide to help you through the process.
Applying Contact Cement Properly
First, apply a thin, even layer of contact cement to both the veneer and the cabinet surface. Use a brush or roller to spread the cement, ensuring complete coverage. Allow the cement to dry according to the manufacturer’s instructions, usually until it feels tacky to the touch.
Positioning and Pressing Veneer
Carefully align the veneer with the cabinet surface, starting from the center and working your way outward. Use a veneer press or a similar tool to press the veneer firmly onto the surface, ensuring good contact and minimizing air bubbles.
Handling Corners and Tight Spaces
Corners and tight spaces can be challenging, but with the right techniques, you can achieve a smooth finish. Use a combination of precision cutting and careful pressing to ensure the veneer fits snugly into these areas.
Trimming and Finishing Veneer Edges Cleanly
Once the veneer is applied, use a sharp utility knife or a trimmer to remove excess material from the edges. Sand the edges smooth to create a seamless joint with the surrounding surfaces.
By following these steps and tips, you can successfully apply veneer to your cabinet boxes and frames, giving your kitchen a fresh new look as part of your DIY home improvement project.
9. Installing Your New Cabinet Doors and Drawer Fronts
As I near the completion of my cabinet refacing project, I’m excited to install the new cabinet doors and drawer fronts. This step is crucial as it brings the entire look together, transforming my kitchen. To ensure a professional finish, I’ll be following a meticulous process.
Accurately Measuring for Hinge Placement
Measuring for hinge placement is a critical step that requires precision. I use a combination of a ruler and a template to mark the exact spot where the hinges will be attached. It’s essential to double-check these measurements to avoid any mistakes that could lead to misaligned doors.
Tips for Accurate Measurement:
- Use a high-quality ruler or caliper for precise measurements.
- Create a template to ensure consistency across all doors.
- Double-check measurements before drilling any holes.
Mounting Hinges and Hanging Doors Correctly
With the measurements in place, the next step is to mount the hinges and hang the doors. I start by attaching the hinges to the door, then align them with the marks made on the cabinet frame. It’s a process that requires patience to ensure the doors are properly aligned and level.
Key Considerations:
- Ensure hinges are securely attached to both the door and the cabinet frame.
- Use a level to check that the doors are perfectly horizontal.
- Make any necessary adjustments before tightening the screws completely.

Attaching Fresh Drawer Fronts
Attaching new drawer fronts is a straightforward process that involves aligning the fronts with the existing drawers and securing them in place. I use a combination of screws and adhesive to ensure a strong bond.
| Step | Description |
|---|---|
| 1 | Align the drawer front with the drawer box, ensuring it’s centered and evenly spaced. |
| 2 | Use screws to secure the front to the drawer box from the inside. |
| 3 | Apply adhesive to reinforce the bond between the front and the drawer box. |
Adjusting Doors for Perfect Alignment and Spacing
The final step involves adjusting the doors to ensure they are perfectly aligned and evenly spaced. This requires checking the gaps between the doors and making any necessary adjustments to the hinges.
Adjustment Tips:
- Check the alignment of the doors relative to each other and the cabinet frame.
- Adjust the hinges as needed to achieve even spacing.
- Verify that the doors open and close smoothly without any obstruction.
By following these steps, I can ensure that my cabinet doors and drawer fronts are installed correctly, completing my cabinet refacing project to a high standard.
10. Adding Hardware and Finishing Touches
As I near the completion of my cabinet refacing project, I’m excited to add the final touches that will bring everything together. This stage is crucial as it not only enhances the functionality of my cabinets but also adds a personal touch that reflects my style.
Installing Knobs, Pulls, and Handles
Choosing the right hardware is essential for both form and function. I select knobs, pulls, and handles that not only match my desired aesthetic but also provide a comfortable grip and ease of use. For instance, I consider the style and finish of my kitchen fixtures to ensure a cohesive look.
When installing new hardware, I make sure to measure carefully to avoid any mistakes. Using a template or jig can help achieve accurate placement. I also ensure that the hardware is securely attached to withstand daily use.
Upgrading with Soft-Close Hinges and Drawer Slides
Upgrading to soft-close hinges and drawer slides is a game-changer for my cabinets. It adds a touch of luxury and significantly reduces the noise and wear associated with traditional hinges and slides. This upgrade is relatively straightforward and makes a big difference in the overall user experience.
When selecting soft-close mechanisms, I consider the type of cabinet and drawer construction to ensure compatibility. Proper installation is key to their smooth operation, so I follow the manufacturer’s instructions carefully.
| Upgrade | Benefits | Considerations |
|---|---|---|
| Soft-Close Hinges | Reduces noise, enhances durability | Compatibility, proper installation |
| Soft-Close Drawer Slides | Improves drawer operation, reduces wear | Weight capacity, alignment |
Final Touch-Ups and Detail Work
The final step in my cabinet refacing project involves inspecting the work and addressing any areas that need touch-ups. This includes checking for any imperfections in the veneer, ensuring that all doors and drawers are properly aligned, and making any necessary adjustments to the hardware.
Just like when constructing an above-ground pool deck or undertaking pool deck construction, attention to detail is crucial. A well-finished cabinet refacing project can significantly enhance the overall look and feel of my kitchen, much like a beautifully designed pool deck can transform my outdoor living space.
By focusing on these final details, I can ensure that my cabinet refacing project is not only functional but also visually appealing, providing a sense of pride and satisfaction with the final result.
11. Common Mistakes to Avoid During Cabinet Refacing
As I embarked on my cabinet refacing journey, I discovered that avoiding certain mistakes was crucial to achieving professional-looking results. Cabinet refacing can be a cost-effective and environmentally friendly way to give your kitchen a fresh new look, but it’s essential to be aware of the potential pitfalls.
One of the most significant advantages of cabinet refacing is that it allows homeowners to update their kitchen’s appearance without the hassle and expense of full cabinet replacement. However, this process requires careful planning and execution to avoid common mistakes that can lead to disappointing results.
Measurement Errors and How I Prevent Them
Measurement errors are one of the most common mistakes people make during cabinet refacing. To avoid this, I made sure to double-check my measurements multiple times before cutting any veneer or ordering new doors and drawers. It’s also essential to use a consistent unit of measurement throughout the project to prevent conversion errors.
For instance, when measuring for new drawer fronts, I used a digital caliper to ensure accuracy. I also took into account the spacing between drawers and doors to ensure proper alignment.
| Measurement Tools | Purpose | Tips for Accuracy |
|---|---|---|
| Digital Caliper | Measuring drawer fronts and doors | Use a consistent unit of measurement |
| Tape Measure | Measuring cabinet boxes and frames | Double-check measurements multiple times |
| Level | Ensuring proper alignment | Use a level to check for plumb and level surfaces |
Veneer Application Problems and Solutions
Applying veneer to cabinet boxes and frames can be a challenging task, especially for those without prior experience. One common issue is air bubbles forming under the veneer. To prevent this, I used a veneer roller to apply even pressure and ensure a smooth finish.
Another problem I encountered was veneer misalignment. To avoid this, I carefully planned my veneer cuts and used a jig to ensure accurate placement.
“The key to successful veneer application is patience and attention to detail. Take your time, and don’t be afraid to seek guidance if you’re unsure about a particular step.”
Door Alignment Issues and Fixes
Door alignment is critical to achieving a professional-looking finish. To ensure proper alignment, I used a combination of measuring and testing to get the doors just right. I also made sure to adjust the hinges as needed to achieve a smooth, even closure.
One tip I learned is to use a shim to adjust the door’s position if it’s not aligning properly. This simple trick can make a significant difference in the overall appearance of your cabinets.
Rushing the Process
Rushing through the cabinet refacing process can lead to a host of problems, from measurement errors to poor veneer application. To avoid this, I took my time and broke the project into smaller, manageable tasks.
By doing so, I was able to maintain a steady pace and ensure that each step was completed to the best of my ability. This approach not only reduced stress but also resulted in a higher-quality finish.
In conclusion, avoiding common mistakes during cabinet refacing requires careful planning, attention to detail, and a willingness to take your time. By being aware of potential pitfalls and taking steps to mitigate them, you can achieve professional-looking results that enhance the beauty and functionality of your kitchen.
12. Conclusion
Completing a DIY cabinet refacing project can be incredibly rewarding, giving your kitchen a fresh new look without the hefty price tag of full replacement. Throughout this guide, we’ve explored the ins and outs of refacing your cabinets, from evaluating their condition to applying the final touches.
By choosing to reface rather than replace, you’re not only saving money but also reducing waste, much like when you tackle a diy pool deck guide project and opt for refurbishing existing structures. The process, while detailed, is achievable with the right tools and a bit of patience.
As you consider embarking on your own cabinet refacing journey, remember that the key to success lies in careful planning, precise measurement, and a willingness to take your time. With these elements in place, you’ll be well on your way to enjoying a beautifully updated kitchen that reflects your personal style.